What is SketchUp LayOut
It’s one thing creating a fantastic design. It’s another thing to have the collateral you need to wow your client at a presentation. SketchUp LayOut is a brilliant SketchUp tool designed to create detailed 2D Architectural documents from your 3D SketchUp models. It quickly, accurately makes beautiful layout documentation from your SketchUp models.
This is how it works. You begin your project in SketchUp, drawing it and creating different scenes to reveal alternative views. You send your file to LayOut, adding extras like the dimensions, labels, text and photos. Then LayOut cleverly exports a beautiful PDF file for you to send to a client or use to wow your audience at an on-screen presentation.
LayOut and SketchUp Pro are a match made in heaven, built to collaborate, enhance your SketchUp workflow and boost productivity. And it’s so flexible. When you want to update your original SketchUp model, you can do so in LayOut and it syncs all the details automatically, saving you time and effort.
What’s the Difference Between SketchUp and LayOut
LayOut is a fantastic tool for creating accurate documentation from SketchUp models. It’s only available via the SketchUp Pro package, not as a stand-alone app. While SketchUp itself is a genius at 3D modelling, LayOut is its 2D partner. Can you imagine being able to quickly, easily transform the 3D models you’ve created in SketchUp into professional-looking 2D drawings? It makes such a difference to your client-facing responsibilities.
Can you use LayOut without SketchUp? The answer is no. They’re a team, and like all great teams, they’re only effective when they’re working together. You’ll need Sketchup Pro to access LayOut.
Creating 2D Designs with LayOut
It’s genuinely easy to create 2D drawings using LayOut. Here’s how to section a model, for example, a model of a house, create a ‘plan’, access the ‘plan’ scene in LayOut, and create a floor plan view ready for annotation.
- Set your view to ‘parallel Projection’ in the Camera menu to create a straight-on view for the plan
- Go to ‘Window’ and pick the Scenes console – you can hide the Section Plane in your LayOut document by opening the window in SketchUp then editing the scene’s default style
- Click the ‘+’ button to create a scene called ‘Plan’
- Access your SketchUp model in LayOut using File > Insert
- Right-click on the SketchUp window and choose ‘Scenes: PLAN’
- Right-click and go to Scale = 1mm:50mm
- Your LayOut scaled plan is ready for dimensioning and annotating
Creating Floor Plans with LayOut
Sketchup and LayOut create fabulous 2D floor plans, too. Here’s how to create a room layout:
- Create a top view of your model
- Centre it on your screen
- You’ll need to use the parallel projection view to avoid perspective distortions. Adjust the camera settings so you’re in parallel projection and it removes perspective from your drawing
- Click ‘add’ to create a scene showing the view you’ve set up
- Rename it, for example ‘floor plan’
- Take a section cut through the building so you can see the doors and windows – go to the large tool set or the tools section plane then add a section plane
SketchUp LayOut Tutorials
You’re never left to figure things out on your own with SketchUp. There are all sorts of top class SketchUp tutorials and LayOut tutorials available on YouTube, and more to enjoy at SketchUcation as well as in the excellent SketchUp tutorials library.
Layout for SketchUp Pro
LayOut takes your 3D model into 2D space; it’s the tool for creating documentation from your SketchUp model as a 3D to 2D converter. You start in SketchUp, draw your project and create scenes to show the different views. then you can send the file to LayOut, add dimensions, labels, other text, photos, or whatever else you need to help communicate your project.
Model and Document
When you’re working with multiple SketchUp model viewports in Layout, you can add corresponding scenes in your SketchUp model. So, if there’s a particular camera angle you want to use in LayOut, it’ll save you time in the long run to open the model in SketchUp and create a scene with the view you want.
Follow these steps to associate a scene you’ve created in SketchUp with a model viewport in an existing LayOut file.
Make beautiful drawings
LayOut brings the “feel” of SketchUp 2D drawings into 2D space in an incomparably beautiful way. Line work, shadows, textures, text, dimensions, title blocks: all exactly the way you want. Annotations allow both you and the client to communicate confidently to push the project forwards,
Intuitive vector drawings
LayOut’s drawing tools are just like SketchUp’s: simple, smart, and fun. And everything you draw is vector smart so you have infinite resolution and smooth crisp lines. Scaling and rotating can be done with the utmost precision
Dimension, detail, explain
Use dimensioning tools that snap to the edges of SketchUp models and quickly set the format, scale, and precision of displayed measurements.
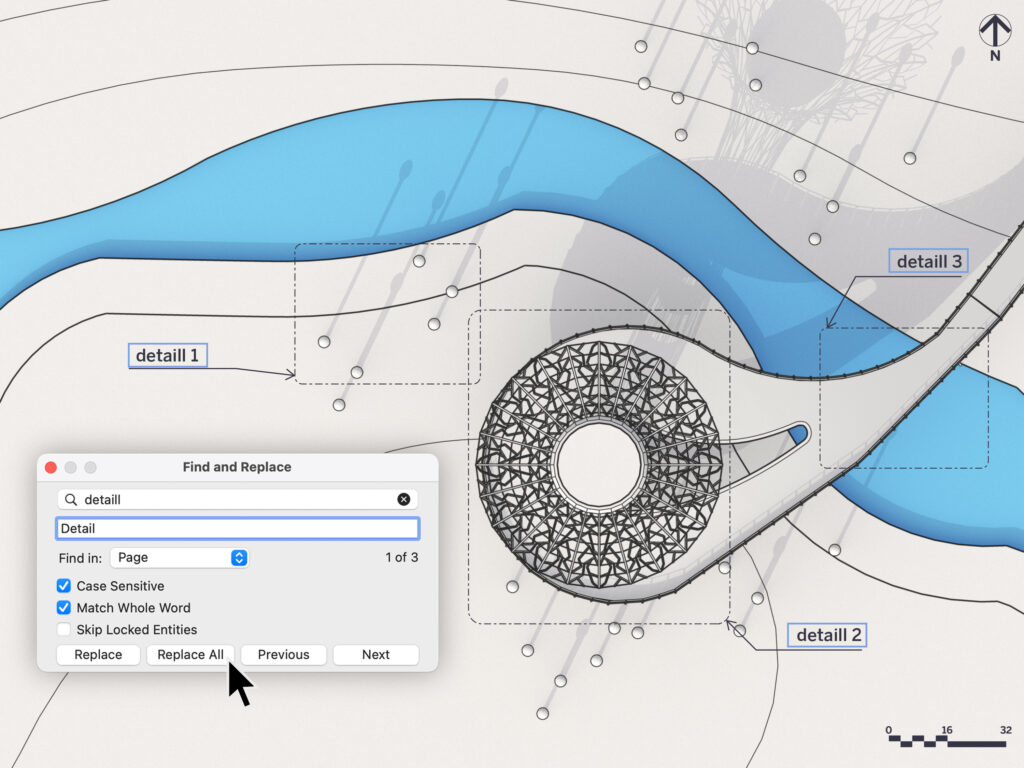
There are several ways to quickly create and copy text across multiple pages in a LayOut document, but modifying text across an entire document has always been difficult. You need to inspect every page and text box of your document. That’s why you’ll love Find & Replace in LayOut! With Find & Replace , changes to text in a selection, a page, or a document is a much quicker process. This not only helps speed up the quality assurance process, but you can update drawing titles, page numbers, specified building materials, and fix typos more efficiently.
As in other applications, Find & Replace can be activated with the Ctrl/Command + F shortcut and from the Text menu in LayOut.
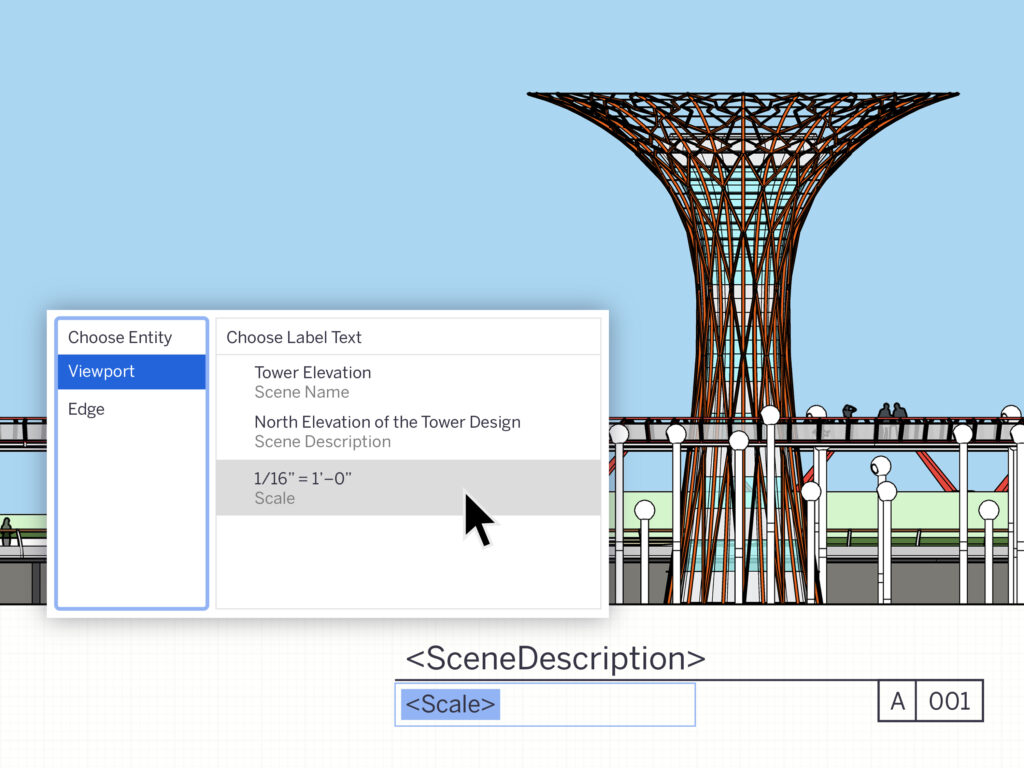
With Auto-Text updates and Find & Replace , LayOut helps you work faster and more efficiently than ever before.
In addition to existing labels that pull entity or component attributes from SketchUp viewports in LayOut, we are introducing new Auto-Text tags that can be selected from the Auto-Text menu in label creation or templated labels.
You can use all of these labels in scrapbooks or with transparent label leaders. This means that you can drag Auto-Text labels in from a scrapbook, hit enter to drag the label leader, and then the value associated with that viewport automatically displays.
#2.1 LAYOUT SKETCHUP: основные инструменты

TELEGRAM — https://t.me/vasyayoyo #sketchup #enscape #layout Серия бесплатных видеоуроков по LAYOUT SKETCHUP для начинающих #2.1: 00:27 инструменты 00:49 инструмент «выбор» 01:28 инструмент «линия» 01:46 привязка 02:34 типы инструмента «линия» 02:54 инструмент «дуга» 03:23 инструмент «прямоугольник» 03:51 инструмент «круг/эллипс» 04:10 инструмент «многоугольник» 04:20 инструмент «смещение» 04:30 редактирование фигур 06:50 лоток 07:13 работа со стилем фигуры / заливкой 08:34 работа с шаблоном / текстурой фигуры 10:11 настройка штриха / отображения линии 12:40 создание групп 13:06 изменить положение фигуры в листе 14:35 слои 16:22 страницы 16:46 продолжение про слои 17:24 инструмент «ластик» 17:31 стиль 18:07 инструмент «разделить» 18:51 инструмент «объединить»
Показать больше
Войдите , чтобы оставлять комментарии
Layout
Простое и быстрое создание презентаций, оформление чертежей на основе моделей Sketchup.
Страницы
- Главная страница
- Scrapbooks
- Шаблоны
- Советы и хитрости
- Лучшее из сети
- Ресурсы и книги
- Загрузки
воскресенье, 22 июня 2014 г.
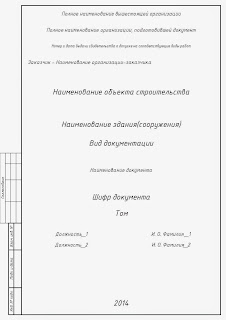
Оформление чертежей. СПДС и ЕСКД
LayOut — это программа для оформление конструкторской документации на основе модели Sketchup. По умолчанию у нее нет шаблонов для оформления согласно СПДС или ЕСКД. Ниже предоставлены шаблоны для LayOut, которые помогут вам в этом.
С выходом версии LayOut 2014, в шаблонах реализовали возможность работать с тегами.
Более подробно читайте официальную справку LayOut: Using the Auto-Text feature
Описание и инструкция по установке находится в архиве с шаблонами
Кроме шаблонов, в чертеже могут быть использованы Scrapbooks.
Для скачивания Шаблонов перейдите в раздел Загрузки