Как скачать Панель управления NVIDIA, минуя Microsoft Store
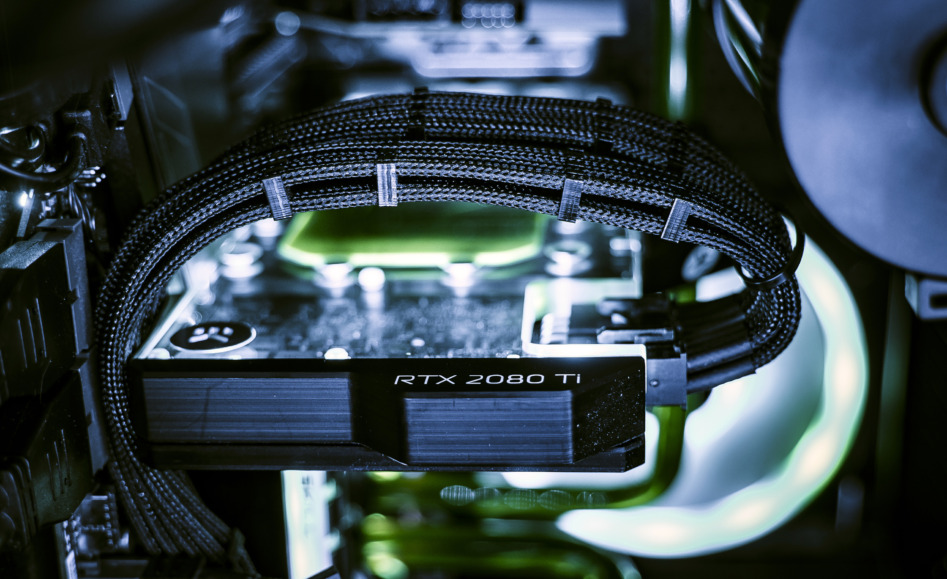
Если вы в последнее время не обновляли графические драйверы, то, возможно, не заметили изменение, которое NVIDIA ввела в декабре 2019 года. Теперь Панель управления NVIDIA больше не идет в комплекте с драйверами NVIDIA, скачиваемыми по умолчанию на главном сайте компании. То есть если зайти на nvidia.com, а затем на страницу «Драйверы», то там можно будет найти лишь драйверы, которые Microsoft называет DCH-драйверами (от англ. «Declarative Componentized Hardware», что можно перевести как «декларативные драйверы, компонентные драйверы, аппаратные приложения для поддержки»), в которых Панели управления NVIDIA нет. Таким образом, если вам нужна Панель управления NVIDIA – а она обычно нужна – ее придется скачивать в онлайн-магазине Microsoft Store. По словам NVIDIA, эти изменения были введены из-за новых требований Microsoft. У DCH-драйверов всегда есть строчка «DCH» в названии файла – например, «445.87-desktop-win10-64bit-international-dch-whql.exe».
И хотя в Microsoft Store можно скачивать приложения без аккаунта в Microsoft, компания использует любое ваше взаимодействие с магазином как способ убедить вас в том, чтобы вы этот аккаунт себе завели. Когда вы пытаетесь скачать Панель управления NVIDIA, не будучи залогиненным в магазине, магазин показывает окно для входа, как бы намекая, что вы ДОЛЖНЫ создать аккаунт, чтобы установить программу. Логиниться не обязательно, но Microsoft всеми силами убеждает вас, что все как раз наоборот.
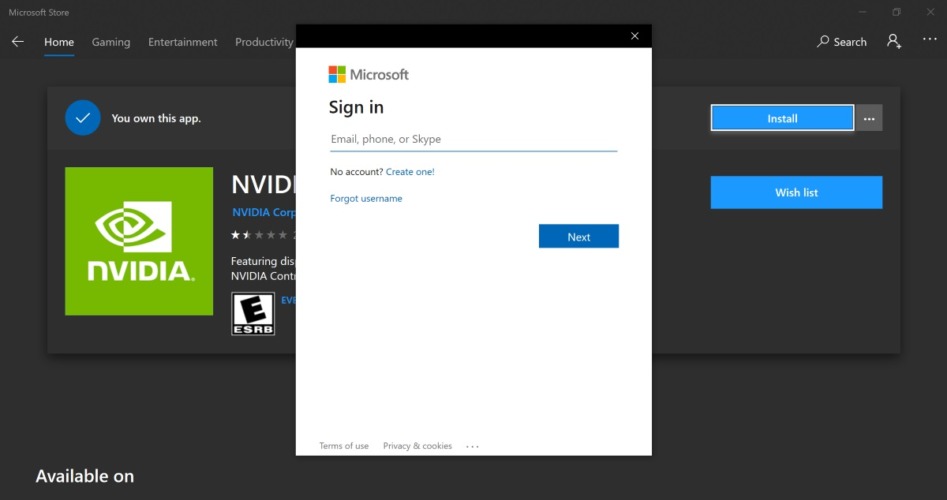
Если кликнуть на «Install», появится вот такое окно. Обратите внимание, что никакой установки пока не началось, что подчеркивает намерение Microsoft подтолкнуть вас введению данных в эти поля
Если закрыть это окно (нажав на крестик справа вверху), Панель управления NVIDIA начнет устанавливаться как обычно. Если вы не против того, чтобы Microsoft управляла вашими драйверами, можете смело идти этим маршрутом. Но что касается меня, то я против.
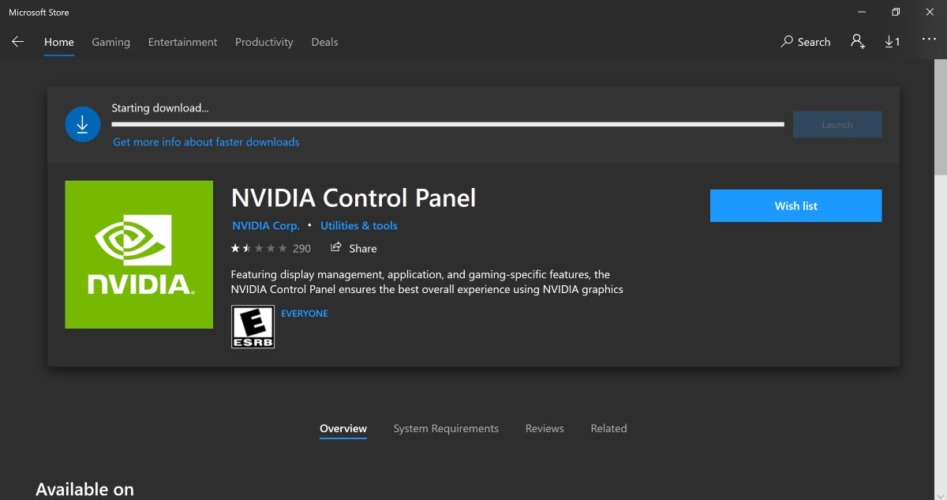
“Хаха, я пошутила!”, – как бы говорит Microsoft. Это называется “темным паттерном”
На мой взгляд, эти попытки Microsoft убедить пользователей в необходимости Windows-аккаунта и обманным образом подтолкнуть их к его созданию откровенно вредны. Более того, у меня была масса неприятных ситуаций, связанных с обновлением драйверов на Windows, так что у меня нет никакого желание отдавать ОС карт-бланш на выполнение этих операций. К примеру, если вы разрешили ОС делать стелс-апдейты драйверов на тестовом ПК, будьте готовы к тому, что однажды ваш тест двух разных GPU-драйверов пойдет насмарку, и вы об этом даже не узнаете.
В некоторых случаях люди оставляют старые версии драйверов, чтобы избежать багов, которые есть в более новых версиях. Пару месяцев назад мне пришлось вручную удалять у друга драйверы AMD-видеокарты после того, как Windows принудительно установила драйвер, связанный с проблемами черного экрана, которыми грешили карты Radeon в начале 2020 года. И хотя проблемы драйверов AMD в этом случае никак не связаны с Microsoft, именно Microsoft установила неисправный драйвер на видеокарту моего друга, а не он.
Кроме того, эта новая система распространения подразумевает, что ваша Панель управления может быть не совместима с драйвером, установленным в данный момент. На сайте NVIDIA есть руководство о том, как решить эту проблему, но Microsoft не дает пользователям ни малейшего намека на то, что они могут столкнуться с такой проблемой.
Как скачать стандартные драйверы NVIDIA
К счастью, у NVIDIA есть альтернативный способ скачивания драйверов – так называемый «Расширенный поиск драйвера», который можно найти по этой ссылке. Обратите внимание, что эта страница отличается от обычной «Загрузки драйвера».

Страница расширенного поиска драйвера на сайте NVIDIA
На этой странице есть возможность найти стандартные драйвера NVIDIA, а не только их DCH-версию. Сама компания заверяет, что обе этих версии (DCH и стандартная) функционально никак не отличаются друг от друга, но не планирует перестать выпускать стандартные драйверы.
Если вы планируете использовать стандартный драйвер, рекомендуем установить программу Display Driver Uninstaller (DDU) и задать в ней опцию, которая не будет позволять Windows искать обновленные версии драйверов при очередном апдейте Windows:
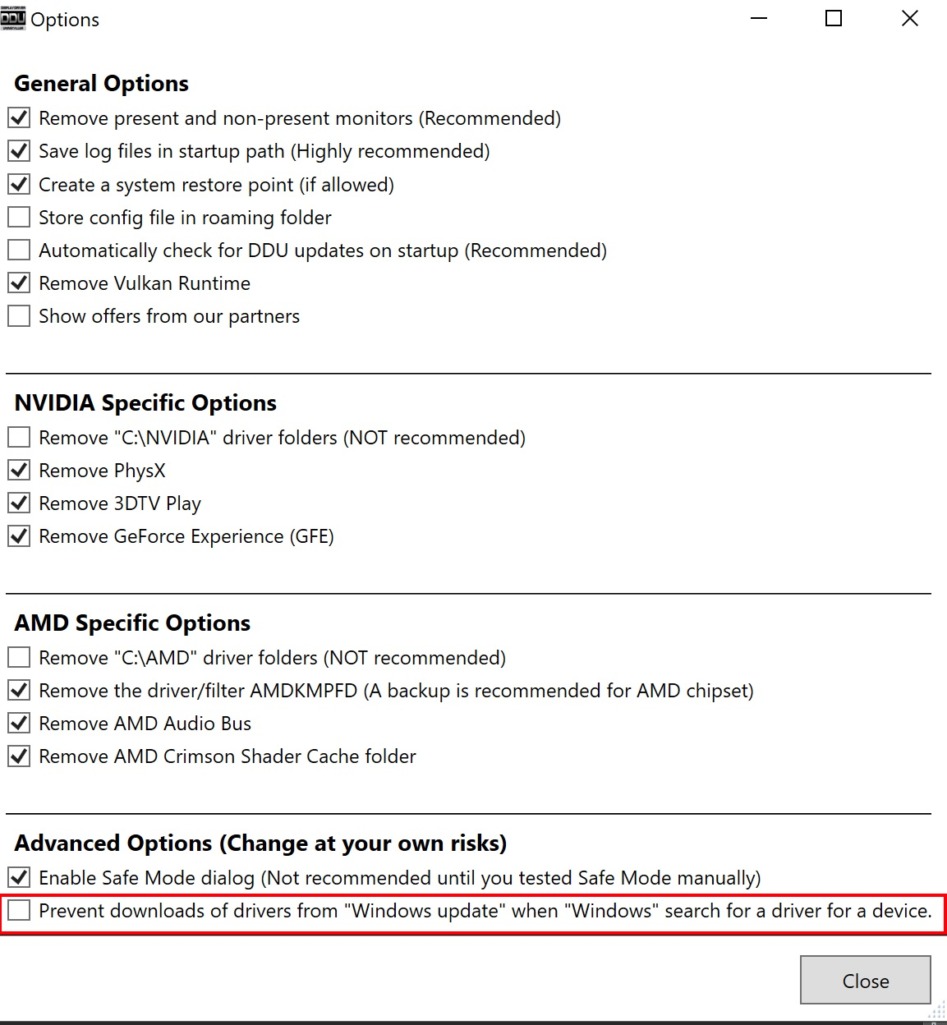
«Display Driver Uninstaller»
Ниже – порядок действий, которые я рекомендую проделать, чтобы процесс удаления/переустановки прошел максимально гладко:
- Скачайте DDU и стандартный драйвер NVIDIA, который хотите установить.
- Запустите деинсталлятор NVIDIA, используемый по умолчанию. Не перезагружайте ПК сразу после удаления старого драйвера.
- Запустите DDU и позвольте приложению выполнить перезапуск в безопасном режиме.
- Когда DDU выполнит перезапуск в безопасном режиме, убедитесь, что поставили галочку в настройках как показано на скриншоте выше. Из выпадающего списка в DDU выберите свою видеокарту NVIDIA, а затем выберите дальнейшее действие (очистить систему и перезагрузить, очистить систему и не перезагружать, очистить систему и выключить).
- Когда ваша система перезагрузится, установите стандартный драйвер NVIDIA, который загрузили ранее.
Очевидно, что не все заметили то, что драйверы NVIDIA теперь нужно скачивать по-новому, а некоторым и вовсе все равно. Но если вы из тех, кого это изменение не устраивает, то способ, благодаря которому вы можете установить Панель управления NVIDIA и сохранить контроль над тем, как и когда будут обновляться ваши драйверы, к счастью, по-прежнему существует.
Как установить nvidia control panel
Будь в курсе последних новостей из мира гаджетов и технологий
iGuides для смартфонов Apple

Как установить Панель управления Nvidia из Магазина Windows 10

Егор Морозов — 16 октября 2018, 18:14
Некоторые разработчики популярных компьютерных компонентов, таких как аудиокарты или видеокарты, стали переносить часть драйвера — например, панель управления — в Магазин Windows 10. К примеру, этим летом так сделал Realtek, и новая панель выглядит достаточно красиво и в стиле Modern UI:
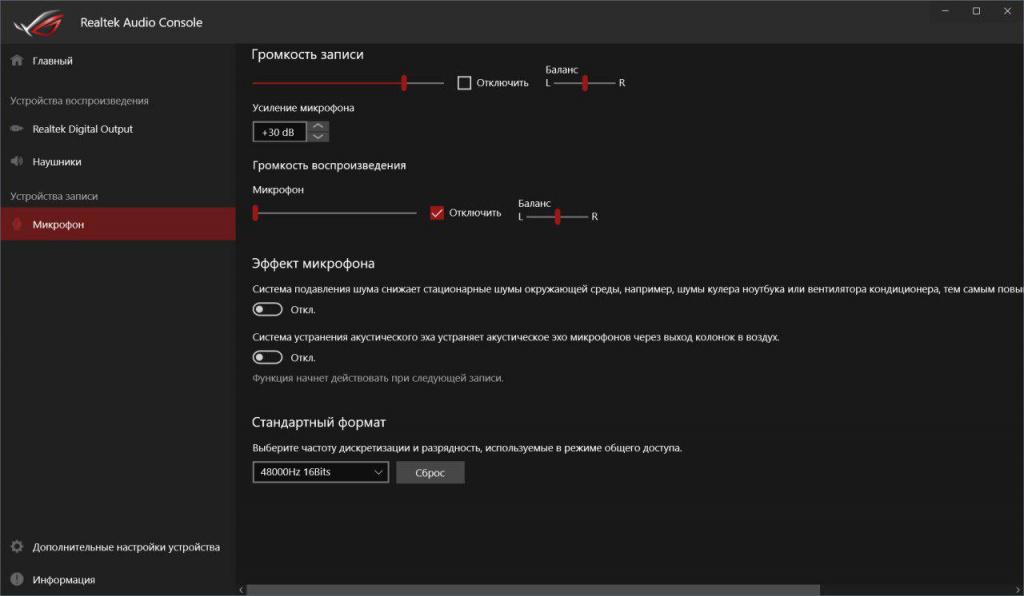
На практике это достаточно удобно, так как теперь панели управления будут находиться и обновляться в одном месте и отдельно от драйвера. Разумеется, это доступно только для пользователей Windows 10, ибо в Windows 7 магазина приложений нет.
Сейчас новая Панель управления Nvidia еще тестируется, поэтому недоступна по умолчанию, однако при желании ее можно включить, на большей части видеокарт проблем быть не должно. Требований всего лишь два: во-первых, должен стоять свежий видеодрайвер, на последнем на данный момент 416.34 все работает. Во-вторых, система должна быть 64-битной.
Если требования выполнены, то перейдите по этой ссылке, согласитесь на открытие Магазина приложений и установите Панель:
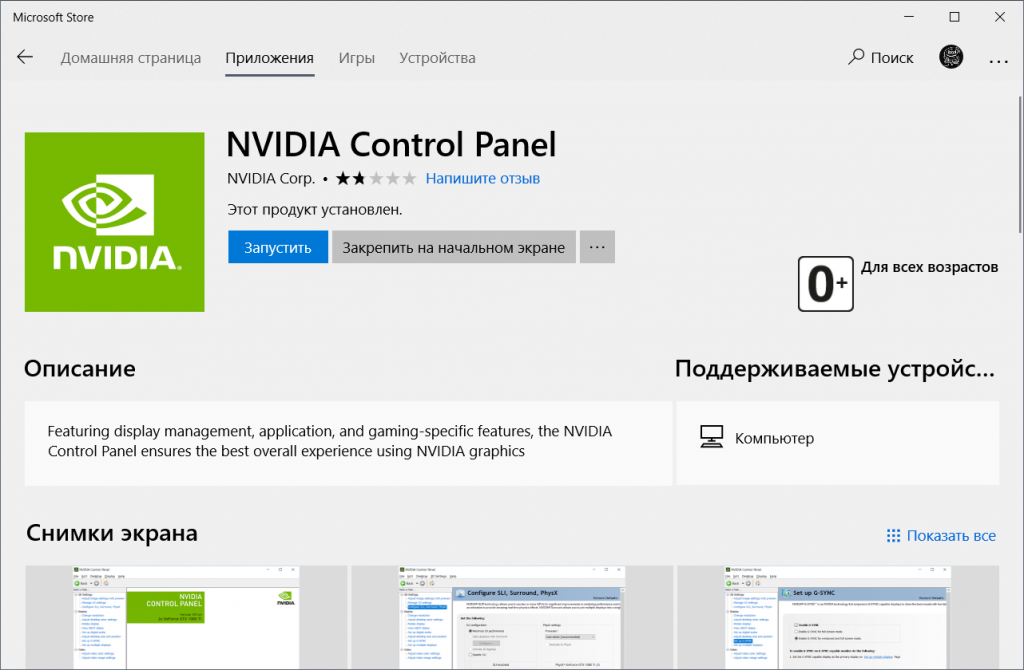
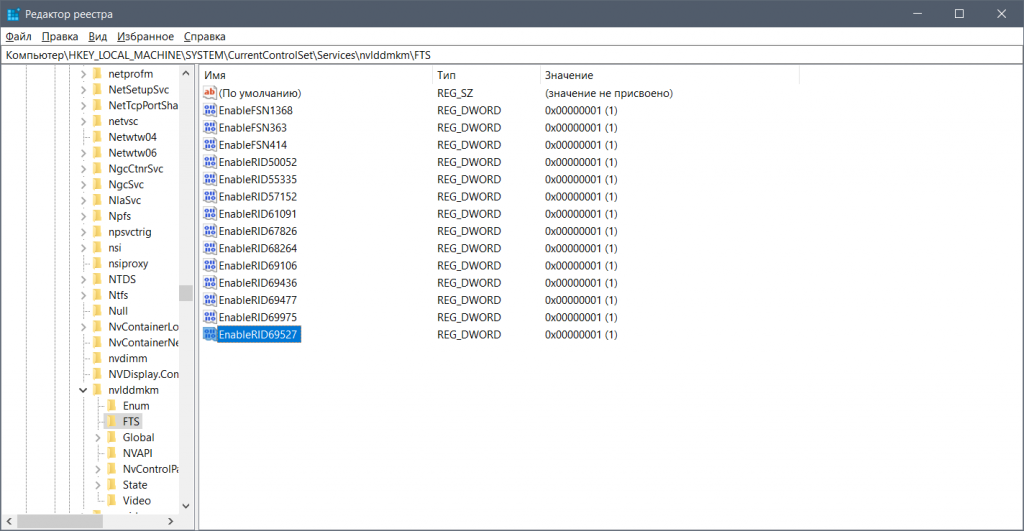
Но не спешите нажимать на кнопку «Запустить» — так как официально Панель еще не доступна, нужны некоторые изменения в реестре, а именно — нужно перейти по пути HKEY_LOCAL_MACHINE\SYSTEM\CurrentControlSet\Services\nvlddmkm\FTS и создать параметр DWORD с названием EnableRID69527 и значением 1:
Все, вот теперь новую Панель можно запускать. Пока что она выглядит так же, как и старая, единственное изменение — новый значок на панели задач:
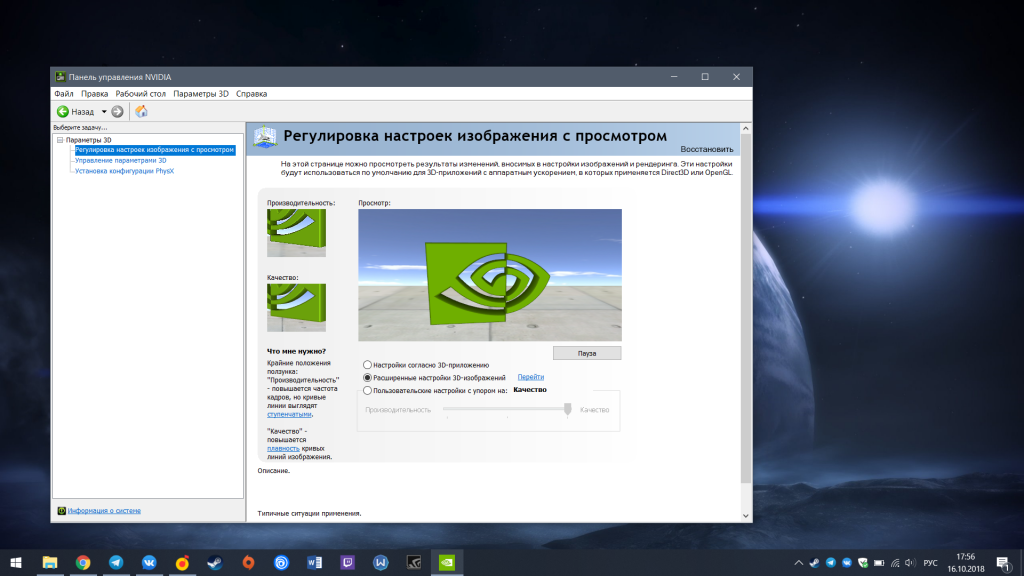
Но, вполне возможно, что Nvidia в будущем, как и Realtek, перепишет ее под Modern UI.
NVIDIA Control Panel Missing? Here’s The Fix
If Nvidia Control Panel is missing on your PC, then this guide will help you fix the issue and bring it back again.
By Aleksandar Cosic
This article has been written by a vetted expert and fact-checked by other experts. The author has been certified as an expert in this topic. Learn more on our about page.
January 7, 2024

NVIDIA Control Panel is a key component in managing the properties of your graphics card, and it can be worrying when the application goes missing. However, you shouldn’t worry as the fix is quite easy, which you will see in this guide.
Usually, you can click on your computer screen using your right mouse button to reach the NVIDIA Control Panel found in the list that appears. Sometimes, it may have disappeared.
If you’re wondering how to bring it back, keep reading. Before looking at some of the standard troubleshooting options, we’ll explain why this issue occurs in the first place.
There are several reasons why you might be unable to find your NVIDIA Control Panel, and the most common one is your graphics card driver receiving an update. During the installation, something might have been moved, which then caused the normal flow to be disrupted.
A registry subkey might have gone missing, or a value was displaced, and there are also numerous random errors that could occur. Luckily, all of these issues can be fixed if you follow these instructions.
Table of Contents Show
Missing NVIDIA Control Panel: Step-by-Step Fix
As mentioned earlier, there are several possible reasons why the NVIDIA Control Panel is missing. We’ll walk you through some of the more common ones.
Restart NVIDIA Services
You might want to try this method if the NVIDIA icon is also missing from the desktop tray.
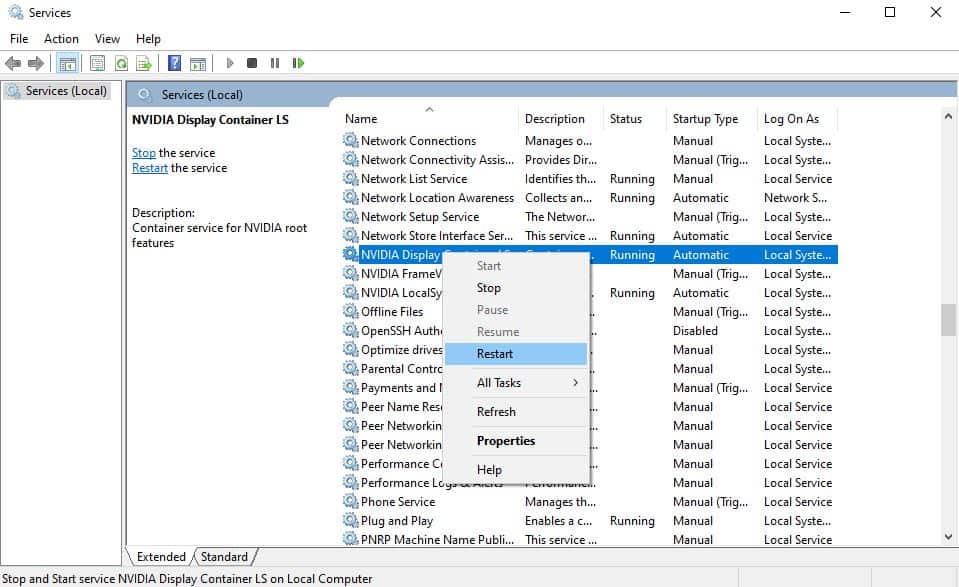
- Press Windows key + R to open the “Run” window, then type in services.msc and press Enter.
- Once the services window opens, look for items with the “NVIDIA” name before them. Right-click each of the items and select Restart from the menu that appears.
If a service is not running, make sure you choose it and click Initiate.
If you receive the Error 14109 message, right-click the “Start” button, then select “Device Manager”. From here, find your graphics card’s name (in the “Display adapters” section) and right-click it. Then choose “Uninstall Device”. Don’t worry, this won’t remove your GPU, but it will remove all the faulty drivers. Restart your PC and re-install the drivers.
Manually Launch The NVIDIA Control Panel
Before continuing, let us make it clear that this is not a permanent solution. It will be effective temporarily, yet there may be an underlying problem that must be resolved, and being able to reach the Control Panel might assist in troubleshooting.
- Navigate to the C:Program FilesNVIDIA CorporationControl Panel Client location on your PC. The NVIDIA Corporation folder might also be in the Program Files (x86) folder.
- Right-click the nvcplui file and choose the “Run as administrator” option.
Unhide NVIDIA Control Panel
This is often the simplest and quickest outcome as it is entirely possible that the Control Panel was simply hidden. To fix this, do the following:
- Access your computer’s Control Panel by pressing the Windows key + R and typing in “control“.
- Once the Control Panel opens, go to the upper-right corner and change “View by” to “Large icons“. Alternatively, you can choose “Small icons”; it’s entirely up to you.
- Double-click the NVIDIA Control Panel.
- Select the ‘Desktop’ option from the top menu and then tick both “Add Desktop Context Menu” and “Show Notification Tray Icon“.
After doing this, check whether or not that was the issue by either right-clicking your desktop or checking your tray.
Use NVIDIA’s Official Solution
This issue has apparently become widespread enough to catch the attention of NVIDIA. The company’s official solution goes like this:
- Navigate to C:Program FilesNVIDIA CorporationNvContainer and copy the nvcontainer file.
- Go to C:Users(Your Username)AppDataRoamingMicrosoftWindowsStart MenuProgramsStartup and paste the file you copied.
- Afterward, right-click the nvcontainer file and select “Properties”.
- Navigate to the “Compatibility” tab and tick the “Run this program as administrator” option.
- Apply the settings and restart your PC.
This technique will guarantee that the app begins running when Windows starts.
Re-install The Drivers
If the issue in question is indeed being caused by your drivers, a fresh install should usually do the trick. The best way to do this is by using GeForce Experience. This application is usually located in the system tray and can be accessed with a double click. When its window appears, you should do the following:
- Click on the Drivers tab.
- On the right-hand side, you will see three dots showing that there are additional options. Click them and choose “Re-install drivers“.
Another method is to use Windows Device Manager and uninstall the drivers from there.
- In the “Display Adapters” menu, right-click your GPU and select “Uninstall the device“.
- Restart your PC.
- Navigate to NVIDIA’s website in your browser.
- Select your graphics card and operating system and download the driver.
- Run the setup wizard and follow the instructions.
Alternatively, you could try downloading NVIDIA Control Panel from the Microsoft Store.
Even the manual reinstallation of the drivers is straightforward, which usually makes this solution the easiest and likeliest to get you the best results.
Recommended Reads


How To Underclock Your GPU
Aleksandar Cosic
Alex is a Computer Science student and a former game designer. That has enabled him to develop skills in critical thinking and fair analysis. As a CS student, Aleksandar has very in-depth technical knowledge about computers, and he also likes to stay current with new technologies.
GPU Mag is reader-supported. When you buy through links on our site, we may earn a small commission.
Nvidia Control Panel – Download Now
Nvidia Control Panel is a utility that allows you to customize the settings of your Nvidia graphics card. You can use the Nvidia Control Panel to adjust image quality, resolution, and other graphics settings.
In the realm of computer graphics, the Nvidia Control Panel stands as a pivotal interface for users seeking to optimize their graphical experience. Whether you’re a gamer, a professional in graphics design, or a casual user, understanding and effectively utilizing the Nvidia Control Panel can significantly enhance your computer’s visual performance. This guide aims to delve deep into the intricacies of the Nvidia Control Panel, providing insights for both beginners and advanced users.
What is Nvidia Control Panel
The Nvidia Control Panel is a software application designed for Nvidia graphics card users. It acts as a control hub for tweaking and managing the settings of Nvidia GPUs (Graphics Processing Units). From adjusting image settings for an enhanced gaming experience to fine-tuning color and resolution for professional graphic work, this tool is indispensable for anyone looking to get the most out of their Nvidia graphics card.
Accessing the Nvidia Control Panel
Accessing the Nvidia Control Panel is straightforward. You can usually find it by right-clicking on the desktop and selecting it from the dropdown menu. Alternatively, it can be accessed through the Windows Control Panel or the system tray icon.
Key Features and Settings
- 3D Settings: This section is a goldmine for gamers and 3D application users. It contains options like image settings, which can be adjusted for performance or quality, and manage 3D settings where you can customize specific parameters for individual games or applications.
- Display Settings: Here, you can adjust your screen resolution, refresh rate, and color settings. This section is crucial for ensuring that your monitor’s capabilities are fully utilized.
- Video Settings: This area allows you to enhance the video playback quality on your PC. It’s especially useful for those who use their computers for watching movies or online streaming.
Advanced Features
For the advanced users, the Nvidia Control Panel offers features like:
- Surround Configuration: For setting up multiple monitors.
- G-Sync Settings: Essential for monitors that support G-Sync technology.
- PhysX Configuration: For optimizing how physics are handled in games.
Download Nvidia Control Panel Latest Version For Windows 10/11
You can download Nvidia Control panel for Windows PC if you are having trouble with the current one. We have shared a direct download link of the control panel so that anyone can download it easily and use it. It is open-source software so you can share it with anyone. It does not require any license key or user registration. Simply download it on your computer and use it. To download the app just click on the below download button.
| Software Name | Nvidia Control Panel |
| File Size | 122 MB |
| Updated On | January 22, 2024 |
Customizing 3D Settings
- Global Settings vs Program Settings: Global settings affect all applications, while program settings allow customization for individual applications.
- Antialiasing and Anisotropic filtering: These settings improve image quality but may affect performance.
- Power Management: Adjust this setting to optimize for performance or power saving.
Optimizing Display Settings
- Resolution and Refresh Rate: Understand how to choose the best resolution and refresh rate for your monitor.
- Adjusting Desktop Color Settings: This section helps in calibrating your monitor’s color for accurate color reproduction.
Enhancing Video Playback
- Adjusting Video Color Settings: Learn how to enhance your video playback by tweaking the color settings.
- Video Image Sharpening: A feature particularly useful for older videos or lower resolution content.
Troubleshooting and Tips
- Common Issues: Addressing issues like the control panel not opening or settings not being saved.
- Best Practices: Tips on regularly updating your drivers and backing up your settings.
How to use the Nvidia Control Panel
Assuming you have an Nvidia graphics card, you can use the Nvidia Control Panel to change various settings related to how your card outputs video. This can be useful if you’re experiencing issues with image quality or want to adjust other settings for gaming or creative purposes.
To open the Nvidia Control Panel, right-click on your desktop and select “Nvidia Control Panel” from the drop-down menu. If you don’t see this option, it may be because you don’t have an Nvidia card; look in your computer’s Device Manager to check.
Once the control panel is open, you’ll see a list of options on the left side. The main ones you’ll want to pay attention to are “Adjust image settings with preview,” “Change resolution,” and “Manage 3D settings.
Conclusion
The Nvidia Control Panel is a robust tool for enhancing the performance and visual quality of your graphics card. Whether you’re looking to optimize your gaming experience, professional graphic design work, or simply enjoy high-quality video playback, the Nvidia Control Panel offers a range of settings and adjustments to suit your needs.
Remember, while tweaking settings can provide noticeable improvements, it’s crucial to understand the impact of each change. Regular updates and a bit of experimentation can help you find the perfect balance between performance and visual fidelity.