Virtual Camera Guide
The Virtual Camera is a feature of OBS Studio that allows you to share your OBS Studio scene with any applications that can make use of a webcam, such as Zoom, Skype, Discord, etc. This feature is particularly useful for applications that cannot capture the screen directly.
Using the virtual camera
To start the virtual camera, click Start Virtual Camera in the Controls dock. To stop the virtual camera, click the same button again (which will be labelled Stop Virtual Camera).
To adjust settings for the virtual camera, click on the ⚙ Gear icon in the Controls dock.
From the Virtual Camera settings window, you can adjust the following settings:
OBS Virtualcam 2.0.5
As an FYI, this plugin will not be updated to support OBS 28. I recommend using Exeldro’s filter plugin that extend the use of the built-in virtual camera instead.
Virtual Cam Filter
adds a filter to output a source or scene to the build in virtual camera Normally the obs virtual camera can only output the final mix, but with this plugin you can output an other scene or source by adding the Virtual Camera filter to the.
obsproject.com
NOTE: The horizontal flip option is bugged and will likely cause crashes. Please do not use it. If you need to flip your video, either flip the sources in OBS itself, or flip on the receiving end (i.e. in Zoom, Skype, etc.)
This plugin provides a DirectShow Output as a virtual webcam.
How to use:
OBS Virtualcam has two main methods for outputting video from OBS. The first is the Preview output, which is enabled from the Tools menu. This output will provide exactly what you see in the Preview in OBS, including any changes or scenes you might switch to. This is the most common method, and probably what you would want to use.
Preview Output:
1. Select Tools -> VirtualCam in the main OBS Studio window
2. Press the Start button, then close the dialog
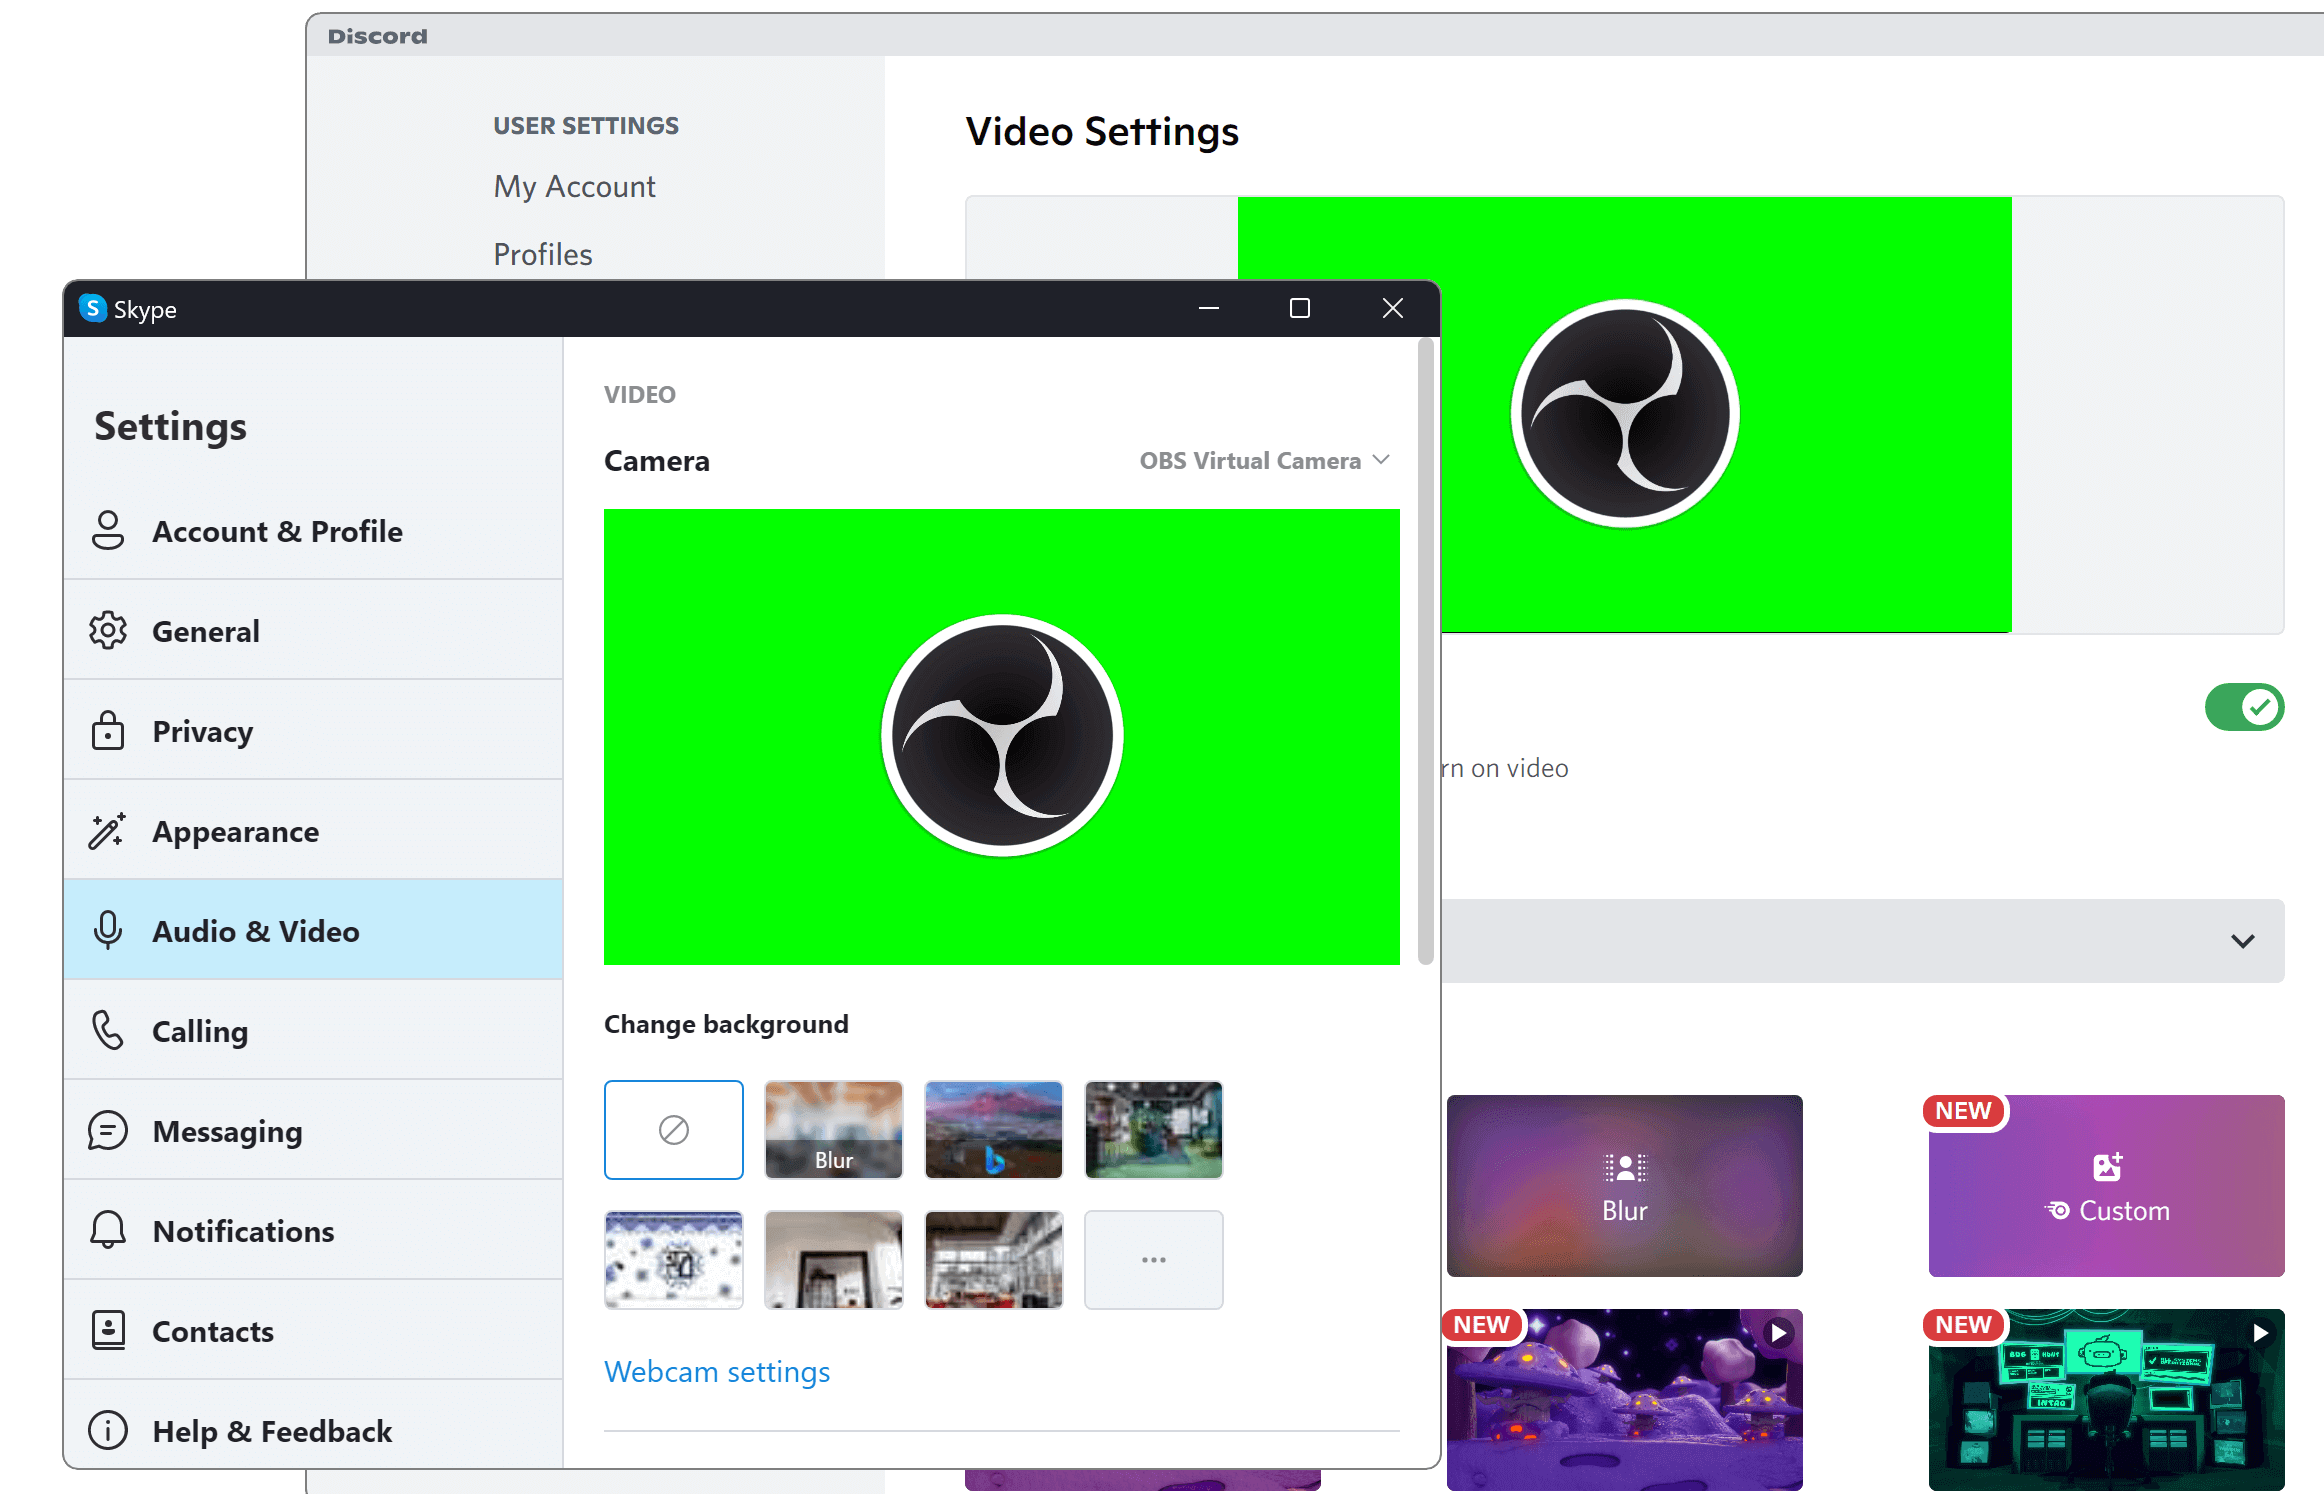
3. Open your program (Zoom, Hangouts, Skype, etc.) and choose OBS-Camera as your webcam
The next method is a filter that you can add to any scene or source, if you only want to output that specific scene or source, and nothing else.
Source Filter:
1. Add a VirtualCam filter to the scene/source you want to output to the virtual camera
2. Choose a camera target then press Start
3. If the button does not change to Stop, it means the camera is already in use, and you must choose a different camera or stop the other output first.
4. Open your program (Zoom, Hangouts, Skype, etc.) and choose the camera you selected as the target as your webcam
Why are the resolution and framerate sometimes not the same as my OBS output settings?
If you open an OBS-Camera device in a 3rd party application before starting the output in OBS, OBS-Camera will default to 1080p 30fps. If you start OBS first, it will use whatever is set as the Output resolution and framerate in OBS Studio’s options, under Settings -> Video.
Does this plugin support other platforms?
For Linux, you can use the Video4Linux sink plugin for OBS Studio. Directions on how to configure it are available from that link. Work is underway to provide a similar plugin for macOS, but there is no ETA.
Known issues
— Skype from the Windows Store doesn’t work with the OBS-Camera, please use Skype Desktop Edition instead.
— Unity can’t get image from virtualcam, please use register batch (reg_path.reg) in release page to manually add dummy device path .(note: The registry conflict with skype desktop , you can use unreg_path.reg to remove it)
Donate
Please consider donating to CatxFish, the original author of this plugin. Paypal.me
Author Fenrir Downloads 2,115,866 Views 4,422,021 First release May 5, 2020 Last update May 5, 2020 Rating 4.12 star(s) 25 ratings
OBS-VirtualCam 2.0.4
This plugin provides a directshow Output as a virtual webcam .
How to use:
Output:
1. Selecting Tools -> VirtualCam
2. Press start button and close diailog
3. Open your 3rd party program and choose «OBS-Camera» as a Video input
Filter:
1.Add a filter to the source you want to output to the camera
2.Choose a sink camera target then press start button
3.If this camera is not occupied , the start button will change to stop button .
4.Open your 3rd party program and choose «OBS-Camera» as a Video input.
How to Install without installer:
1.Go Github Release to find zip file
2.Unzip OBS-VirtualCam2.0.1.zip and put it to your obs-studio install folder
3.Run CMD as Administrator and register 32bit directshow source
ex: regsvr32 «C:\Program Files (x86)\obs-studio\bin\32bit\obs-virtualsource.dll»
4.Do it again to register 64bit directshow source
ex: regsvr32 «C:\Program Files (x86)\obs-studio\bin\64bit\obs-virtualsource.dll»
Register failed during installation
It’s usually due to dependency reason . There’s a chance you need to install visual studio 2017 redistributable package (2013 if the plugin version is 1.x.x ), also the directshow interface needs swscale-4.dll and avutil-55.dll in you obs install directory.
FAQ:
Is it necessary to install 32bit version?
Yes, there are still many 3rd party programs use 32bit directshow interface for the reason of compatibility.
Why resolution and framerate are not same as OBS output Setting?
If you open OBS and Start Virtual Output before using your 3rd party software, the virtual webcam will set the obs setting as a default setting .Otherwise the default setting of virtual webcam will be 1920×1080 @ 30fps
Is it possible to output with portrait resolution (like 1080×1920) ?
It depends on your 3rd party software , it might reject recommended resolution.
If your software is compatible , you just need to set the obs output setting to the resolution you want.
How to prevent the drop frame issue?
Maybe your PC is too busy ,try to set more buffer.
Is there a virtual microphone ?
This plugin provide a directshow audio source which can’t be recognized as microphone , only some programs like VLC can use it.
Does this plugin support other platforms?
There’s a Video4Linux version . But it only contains the sink part , you have to use it with v4l2loopback.
And there’s no plan on mac version.
Is the driver-layer virtual device ( for microphone) development still going?
No, there are two reasons why I decide to make it pending.
1. The development is mess and painful, an error could cause blue screen.
2. Even you finish the code , you still need a paid certificate called EV code signing to distribute your driver.
Known issues
— Skype UWP edition don’t accept directshow interface , please use Skype desktop edition.
— Unity Application can’t get image from virtualcam , please use register batch (reg_path.reg) in release page to manually add dummy device path .(note: The registry conflict with skype desktop , you can use unreg_path.reg to remove it)
Donate
If you like my work on this plugin , you can donate via Paypal.me
How to Use an OBS Virtual Camera
Need more options? Draw on recordings and highlight mouse clicks with Movavi Screen Recorder. Make your videos more engaging!
- Learning Portal
- How to Use OBS Virtual Camera in 2024 [Full Guide]
January 16, 2024
Using an OBS studio virtual camera is a great way to get creative with your webcam feed when live streaming, video calling, or attending online meetings and conferences. If you’re not sure how to use an OBS virtual camera, this guide will go over all you need to know.
Ways of using virtual camera
Step-by-step instructions
Windows virtual cam setup
Mac virtual cam setup
1. Set up sources and scenes… Read more
1. Configure the program… Read more
1. Set up sources… Read more
1. Set up the app… Read more
1. Download and install OBS Studio… Read more
Bonus: change the webcam video quality
1. Add your webcam as a source… Read more
Bonus: add filters
1. Add your webcam as a source… Read more
Our goal is to provide you with only verified information. To ensure this, Movavi Content Team does the following:
- When selecting products to include in our reviews, we research both demand and popularity.
- The team tests all the products mentioned in this article.
- When testing, we compare the key characteristics of the products, which include selecting capture area, schedule recording, showing keystrokes and mouse, and other significant features.
- We study user reviews from popular review platforms and make use of this information when writing our product reviews.
- We collect feedback from our users and analyze their opinions of Movavi software as well as products from other companies.
Another great app you can use for recording video calls, meetings, and more is Movavi Screen Recorder. This app makes it easy to capture and record webinars, online calls, and other screen activities. It can also be used for making your own recordings for tutorials or video guides. Available for both Mac and Windows, Movavi Screen Recorder is easy to use and even has basic editing tools.
What is an OBS virtual camera?
So, what is an OBS virtual camera? As the name suggests, the virtual camera in OBS is basically a virtual cam tool that can be used to replace your webcam feed in apps like Zoom, Skype, Google Meet, and more. It’s part of OBS Studio, a video recording and editing program. The OBS virtual cam plugin lets you use various kinds of media, like images and videos, as the camera output in these kinds of apps.
If you launch a Skype call with a friend using OBS virtual camera, for example, you can show them different content, like videos or even a live feed of your screen, instead of your usual webcam. It can also be used to display your webcam with special filters and enhancements. There are many different uses of the OBS virtual camera download.
How to set up a virtual camera in OBS on Windows
Step 1. Install or update the program
The first step of the process is to download and install OBS Studio on your Windows device. If you’re not sure how to install OBS, you can simply find it on the official OBS Studio website and download it for free. If you already have OBS installed, open it up and click Help > Check for Updates to update to the latest version.
Step 2. Add sources
The next step of the process is to add the sources you wish to use when using the virtual camera. OBS Studio allows you to add various sources to your virtual camera feed, like your current monitor display, a media source, or a connected webcam. To add sources, simply go to the Sources box in the bottom section of the screen and click the + icon. You can then choose sources like Display Capture or Media Source to add the various sources you want to show in your virtual cam.