Русские Блоги
Прошло много времени с тех пор, как я начал вести блог, и мне нравится Markdown, но для профессионального разработчика написание документов с помощью инструмента редактирования ide является основным навыком. Хотя различные документы с требованиями к дизайну в проекте — это все В ежедневной разработке и сопровождении самый удобный способ использования в группе — это markdwn. В этой записи блога подробно рассказывается, как написать текст разметки с помощью vs.
1. Установите плагин Markdown.
Для разработчиков я считаю, что возможность установки и использования vscode должна быть доступна, поэтому в этой статье будут пропущены этапы установки vscode напрямую, а для разработчиков рекомендуется не использовать китайский пакет для китайского, всего несколько английских слов, если даже этот порог не превышен Ваш путь к программированию тревожит!
1. vscode открывает расширение
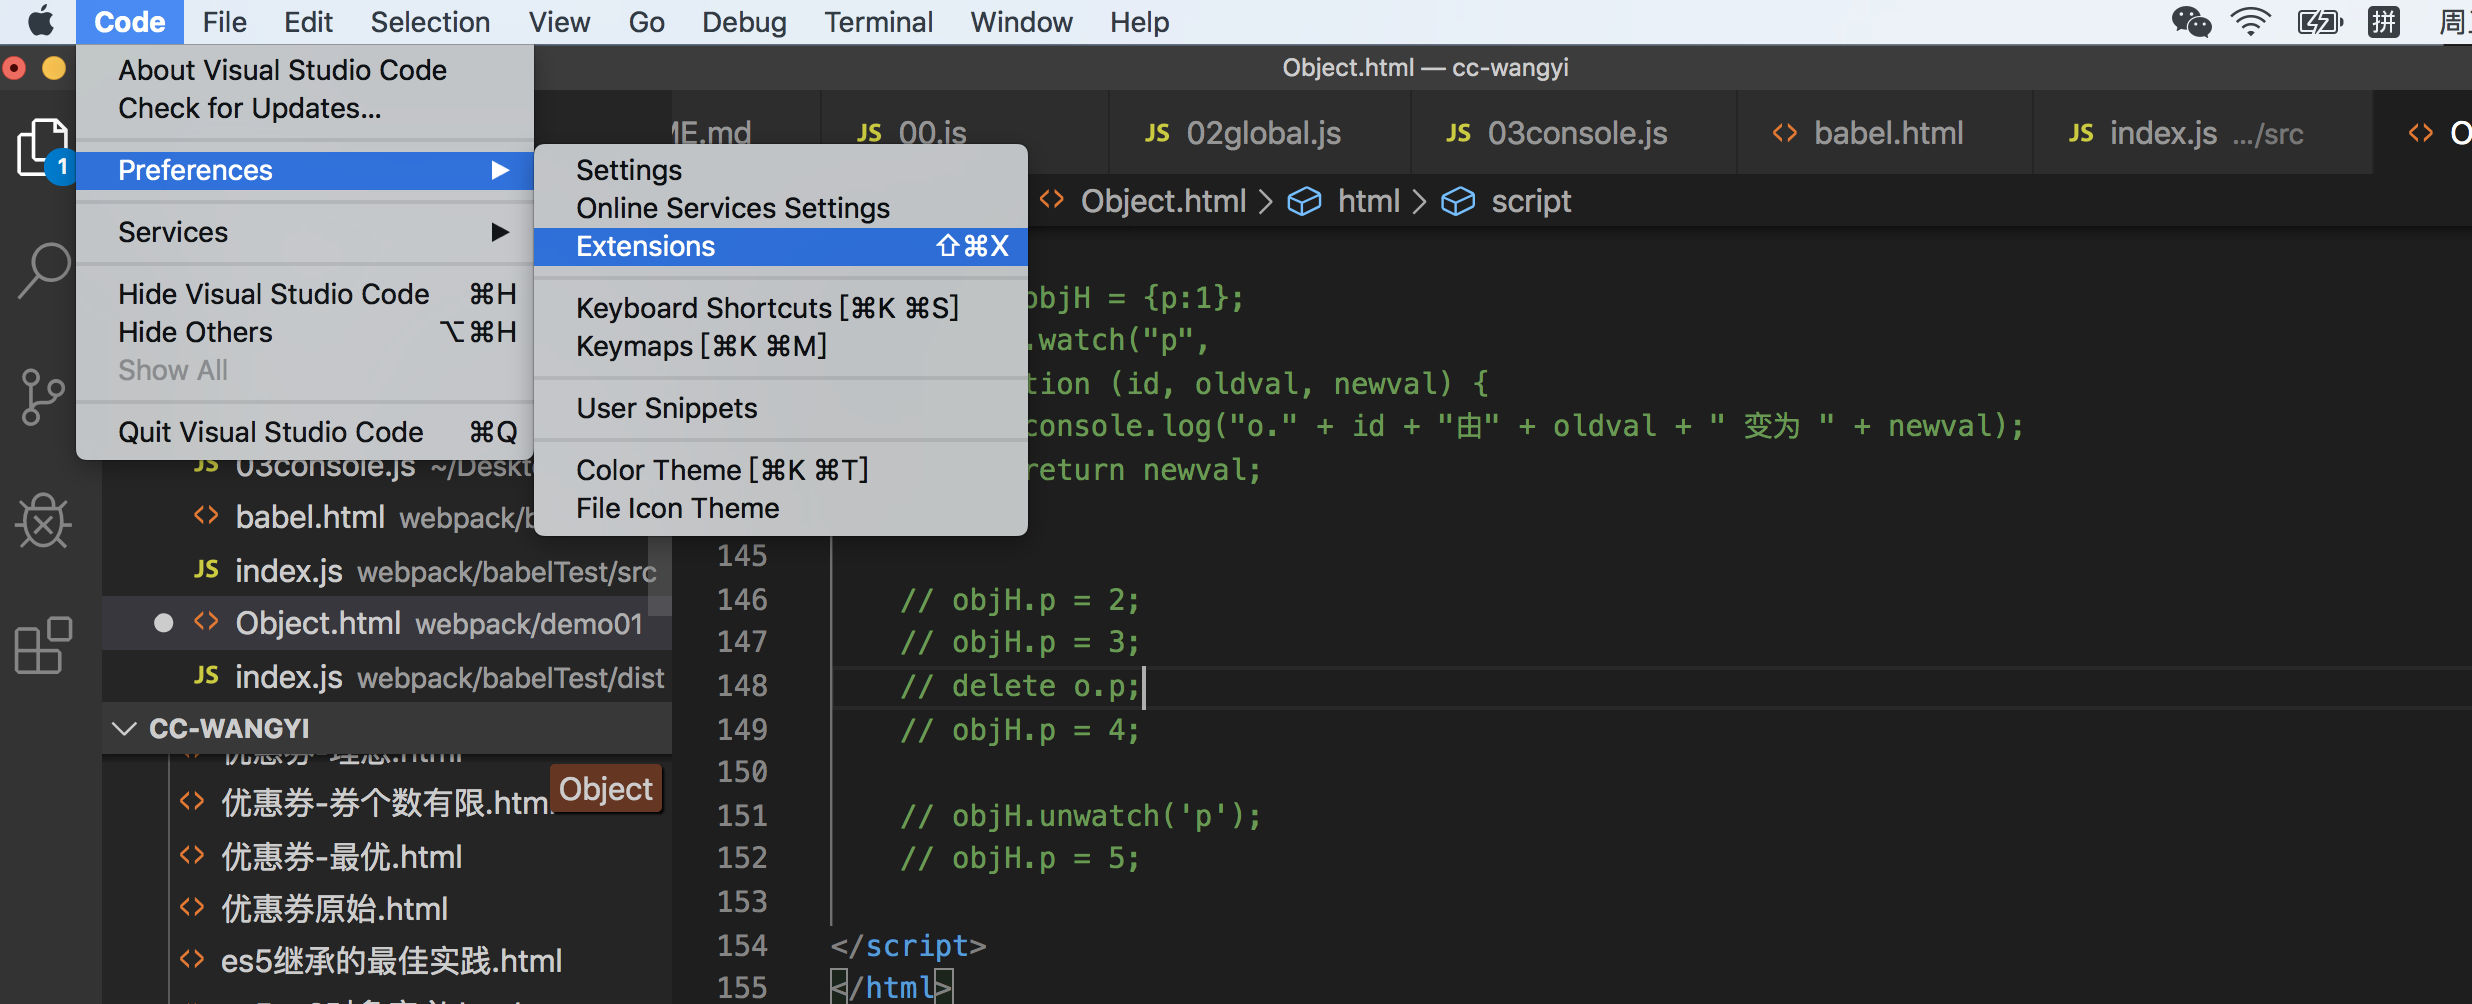
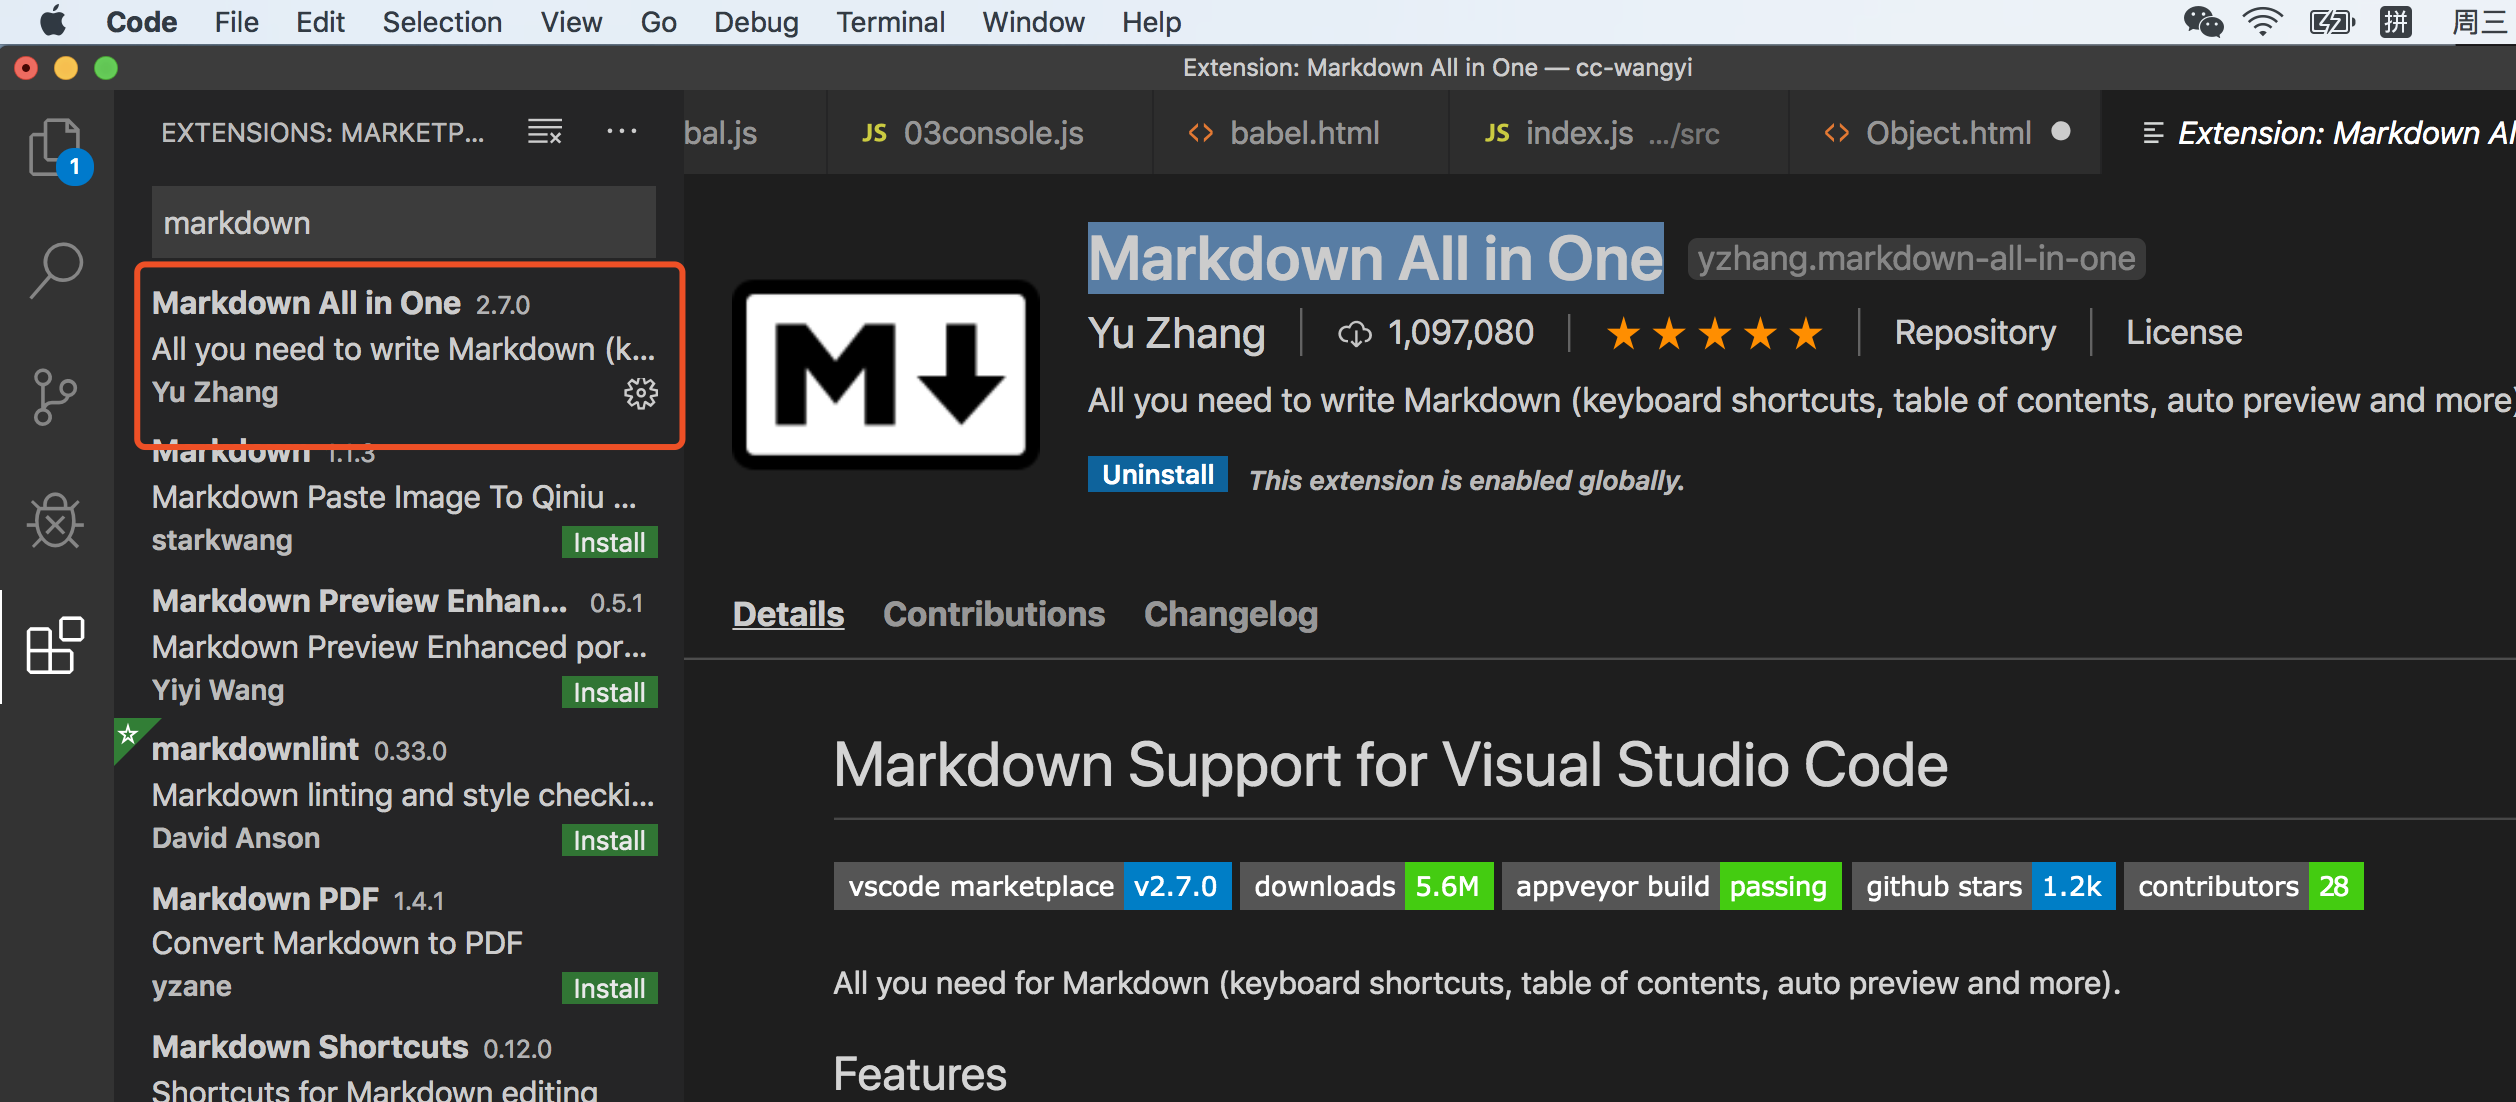
2. Поиск в Markdown All in One
Markdown All in One, как следует из названия, содержит формирование различных элементов обработки при записи файлов уценки.
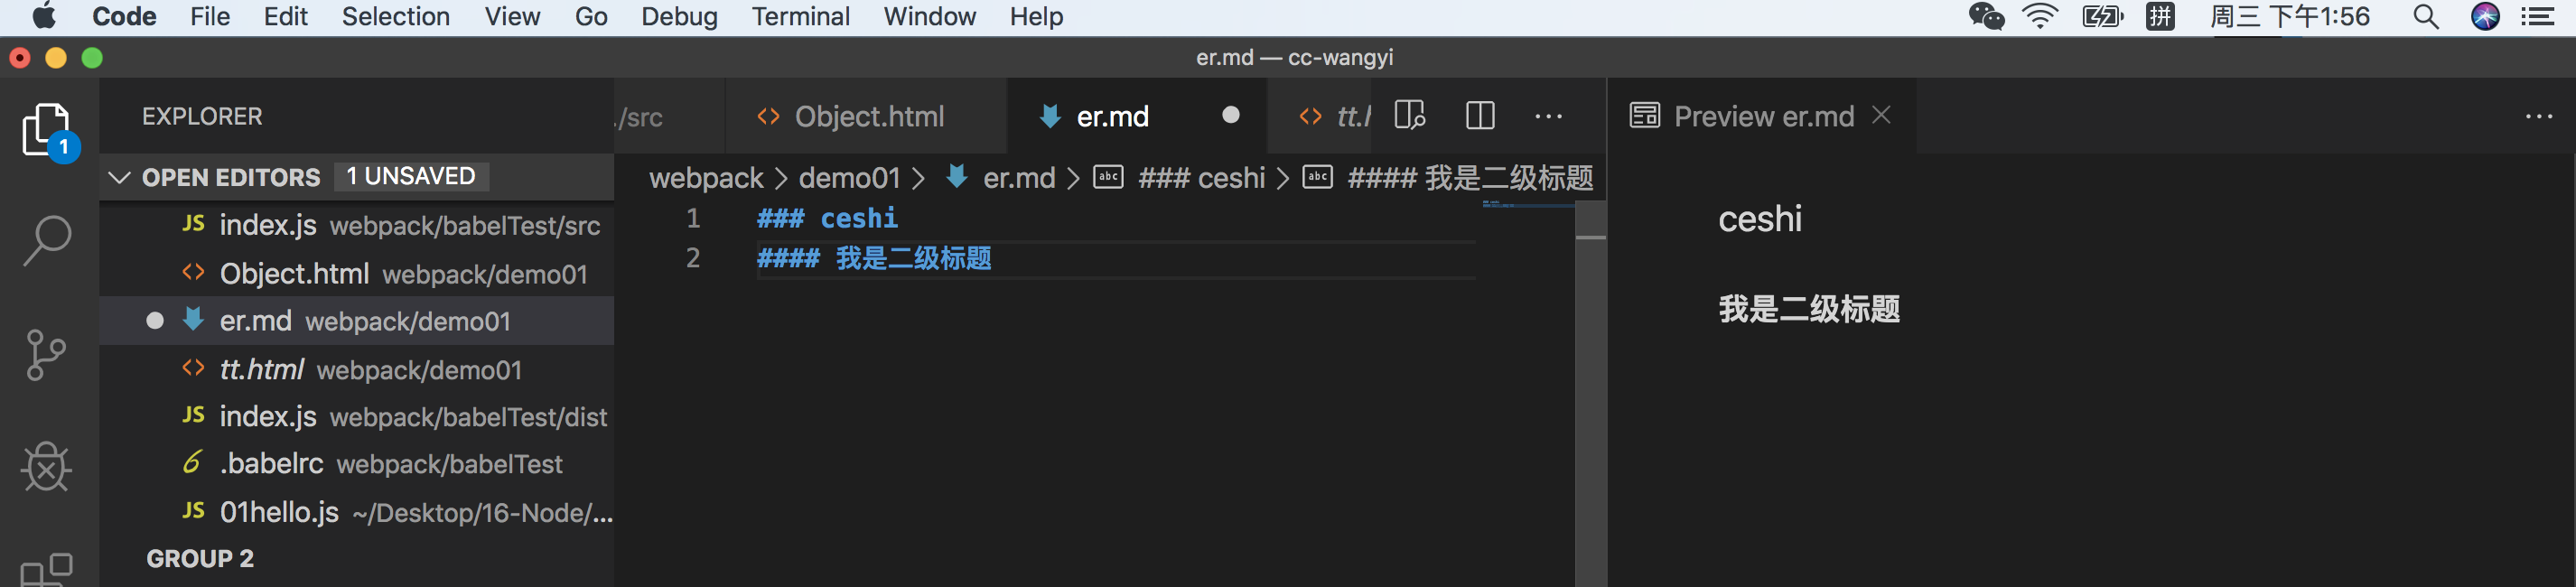
3. Проверьте, успешно ли установлен плагин.
Создайте новый файл XX.md document, отредактируйте ### title;

Щелкните значок в красном поле на рисунке
Теперь проверка прошла успешно.
2. Управление файлами markdwon
1. Создайте новый каталог документов в соответствующем каталоге.
mkdir markdown-doc 2. Команда открытия каталога файлов
Удерживайте одновременно нажатыми Shift + Command + P, чтобы открыть командную панель.
Найдите команду Install ‘code’ в PATH и выполните ее.
Если он был установлен, запустите его прямо на консоли:
code markdown-doc Каталог уценки будет открыт в новом окне vscode.
Поцелуи с суффиксом .md — это нормально, когда вы создаете новый файл.
3. Как быстро прочитать отредактированный md файл

Горячая клавиша: команда + K + V
Markdown and Visual Studio Code
Working with Markdown files in Visual Studio Code is simple, straightforward, and fun. Besides VS Code’s basic editing, there are a number of Markdown specific features that will help you be more productive.
Note: To help get you started with editing Markdown files, you can use the Doc Writer profile template to install useful extensions (spell checker, Markdown linter) and configure appropriate setting values.
Editing Markdown
Document outline
The Outline view is a separate section in the bottom of the File Explorer. When expanded, it will show the symbol tree of the currently active editor. For Markdown files, the symbol tree is the Markdown file’s header hierarchy.
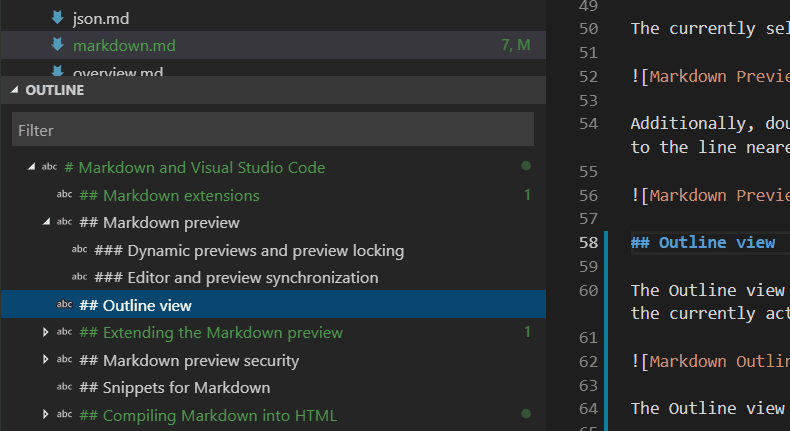
The Outline view is a great way to review your document’s header structure and outline.
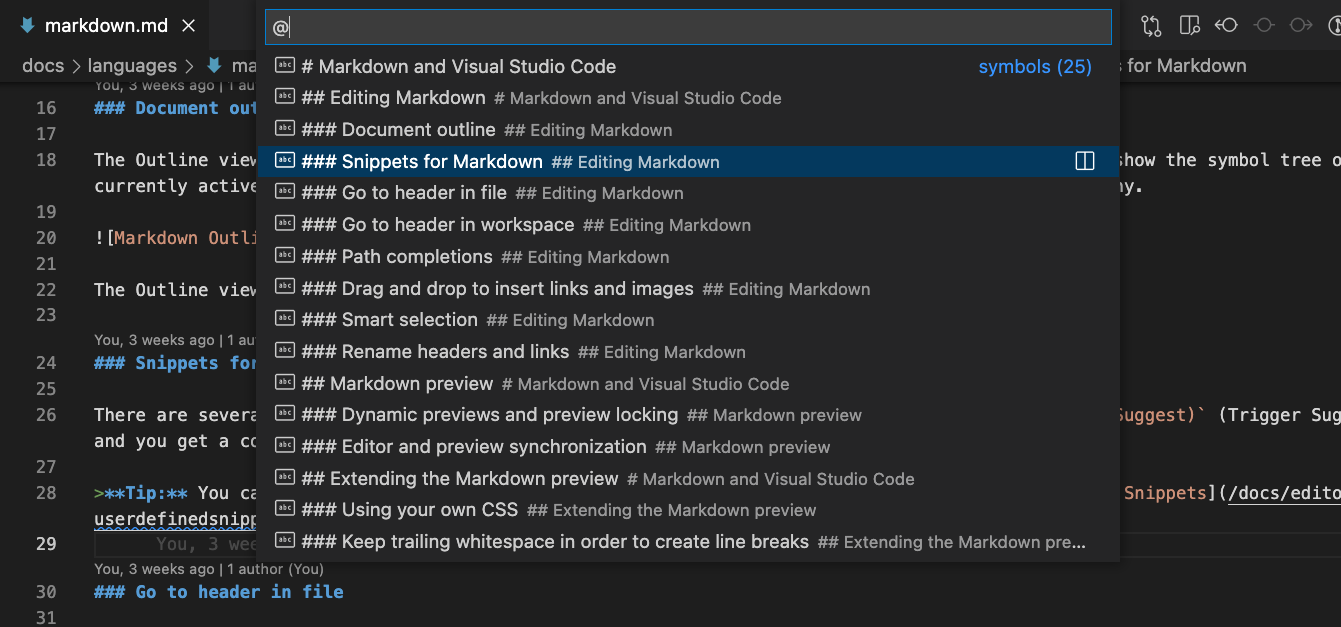
Snippets for Markdown
VS Code includes some useful snippets that can speed up writing Markdown. This includes snippets for code blocks, images, and more. Press ⌃Space (Windows, Linux Ctrl+Space ) (Trigger Suggest) while editing to see a list of suggested Markdown snippets. You can also use the dedicated snippet picker by selecting Insert Snippet in the Command Palette.
Tip: You can add in your own User Defined Snippets for Markdown. Take a look at User Defined Snippets to find out how.
Go to header in file
Use ⇧⌘O (Windows, Linux Ctrl+Shift+O ) to quickly jump to a header in the current file.
You can browse through all headers in the file or start typing a header name to find just the one you are after. Once you’ve found the header you what, press Enter to move your cursor to it. Press Esc to cancel jumping to the header.
Go to header in workspace
Use ⌘T (Windows, Linux Ctrl+T ) to search through headers across all Markdown files in the current workspace.
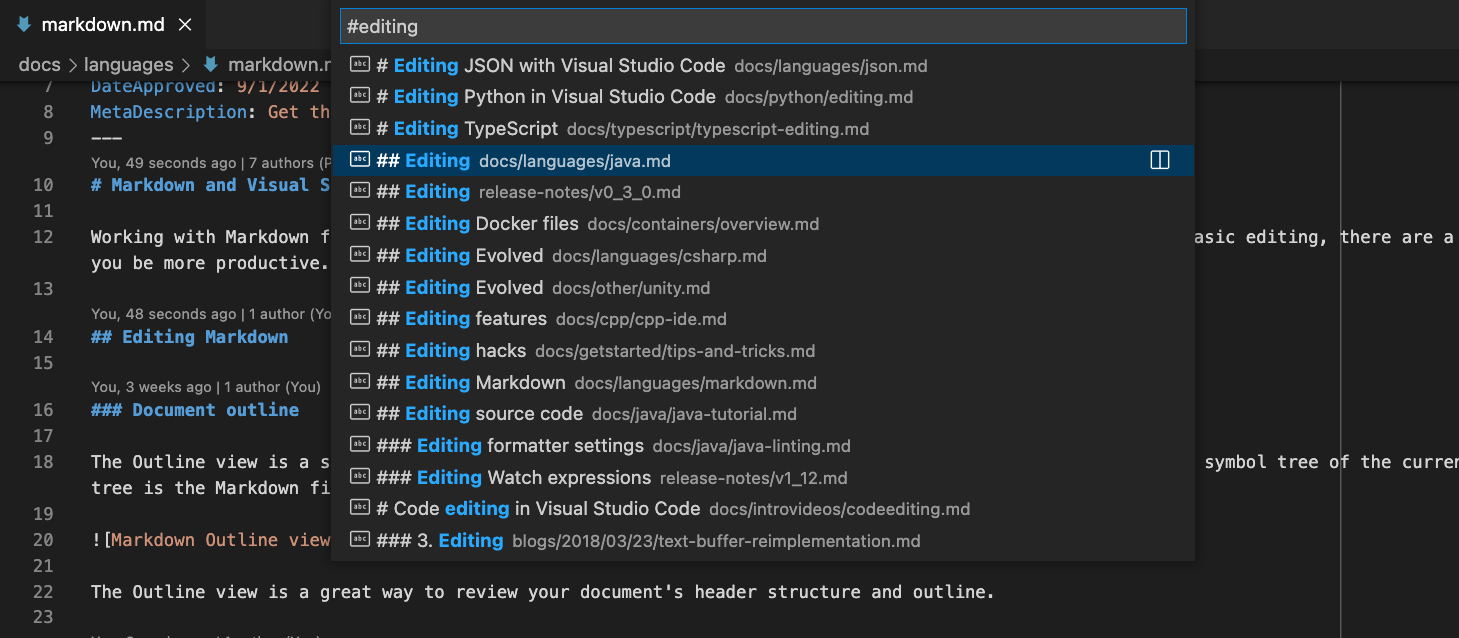
Start typing a header name to filter down the list and find the header you are after.
Path completions
Path completions help with create links to files and images. These paths are shown automatically by IntelliSense as you type the path of an image or link, and can also be manually requested by using ⌃Space (Windows, Linux Ctrl+Space ) .
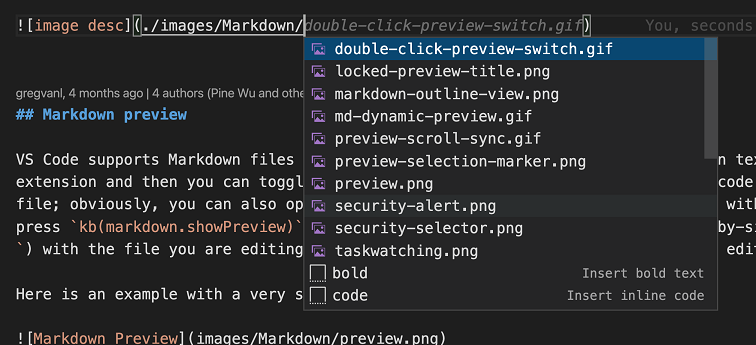
Paths starting with / are resolved relative to the current workspace root, while paths staring with ./ or without any prefix are resolved relative to the current file. Path suggestions are automatically shown when you type / or can be manually invoked by using ⌃Space (Windows, Linux Ctrl+Space ) .
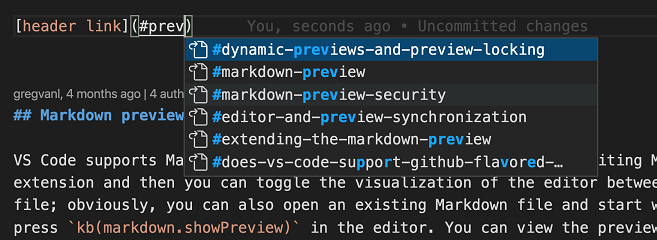
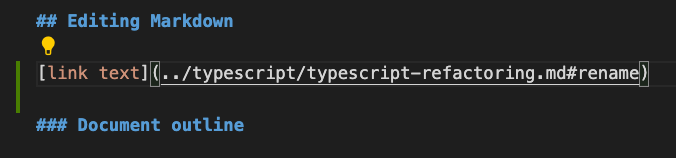
Path IntelliSense can also help you link to headers within the current file or within another Markdown file. Start the path with # to see completions for all the headers in the file (depending on your settings, you may need to use ⌃Space (Windows, Linux Ctrl+Space ) to see these):
You can disable path IntelliSense with «markdown.suggest.paths.enabled»: false .
Creating links to a header in another file
Need to link to a header in another Markdown document but don’t remember or want to type out the full file path? Try using workspace header completions! To start, just type ## in a Markdown link to see a list of all Markdown headers from the current workspace:

Accept one of these completions to insert the full link to that header, even if it’s in another file:
You can configure if/when workspace header completions show with the markdown.suggest.paths.includeWorkspaceHeaderCompletions setting. Valid setting values are:
- onDoubleHash (the default) — Show workspace header completions only after you type ## .
- onSingleOrDoubleHash — Show workspace header completions after you type # or ## .
- never — Never show workspace header completions.
Keep in mind that finding all headers in the current workspace can be expensive, so there may be a slight delay the first time they are requested, especially for workspaces with lots of Markdown files.
Inserting images and links to files
In addition to path completion, VS Code also supports a few other ways to insert images and file links into your Markdown documents:
You can Drag and drop a file from VS Code’s Explorer or from your operating system into a Markdown editor. Start by dragging a file from VS Code’s Explorer over your Markdown code and then hold down Shift to start dropping it into the file. The preview cursor shows where it will be inserted when you drop it.
If you prefer using the keyboard, you can also Copy and paste a file or image data into a Markdown editor.
Or you can use the Markdown: Insert Image from Workspace command to insert images and Markdown: Insert Link to File in Workspace to insert file links.
Inserted images use Markdown image syntax  . Links insert a normal Markdown link [](path/to/file.md) .
By default VS Code automatically copies dropped or pasted images outside of the workspace into your workspace. The markdown.copyFiles.destination setting controls where the new image file should be created. This setting maps globs that match on the current Markdown document to image destinations. The image destinations can also use some simple variables. See the markdown.copyFiles.destination setting description for information about the available variables.
For example, if we want every Markdown file under /docs in our workspace to put new media files into an images directory specific to the current file, we can write:
"markdown.copyFiles.destination": "/docs/**/*": "images/$/" > Now when a new file is pasted in /docs/api/readme.md , the image file is created at /docs/api/images/readme/image.png .
You can even use simple regular expressions to transform variables in a similar way to snippets. For example, this transform uses only the first letter of the document file name when creating the media file:
"markdown.copyFiles.destination": "/docs/**/*": "images/$/" > When a new file is pasted into /docs/api/readme.md , the image is now created under /docs/api/images/r/image.png .
Smart selection
Smart selection lets you quickly expand and shrink selection in Markdown documents. This can be used to quickly select entire block elements (such as codeblocks or tables) and to select the entire contents of a header section in the Markdown file.
Smart selection uses the following commands:
- Expand: ⌃⇧⌘→ (Windows, Linux Shift+Alt+Right )
- Shrink: ⌃⇧⌘← (Windows, Linux Shift+Alt+Left )
Selection applies to the following, and follows a traditional hierarchical pattern:
- Headers
- Lists
- Block quotes
- Fenced code blocks
- Html code blocks
- Paragraphs
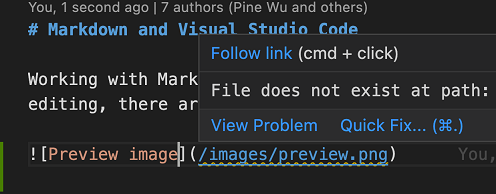
Link validation
Link validation checks local links in your Markdown code to make sure they are valid. This can catch common mistakes, such linking to a header that has been renamed or to a file that no longer exists on disk.
Link validation is off by default. To enable it, just set «markdown.validate.enabled»: true . VS Code will then analyze Markdown links to headers, images, and other local files. Invalid links will be reported as either warnings or errors. All link validation happens locally and there is no checking of external http(s) links.
There are a few settings you can use to customize link validation:
- markdown.validate.fileLinks.enabled — Enable/disable validation of links to local files: [link](/path/to/file.md)
- markdown.validate.fragmentLinks.enabled — Enable/disable validation of links to headers in the current file: [link](#_some-header)
- markdown.validate.fileLinks.markdownFragmentLinks — Enabled/disable validation of links to to headers in the other markdown file: [link](other-file.md#some-header)
- markdown.validate.referenceLinks.enabled — Enable/disable validation of reference links: [link][ref] .
- markdown.validate.ignoredLinks — A list of link globs that skip validation. This is useful if you link to files that don’t exist on disk but do exist once the Markdown has been published.
Find All References to headers and links
Use the Find All References ( ⇧⌥F12 (Windows, Linux Shift+Alt+F12 ) ) command to find all locations in the current workspace where a Markdown header or link is referenced:

Find All References is supported for:
- Headers: # My Header . Shows all links to #my-header .
- External links: [text](http://example.com) . Shows all links to http://example.com .
- Internal links: [text](./path/to/file.md) . Shows all links to ./path/to/file.md
- Fragments in links: [text](./path/to/file.md#my-header) . Shows all links to #my-header in ./path/to/file.md
Rename headers and links
Tired of accidentally breaking links when you change a Markdown header? Try using Rename Symbol ( F2 ) instead. After you type the new header name and press Enter , VS Code will update the header as well as automatically updating all links to that header:
You can also use F2 on:
- Headers: # My Header . This will update all links to #my-header .
- External links: [text](http://example.com/page) . This will update all places that linked to http://example.com/page
- Internal links: [text](./path/to/file.md) . This will rename the file ./path/to/file.md and also update all links to it.
- Fragments in links: [text](./path/to/file.md#my-header) . This will rename the header in ./path/to/file.md and also update all links to it.
Automatic link updates on file move or rename
With automatic Markdown link updating, VS Code will automatically update Markdown links whenever a linked to file is moved or renamed. You can enable this feature with the markdown.updateLinksOnFileMove.enabled setting. Valid setting values are:
- never (the default) — Don’t try to update links automatically.
- prompt — Confirm before updating links.
- always — Update links automatically without confirmation.
Automatic link updating detects renames of Markdown files, images, and directories. You can enable it for additional file types with markdown.updateLinksOnFileMove.include .
Markdown preview
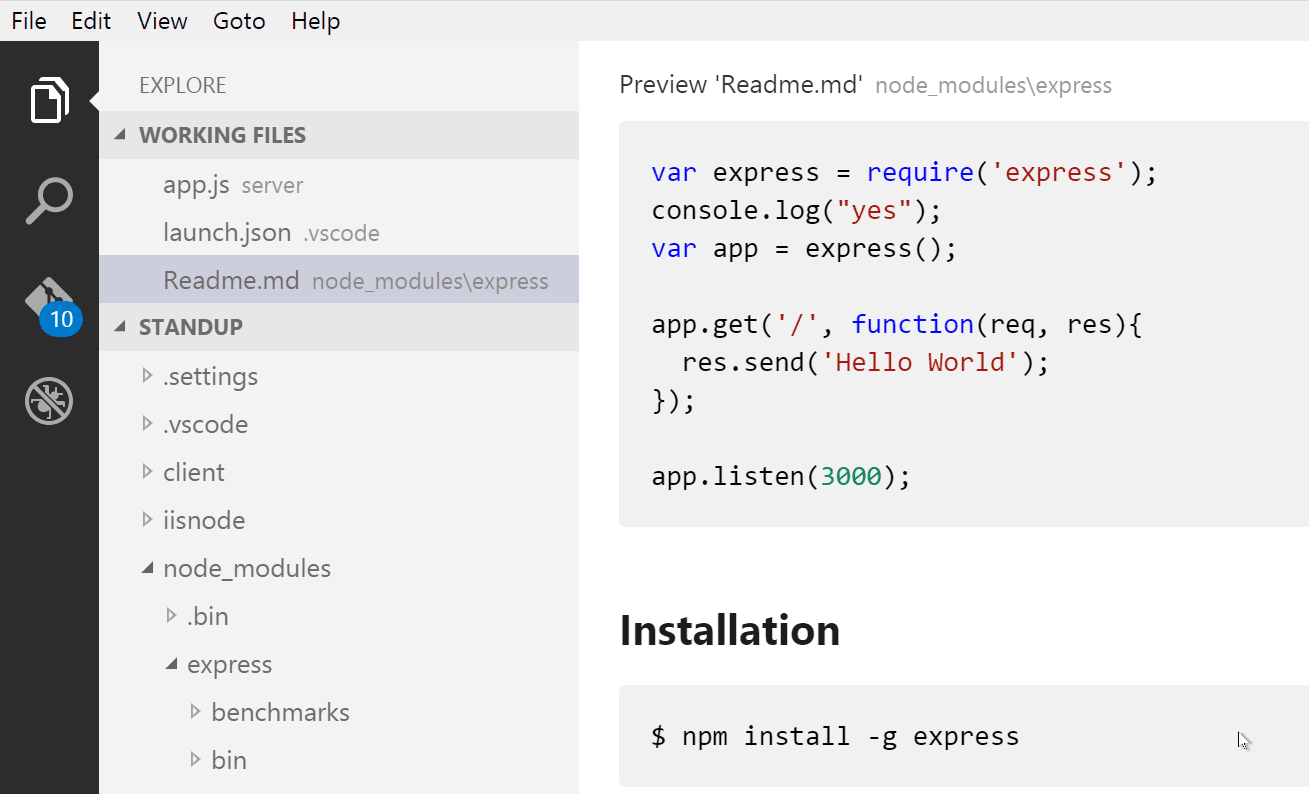
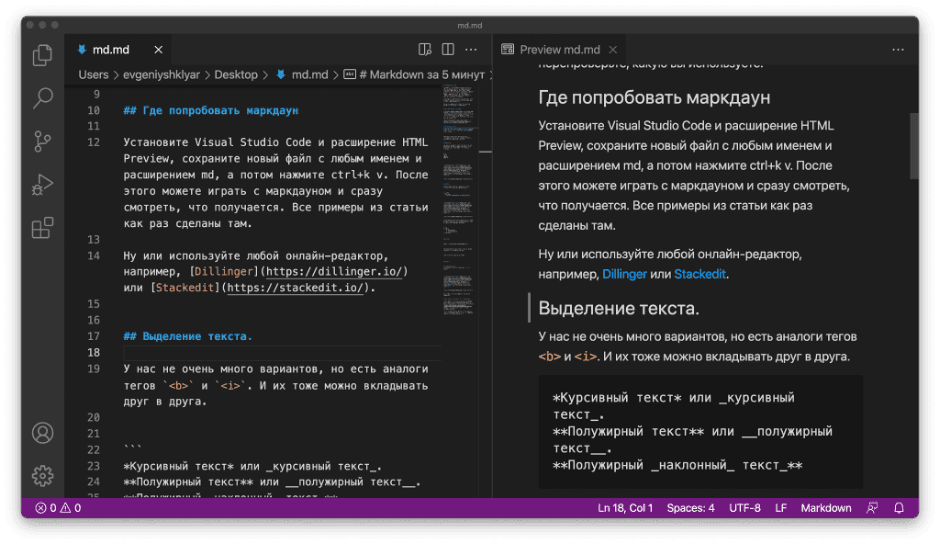
VS Code supports Markdown files out of the box. You just start writing Markdown text, save the file with the .md extension and then you can toggle the visualization of the editor between the code and the preview of the Markdown file; obviously, you can also open an existing Markdown file and start working with it. To switch between views, press ⇧⌘V (Windows, Linux Ctrl+Shift+V ) in the editor. You can view the preview side-by-side ( ⌘K V (Windows, Linux Ctrl+K V ) ) with the file you are editing and see changes reflected in real-time as you edit.
Here is an example with a simple file.
Tip: You can also right-click on the editor Tab and select Open Preview ( ⇧⌘V (Windows, Linux Ctrl+Shift+V ) ) or use the Command Palette ( ⇧⌘P (Windows, Linux Ctrl+Shift+P ) ) to run the Markdown: Open Preview to the Side command ( ⌘K V (Windows, Linux Ctrl+K V ) ).
Dynamic previews and preview locking
By default, Markdown previews automatically update to preview the currently active Markdown file:
You can lock a Markdown preview using the Markdown: Toggle Preview Locking command to keep it locked to its current Markdown document. Locked previews are indicated by [Preview] in the title:

Note: The Markdown: Toggle Preview Locking command is available only if Markdown preview is the active Tab.
Editor and preview synchronization
VS Code automatically synchronizes the Markdown editor and the preview panes. Scroll the Markdown preview and the editor is scrolled to match the preview’s viewport. Scroll the Markdown editor and the preview is scrolled to match its viewport:
You can disable scroll synchronization using the markdown.preview.scrollPreviewWithEditor and markdown.preview.scrollEditorWithPreview settings.
The currently selected line in the editor is indicated in the Markdown preview by a light gray bar in the left margin:

Additionally, double clicking an element in the Markdown preview will automatically open the editor for the file and scroll to the line nearest the clicked element.
Extending the Markdown preview
Extensions can contribute custom styles and scripts to the Markdown preview to change its appearance and add new functionality. Here’s a set of example extensions that customize the preview:
Using your own CSS
You can also use your own CSS in the Markdown preview with the «markdown.styles»: [] setting. This lists URLs for style sheets to load in the Markdown preview. These stylesheets can either be https URLs, or relative paths to local files in the current workspace.
For example, to load a stylesheet called Style.css at the root of your current workspace, use File > Preferences > Settings to bring up the workspace settings.json file and make this update:
// Place your settings in this file to overwrite default and user settings. "markdown.styles": ["Style.css"] > Keep trailing whitespace in order to create line breaks
To create hard line breaks, Markdown requires two or more spaces at the end of a line. Depending on your user or workspace settings, VS Code may be configured to remove trailing whitespace. In order to keep trailing whitespace in Markdown files only, you can add these lines to your settings.json :
"[markdown]": "files.trimTrailingWhitespace": false > > Markdown preview security
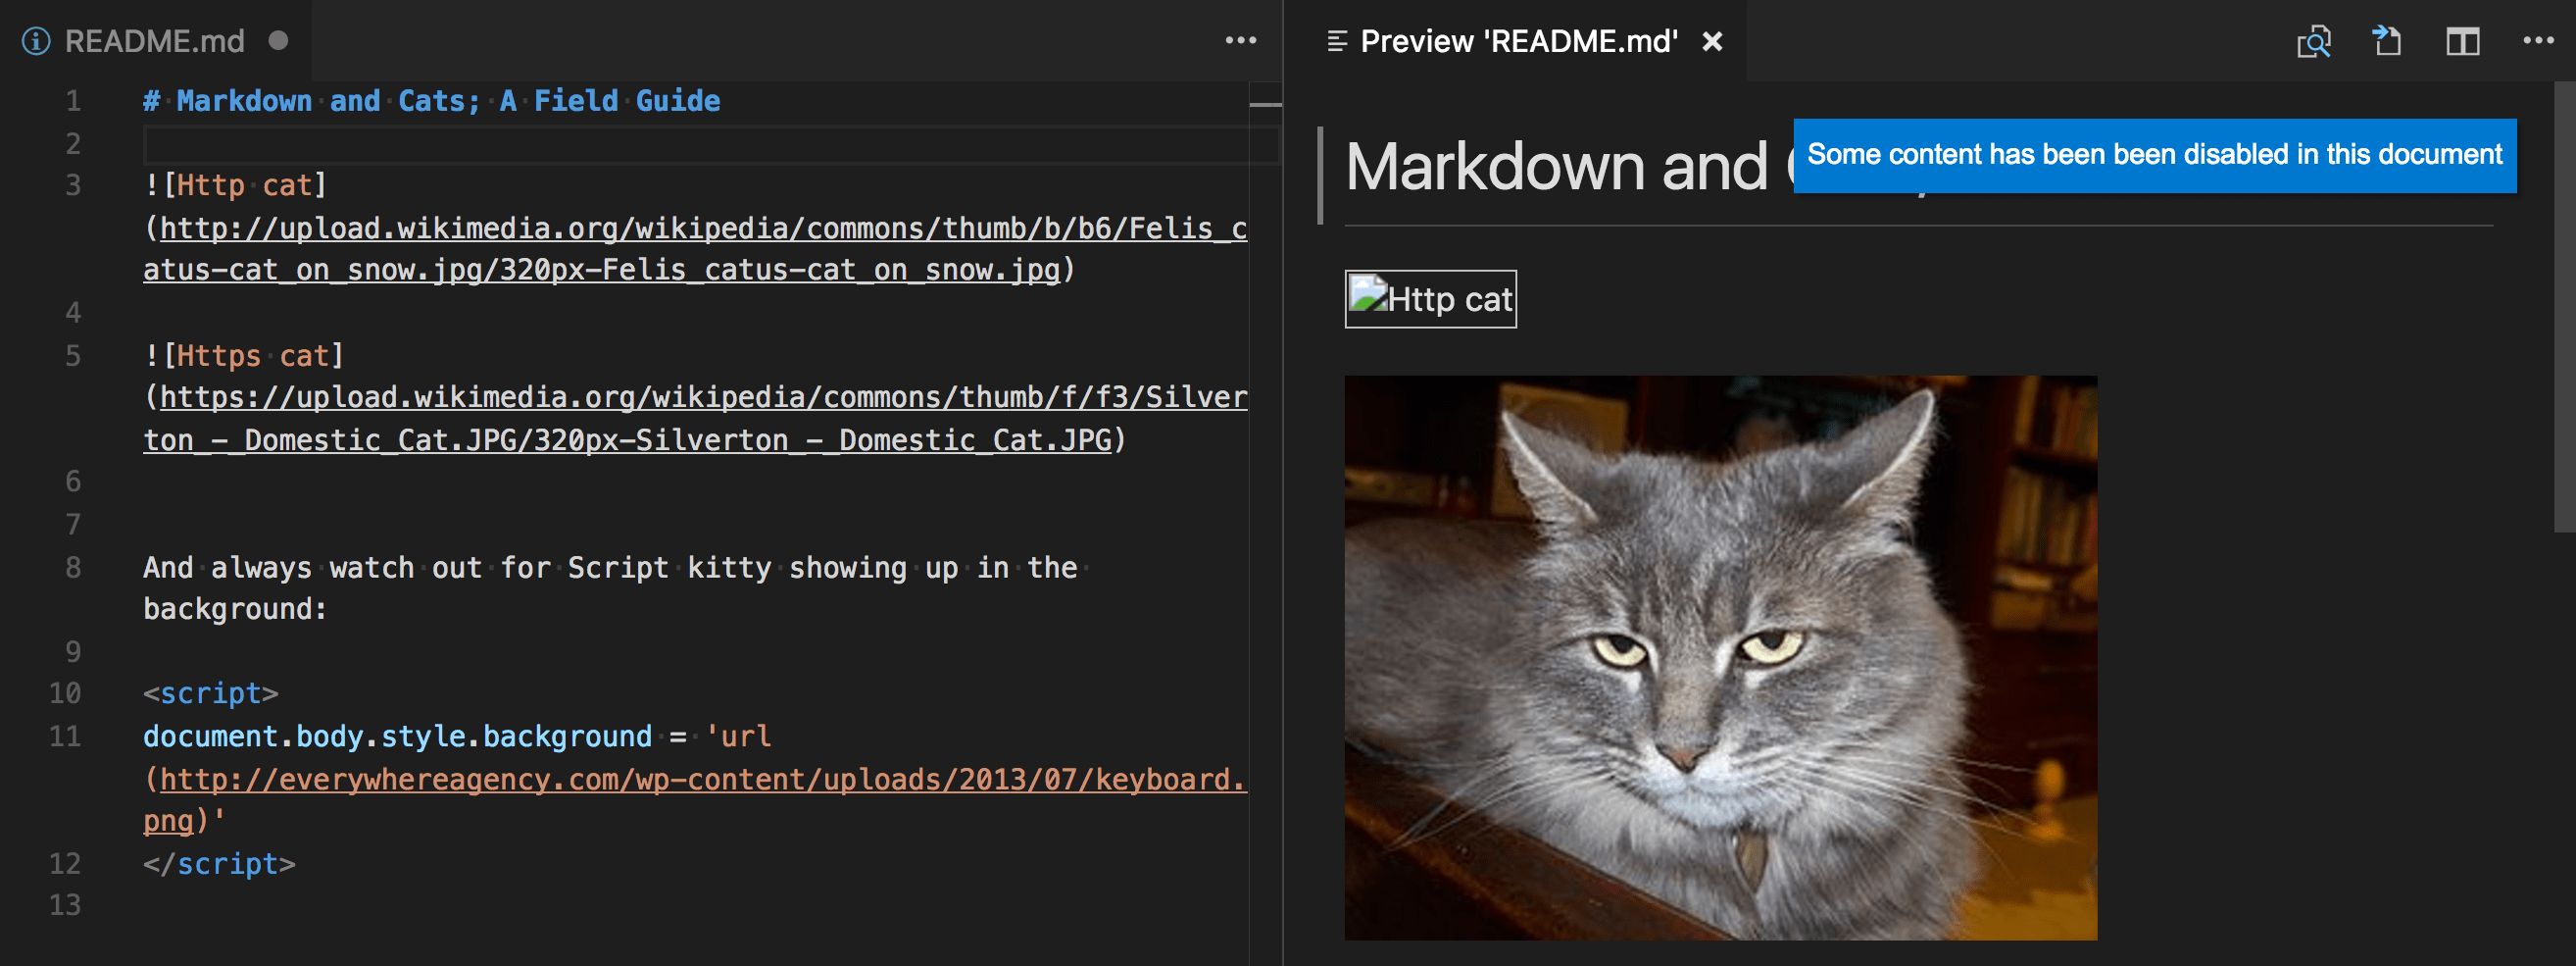
For security reasons, VS Code restricts the content displayed in the Markdown preview. This includes disabling script execution and only allowing resources to be loaded over https .
When the Markdown preview blocks content on a page, an alert popup is shown in the top right corner of the preview window:
You can change what content is allowed in the Markdown preview by clicking on this popup or running the Markdown: Change preview security settings command in any Markdown file:

The Markdown preview security settings apply to all files in the workspace.
Here are the details about each of these security levels:
Strict
This is the default setting. Only loads trusted content and disables script execution. Blocks http images.
It is strongly recommended that you keep Strict security enabled unless you have a very good reason to change it AND you trust all Markdown files in the workspace.
Allow insecure content
Keeps scripts disabled but allows content to be loaded over http .
Disable
Disables additional security in the preview window. This allows script execution and also allows content to be loaded over http .
Doc Writer profile template
Profiles let you quickly switch your extensions, settings, and UI layout depending on your current project or task. To help you get started with editing Markdown, you can use the Doc Writer profile template, which is a curated profile with useful extensions and settings. You can use a profile template as is or use it as a starting point to customize further for you own workflows.
You select a profile template through the Profiles > Create Profile. dropdown:
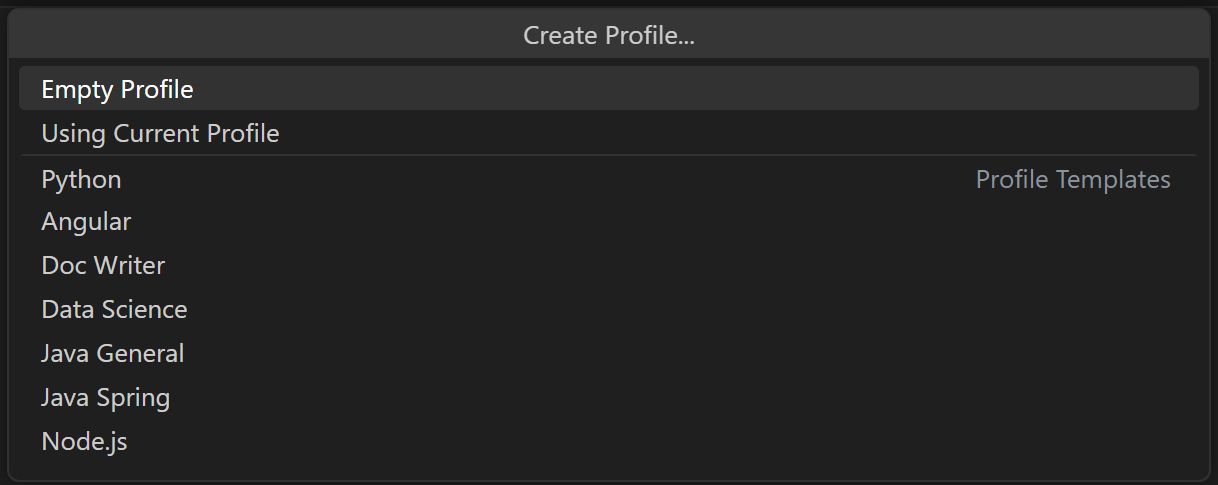
Once you select a profile template, you can review the settings and extensions, and remove individual items if you don’t want to include them in your new Profile. After creating the new profile based on a template, changes made to settings, extensions, or UI are persisted in your profile.
Markdown extensions
In addition to the functionality VS Code provides out of the box, you can install an extension for greater functionality.
Tip: Select an extension tile above to read the description and reviews to decide which extension is best for you. See more in the Marketplace.
Next steps
Read on to find out about:
- CSS, SCSS, and Less — Want to edit your CSS? VS Code has great support for CSS, SCSS, and Less editing.
Common questions
Is there spell checking?
Not installed with VS Code but there are spell checking extensions. Check the VS Code Marketplace to look for useful extensions to help with your workflow.
Does VS Code support GitHub Flavored Markdown?
No, VS Code targets the CommonMark Markdown specification using the markdown-it library. GitHub is moving toward the CommonMark specification, which you can read about in this update.
6. Разное
Устанавливаем расширение Markdown Preview Enhanced в VSCode. Даное расширение дает возможность предпросмотра готового файла.
В редакторе создаем файл README.md и вносим в него изменения.
Чтобы открыть превью нажимаем правой кнопкой мыши и выбираем Markdown Preview Enhanced: Open Preview to the Side .
2. Маркированные списки — + или — или *
3. Нумерованные списки — 1. , 2.
4. Горизонтальная линия на всю строку — *** или — или ___
5. Стиль текста — жирный и курсивный
6. Серая подложка для фрагмента — «`
Markdown за 5 минут
Маркдаун, он же markdown — удобный и быстрый способ разметки текста. Маркдаун используют, если недоступен HTML, а текст нужно сделать читаемым и хотя бы немного размеченным (заголовки, списки, картинки, ссылки).
Главный пример использования маркдауна, с которым мы часто сталкиваемся — файлы readme.md , которые есть в каждом репозитории на Гитхабе. md в имени файла это как раз сокращение от markdown.
Другой частый пример — сообщения в мессенджерах. Можно поставить звёздочки вокруг текста в Телеграме, и текст станет полужирным.

Версии маркдауна отличаются, поэтому перепроверьте, какую вы используете.
Где попробовать маркдаун
Установите Visual Studio Code и расширение HTML Preview, сохраните новый файл с любым именем и расширением md, а потом нажмите ctrl+k v. После этого можете играть с маркдауном и сразу смотреть, что получается. Все примеры из статьи как раз сделаны там.
Ну или используйте любой онлайн-редактор, например, Dillinger или Stackedit.
Выделение текста
У нас не очень много вариантов, но есть аналоги тегов и . И их тоже можно вкладывать друг в друга.
*Курсивный текст* или _курсивный текст_. **Полужирный текст** или __полужирный текст__. **Полужирный _наклонный_ текст_** 
Заголовки
Чем больше раз повторяем #, тем больше уровень заголовка. Вообще доступно 6 уровней, но на практике очень редко нужно что-то больше третьего.
# h1 ## h2 ### h3 #### h4 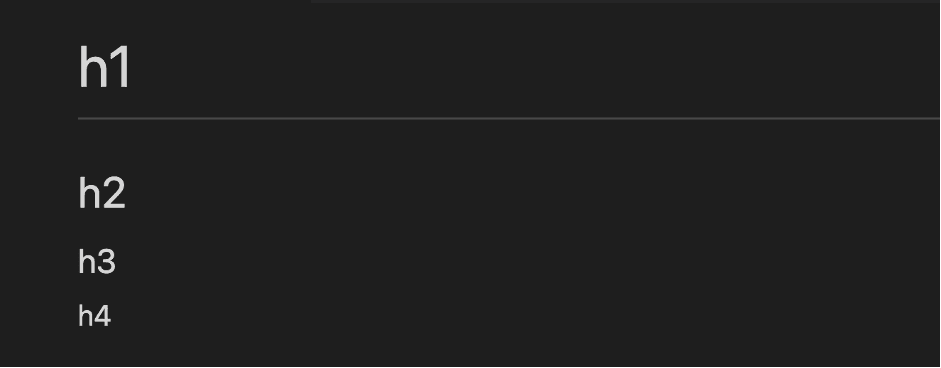
Списки
Ненумерованный список — звёздочки с одной стороны. Второй уровень — ставим таб.
* Привет * Как дела * после таба получаем вложенный список 
С нумерацией вообще смешно — можно просто везде поставить единички, а в документе появится уже нормально проставленная нумерация.
1. Да 1. Да-да 1. Да-да-да-да 1. Да-да-да-да-да 1. Да-да-да Ссылки
[Текст ссылки](https://htmlacademy.ru) Картинки ставятся как ссылки, только в начале добавляется восклицательный знак.
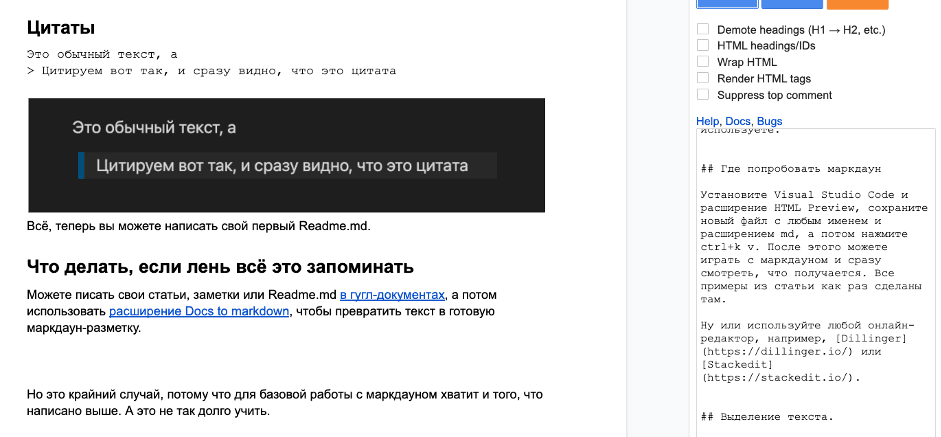
 Цитаты
Это обычный текст, а > Цитируем вот так, и сразу видно, что это цитата 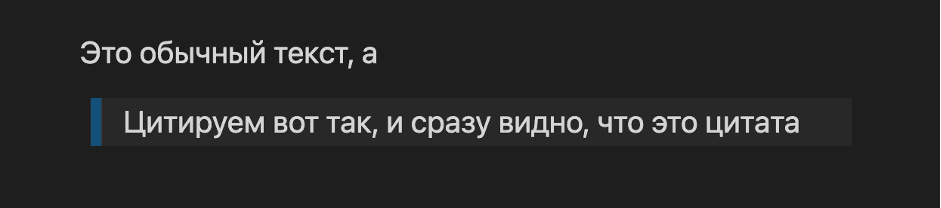
Всё, теперь вы можете написать свой первый Readme.md.
Что делать, если лень всё это запоминать
Можете писать свои статьи, заметки или Readme. md в гугл-документах, а потом использовать расширение Docs to markdown, чтобы превратить текст в готовую маркдаун-разметку.
Но это крайний случай, потому что для базовой работы с маркдауном хватит и того, что написано выше. А это дел на пять минут.
«Доктайп» — журнал о фронтенде. Читайте, слушайте и учитесь с нами.
Читать дальше

5 частых ошибок при работе с Git
Git — это важный и довольной понятный инструмент для контроля версий в разработке программного обеспечения, но иногда он может выдавать ошибки, которые сбивают с толку. Если вы столкнулись с одной из этих ошибок, попробуйте наше решение.
- 27 августа 2023
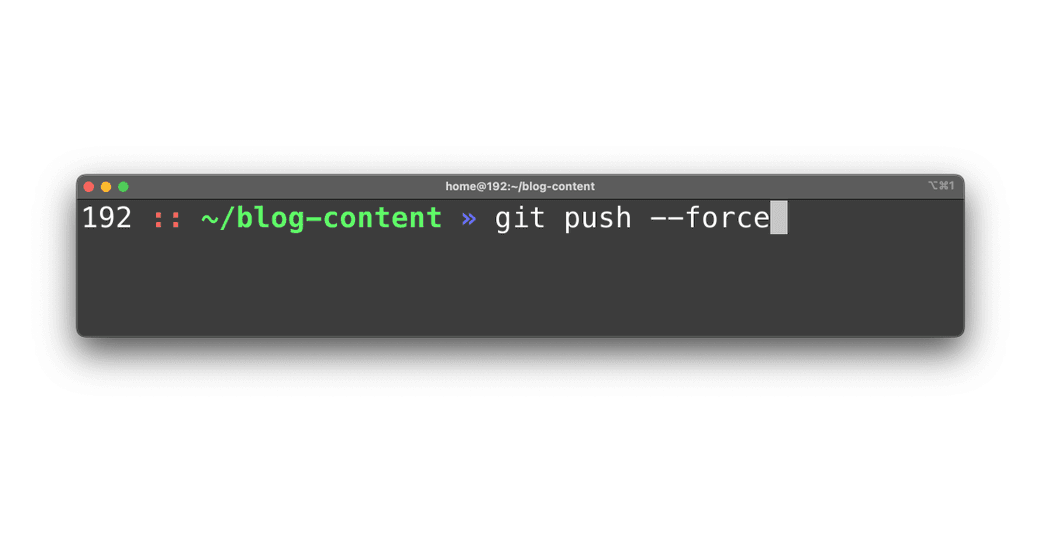
Работа с Git через консоль
Задача: форкнуть репозиторий в GitHub, создать ветку и работать с кодом.
Сразу появляется много вопросов — что такое GitHub, какие для этого нужны команды, зачем, а главное, как всем этим пользоваться? Давайте разберёмся.
Когда мы пишем код, мы постоянно туда что-то добавляем, удаляем, и иногда всё может ломаться. Поэтому перед любыми изменениями стоит сделать копию проекта. Если собирать проекты в папки с именами проект1 , проект1_финал и проект2_доделка , вы быстро запутаетесь и точно что-нибудь потеряете. Поэтому для работы с кодом используют системы контроля версий.
Система контроля версий — программа, которая хранит разные версии одного документа, позволяет переключаться между ними, вносить и отслеживать изменения. Таких систем много и все они работают по принципу компьютерной игры, где вы можете вернуться к месту сохранения, если что-то пошло не так.
Git — самая популярная система контроля версий. С Git можно работать через командную строку (или терминал). В каждой системе своя встроенная программа для работы с командной строкой. В Windows это PowerShell или cmd, а в Linux или macOS — Terminal. Вместо встроенных программ можно использовать любую другую — например, Git Bash в Windows или iTerm2 для macOS.
Как работает терминал: мы вводим команду и получаем ответ компьютера — или всё получилось, или где-то ошибка, или нужно ввести что-то ещё — например, пароль. Поэтому большая часть этой инструкции состоит из команд для терминала. Сначала будет непривычно, но вам понравится.
Но давайте по порядку — установим Git на компьютер.
- 7 августа 2023

GitHub Desktop: обзор и первая настройка
Самая короткая инструкция о том, как сохранить файлы в GitHub и ничего не сломать. И самое главное — никакой консоли, всё через окошки и с помощью мышки. Для этого используем GitHub Desktop.
Внимание! GitHub Desktop не работает на Windows 7×32, поэтому если у вас эта версия системы, обновитесь до Windows 10 или воспользуйтесь программой GitKraken.
В этой статье идёт рассказ о системах контроля версий. Если вы совсем ничего о них не знаете, прочитайте статьи «Словарь терминов для Git и GitHub» и «Введение в системы контроля версий», чтобы понять терминологию и разобраться, зачем мы вообще это делаем.
- 7 августа 2023

Как склеить коммиты и зачем это нужно
Когда вы открываете пулреквест и ваш код смотрят и комментируют другие, бывает нужно что-то исправить. Обычно такие изменения мы комментируем сообщением вроде «Увеличил шрифт на 2px » или «Поменял оттенок фона в шапке». Такие маленькие изменения интересны, только пока они в пулреквесте. Ревьювер (человек, который смотрит ваш код), может легко узнать, что и когда вы изменили, а не читать весь diff заново, а вы можете легко откатить коммит, если он не нужен. Но когда приходит время вливать пулреквест, эти маленькие коммиты теряют свою ценность. Поэтому лучше их склеить в один.
- 14 июня 2023

Основные команды для работы с Git
Работа с Git через терминал — это обязательная часть практики фронтендера. Однако для начинающих разработчиков этот инструмент может показаться сложным. Чтобы вам было проще учиться, мы собрали основные команды для работы с Git.
☝ В некоторых командах мы будем писать URL-адрес удалённого репозитория и название проекта в квадратных скобках, вот так — [ссылка на удалённый репозиторий] . Мы делаем это только для наглядности. Вам квадратные скобки ставить не нужно.
- 22 февраля 2023

Как бесплатно залить сайт на GitHub Pages
Допустим, вы сделали какой-то проект, например, собрали себе портфолио по шаблону, и теперь хотите выложить его в интернет. Если вы использовали только HTML и CSS, то необязательно платить деньги, чтобы загрузить сайт куда-то. Вы можете бесплатно выложить сайт на сервис GitHub Pages. Всё, что нужно — аккаунт на Гитхабе.
- 29 ноября 2022

Регистрация на GitHub
Создание нового аккаунта на GitHub состоит всего из 10 шагов — и вся регистрация занимает меньше пяти минут.
�� Обратите внимания, что интерфейс Гитхаба регулярно меняется, так что внешне он может отличаться, когда вы читаете эту статью.
Начало регистрации. Так выглядит главный экран Гитхаба, когда вы не зарегистрированы. Главное, что вам нужно заметить — большое поле для ввода почты и зелёная кнопка. Вводите свой адрес и переходите на следующий шаг.
Ввод почты. На следующем шаге начинается регистрация. Подтвердите свою почту с прошлого шага и нажмите Continue (Продолжить).
Пароль. Придумайте сложный пароль, чтобы его никто не взломал. Например, Гитхаб просит, чтобы в пароле было не меньше 15 символов или 8 символов, но тогда должны быть и латинские буквы, и цифры.
Имя профиля. Теперь выберите имя вашего профиля — оно будет использоваться в интерфейсе, в коммитах и комментариях. То есть именно так вас будет видеть любой пользователь Гитхаба. Для разработчика Гитхаб вместо визитки, так что выбирайте что-нибудь приличное, лучше, если ник будет совпадать с вашими никнеймами на других сайтах.
Если имя недоступно, Гитхаб вам об этом скажет. А если доступно — жмите Continue.
Рассылки. Дальше Гитхаб спросит, хотите ли вы подписаться на рассылку об обновлениях. Впечатайте латинскую У, если хотите, или n, если письма вам не нужны. Готовы спорить, мы знаем, что вы выберете.
Капча, чтобы проверить, что вы не робот. Нам при регистрации пришлось два раза выбрать спиральную галактику — не сильно сложно. А если вы робот — не причиняйте вред человеку своим действием или бездействием.
Подтверждение почты. После капчи вам придёт письмо с кодом на почту. Введите его на следующей странице.
Вот здесь. Главное — не ошибайтесь.
Общая информация о вас и вашей команде. Если вы регистрируете аккаунт для себя, выбирайте Just me. Второй пункт — студент вы или учитель. Выбирайте «Студент», если вы не учитель.
Интересы. Дальше Гитхаб спросит вас об интересах — то есть о том, зачем вы регистрируете аккаунт. Из вариантов:
- Совместная разработка и код ревью.
- Автоматизация. CI/CD, API и другие админские вещи.
- Безопасность. Двухфакторная аутентификация, ревью, сканирование кода и списки зависимостей.
- Приложения. Выбирайте, если будете использовать GitHub Mobile, CLI, Desktop.
- Управление проектами. Проекты, метки, ишьи, вики и другие управленческие дела.
- Управление командами. Организации, приглашения, роли, домены.
- Сообщество. Выбирайте, если Гитхаб интересен вам как соцсеть.
Вы можете выбрать несколько пунктов или пропустить и не указывать ничего, для этого пролистайте страницу вниз для кнопки Skip customization.
Выбор тарифа. На выбор бесплатный тариф или платный GitHub Pro. Практика показывает, что для большинства личных проектов хватит бесплатного тарифа. В сентябре 2022 в него входили:
- Безлимитное количество репозиториев.
- 2000 минут CI/CD в месяц.
- 500 мегабайт места в хранилище пакетов.
- Поддержка сообщества.
Выбор тоже можно пропустить, тогда у вас будет бесплатный тариф.
Всё готово. Теперь у вас есть аккаунт. Можете создать репозиторий и работать с ним, или склонировать чужой. А для работы у вас есть несколько удобных вариантов:
- 28 сентября 2022

Работа с Git в Visual Studio Code
Если вы вёрстаете сайты или пишете код в редакторе Visual Studio Code, то Git за пять минут настраивается прямо внутри редактора. Не нужно запоминать команды для консоли, не нужно тыкать в лишние приложения.
Следуйте инструкции и всё получится.
- 16 сентября 2022

Шпаргалка по Git. Решение основных проблем
Поговорим о решении проблем с Git.
- 11 декабря 2020

Полезные команды для работы с Git
Работа с Git через терминал — это обязательная часть практики каждого современного фронтенд-специалиста. Однако, для начинающих это может показаться сложным. Чтобы упростить процесс обучения, мы собрали для вас все самые необходимые команды, которые пригодятся в работе с Git на первое время.
- 1 января 2020