How To Import & Open a GPX File in Google Maps (Android & PC)

If you’re a hiking addict or regularly take trips to unfamiliar areas, you’re most likely to come across the GPX format. It is one of the most widely used formats for route sharing and regular hikers often use this format to share routes or save their own tracks, This article will guide you to import and open GPX files in Google Maps on Android, iPhone, and PC.
What is the GPX format?
GPX is an abbreviation for GPS eXchange, which is a file format that, as its name suggests, allows you to exchange GPS coordinates by sharing them as a file that can be imported into a GPS application. It is an organized list of precise locations that form a route for hikers, cyclists, or anyone who performs an activity that requires the tracking of a specific route. This route can be indicated on an interactive map or even printed on paper.
You can think of GPX as a format used for maps just like mp3 is used for music. When you open an mp3 song, every note is encoded in a certain way in the file’s data. Your computer manages to transform this data to sound for you to enjoy. In the same way, a GPX file contains map data and coordinates. Just like your computer transforms mp3 data to successive music notes, Google Maps transforms GPX file data to successive points on a map to draw routes.
Import and Open GPX files in Google Maps on computer
Follow the steps below to import and open a GPX file in Google Maps:
- Go to https://www.google.com/maps/d/u/0/
- At the top right, click on the Create a Map button.
- In the left menu, click on Import gpx
- Select your gpx file from its folder or drag and drop it in the window to import it into Google Maps.
- Go back to My Maps
- In the Maps tab you can view all your imported routes and open them.
Please note that this may not import all the data from the GPX file. To make sure that you import all the map features, you should convert the map file into KML format first.
Import & Open GPX files in Google Maps on Android and iPhone
Follow the steps below to import and open GPX files in Google Maps on Android and iPhone
- Import the file from a computer to My Maps.
- Open Google Maps on your Android smartphone, iPhone, or iPad. (make sure you are logged in with the same Gmail account that was used to import the GPX).
- Press the three horizontal lines in the upper left corner to open the side menu
- Go to “Your Locations” from the side menu and then to the “Maps” tab.
This is how you import and open GPX files on Google Maps on Android. Alternatively, you can use third-party apps to open GPX files. We suggest using GPX Viewer. It’s a very powerful app to open and view GPX files without the need for Google Maps.
How To Convert a GPX File into KML
Although Google Maps support GPX, data can be lost during upload. To make sure that all the data in your GPX file is correctly imported to Google Maps, you need to convert the GPX file into KML format first. The easiest and fastest way to convert GPX to KML is by using an online converter like GPX2KML.com. It’s a light, free, and very powerful converter. You just have to upload the GPX file, click on convert and download the KML result file.
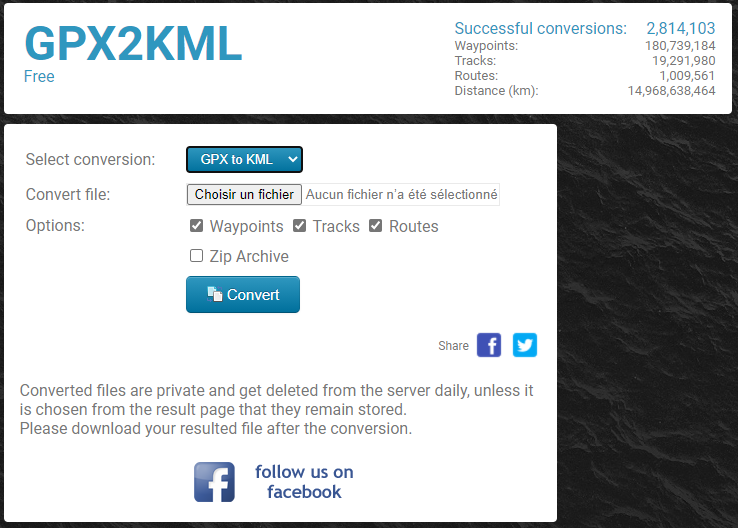
Then you can use your KML file to upload it on Google Maps. Converting your file to KML format assures you that all your file data will be uploaded without loss.
How To Import A KML file In Google Maps
To import a KML file in Google Maps, go to Google Maps and click on “Create a Map” then click on “Import KML” and select your KML file, or drag and drop it into the import window. That’s it, you should now see your route in your list of itineraries.
How To Generate GPX file from Google Maps on Android and PC
To create your own routes on Google Maps and save them as GPX files and share them with your friends, follow these steps:
- Go to Google Maps
- Draw your itinerary
- Copy the URL from Google Maps
- Go to https://mapstogpx.com/
- Paste the Google Maps link in the box
- Click on “Let’s Go”
- Wait until the GPX file is generated and download it on your computer.
After you have downloaded your file you can use it everywhere, on any software or app that supports GPX format. You can share your files online with friends or family. MapsToGpx is a fast and free solution. But never forget that you may need to convert your GPX files to KML to make sure that all your data will be correctly uploaded to Google Maps.
While you are hiking see How to Keep Youtube Playing in the Background to listen to your favorite music ��
FAQ
Can I load a route into Google Maps?
Yes, you can open a route in Google Maps, to do this go to Google Maps and click on “Create a Map” then click on “Import GPX”, select your route file and click OK.
Can I open a KML file in Google Maps?
Yes, you can open a KML file in Google Maps, to do this go to Google Maps and click on “Create a Map” then click on “Import KML”, select your KML file, or drag and drop it into the import window.
How To Add Gpx Files To Google Maps
GPX, also commonly referred to as GPS eXchange format, is an open standard XML type that contains Global Positioning System (GPS) coordinates on top of additional map data. The format has seen increased growth and is used by many manufacturers as their preferred native format no matter the device. Think of GPX in the way that you would an image file format like JPG or PNG. There is no single universal standard for an image file but most would prefer the use of either JPG or PNG to any other format available. They’re easiest to use and readily accepted on almost all platforms. GPX is essentially the JPG of the map data world. It makes it easy to share map data with an audience and allows that data to be viewed on almost any device they choose. Although Google Maps does support GPX, the file will still need to be converted into the KML format. GPX is not considered to be one of the easier formats to import into Google Maps and can face difficulties depending on the amount of data moved. Google Maps will convert the GPX file automatically to varying results, hence the mentioned difficulty, or you can choose to pre-convert the file yourself prior to the import. Regardless, GPX is still widely popular and universally accepted on almost all devices that can store map data.
Importing a GPX File Into Google Maps#
The process isn’t overly complicated if all you want to do is load up a GPX file directly into Google Maps. It’s not an ideal situation as there is a chance that doing so directly could result in a loss of map data. The reason for this is that Google Maps will be forced to convert your GPX file into a KML file for use on the platform. It can still work just fine but I felt it was pertinent information to have just in case there is a lot of data that needs converting. If all you need is a quick solution to pop over the GPX file into Google Maps, you can follow these steps.
The first thing you’ll need to do is sign in to My Maps.Next, in the top-left corner of the screen, click on the menu icon and look for Create new map. Click on it to pull up a new map that should be centered on your current location.
Then, follow this up by clicking on Add Layer. You can find this option in the menu on the left. Just under that layer, click the Import link.
An option to import the GPX file from your computer will present itself. You can choose to do so or simply drag and drop the file directly into the area provided. Hit the Upload button and your map waypoints should be added to the new map, automatically.
It seems simple enough, right? The process really is. However, there is still that possibility your GPX file was not fully converted by Google Maps and didn’t produce all of the necessary data. It will benefit you more in the end if you decide to convert the map file to KML yourself, prior to uploading it to Google Maps.
How To Convert a GPX Into a KML#
The best way to ensure that all data from a GPX file is properly imported into Google Maps is to first convert it to KML, Google’s preferred format. There is plenty of conversion software available to you online, which is likely the more convenient route to take. Just type GPX to KML converter into your search engine and you’ll receive plenty of results from which to choose. Typically, these programs will be free to use but some will require a quick installation. I would recommend gpsvisualizer.com as it is both lightweight and easy to use.
Once you find the right one for you, simply upload your GPX file and select KML (or Google Maps) as your output format. Most conversions take very little time at all to complete so you should expect to have a fully converted file produced rather quickly. As soon as the file has been converted, download and save it to your system, then follow the steps detailed above on how to upload a file to Google Maps.
Taking an additional few moments to knock out this step will ensure that no data is lost during the upload. After the converted file has been uploaded to Google Maps, you can perform any of the necessary actions that you would normally when using the tool. Already working on a map? If you’d like, you can save the recently imported data onto the currently viewed map as either a replacement of the current data or as an overlay.
How To Import GPX To Google Maps (And Export Google Maps To GPX)
In my career as an ultra-endurance cyclist, I’ve used Google Maps extensively to plan the quickest and most efficient route from A to B on roads and trails that are appropriate for cycling, saving me valuable time and energy along the way.
However, in order to make full use of these features for cyclists, it’s essential to understand how to export or import GPX to Google Maps.
GPX files are used to store GPS data including routes and waypoints, and can be shared with devices such as bike computers to show directions and other essential data about your route while you ride, or to analyze your route afterward.
In this article, we’ll be covering:
- Why Import or Export GPX Routes From Google Maps?
- How To Import GPX To Google Maps
- How To Export Google Maps to GPX

Why Import And Export GPX Routes From Google Maps?
Importing and exporting GPX routes is a great skill to learn for Google Maps. Here are a few of the benefits:
- Route Sharing: Google Maps is an easy way to send shared routes between friends.
- Exporting Maps To Bike Computers: After exporting, you can use them for navigation on cycle computers.
- Backup Files: Great as a backup file if something goes wrong with your navigation device and it needs replacing.
- Analysis: After planning routes, you can export GPX files to investigate the terrain on applications such as Komoot.
How To Import GPX To Google Maps
Step #1. Sign In To Your Google Account

First, sign in (or register) to your Google account. Open your browser, head to Google’s homepage, and sign in with your details by clicking the profile icon in the top right corner.
If you don’t have an account, registering takes around 10 minutes. A Google account is required to save routes in Google Maps.
Step #2. Go To Your Saved Maps
Now, open Google Maps.

In the search bar at the top left of the screen, click the three lines to open the menu, then click on “Saved”. A new menu will appear showing your saved routes (if you have any).

Across the top of this panel, you will have four options: “Lists”, “Labelled”, “Visited”, and “Maps”. Click on “Maps”.

At the bottom of this panel, you will see a small button that says “Create a Map”. Click here, and a new tab will open in your browser. This is a custom map.

Step #3. Import The GPX File
Next, we are going to get that GPX file uploaded.
On the left-hand side of the screen, you’ll see that you have one “Layer” in place automatically.

Under the layer title, you’ll find an import button.
Click the button, which will open a file explorer. Find the GPX file you want to upload and then click “Import”. This will import your GPX file to Google Maps.

In my experience, I have occasionally found that the upload function sometimes doesn’t work properly and displays an error message when importing GPX files directly.
If this happens, I’d recommend uploading the GPX file to your Google Drive first. Then, in the file explorer you have open in Google Maps, click on the “Google Drive” tab instead of “Upload”, and select your GPX file from there.
You can add multiple routes if required.
Step #4. Rename And Save

Before you finish, rename and save the map.
Click where it says “Untitled Map”, then enter the route’s name and add a short description if you wish.
Hit “Save”. Your route is now saved on your Google account and can be accessed or downloaded on your devices.
Now you know how to import GPX to Google Maps!
How To Export Google Maps to GPX
Google Maps is an excellent place to plan a route, but many cyclists encounter difficulties in making Google Maps export to GPX.
The export process is actually much simpler than you might think with Google Maps – check out our step-by-step guide below!
Step #1. Load Google Maps

First, open Google Maps.
Unlike importing GPX to Google Maps, you won’t need to sign into a Google account to export Google Maps to GPX.
Step #2. Create Your Route

Next, create your route.
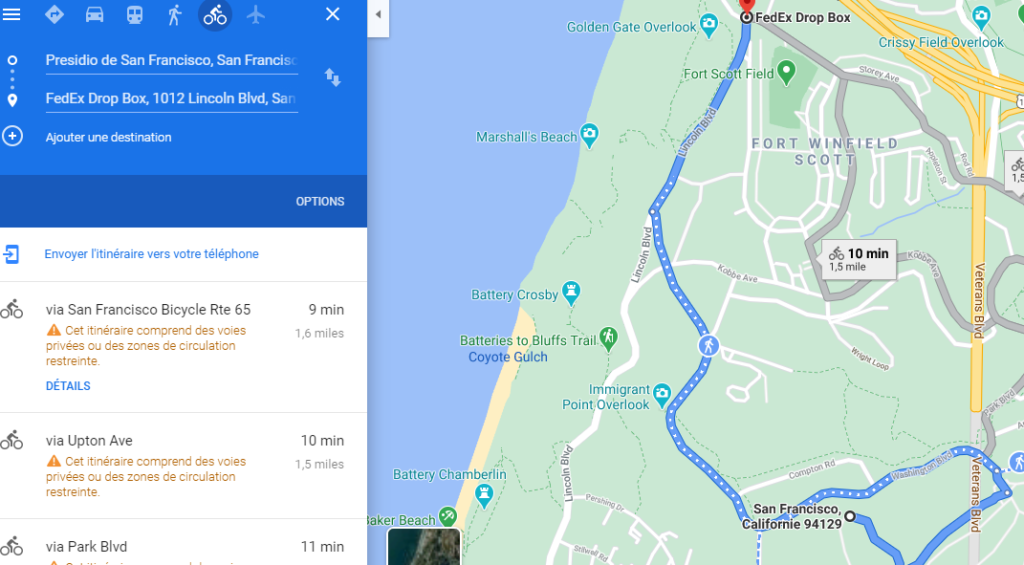
Ensure that you are on the bicycle tab so the route planner automatically avoids major highways. We recommend trying to remain below 300 miles for a single route, as some devices struggle with very large GPX files.
Step #3. Export Google Maps To GPX

Next, it’s time to convert the map to a GPX file.
Google doesn’t currently offer a direct export to a GPX file within the app, but other websites do. Open a new tab, and head to a website such as Maps To GPX, which is free to use.
Return to the Google Maps desktop page with your route open, take the link from the address bar, and paste it into the entry box to create a map on Maps To GPX. It will then let you download the map as a GPX file to guide you on your travels.

If you are using an application on a smart device, you won’t have the address bar, so you will need to click the button with three little dots in the top right-hand corner (next to the locations) and select share.
Here, you can take the address and paste it into Maps To GPX.
Step #4. Send To Device
Now you have the option to send it to your device, such as a Garmin cycle computer or a Wahoo computer.
You can even send it across to an application like Komoot to analyze it more closely.
Now you know the Google Maps to GPX export process!
ahiin
Недавно, в процессе создания карты забега по Исландии, внезапно обнаружилось, что наложить свой трек на гуглокарту — нетривиальная задача. В этом посте я расскажу как это делается:
Здесь изображен трек, записанный в течение 10-го дня в Исландии, во время пешеходного забега по окрестностям озера Миватн.
Для начала, нам необходим Garmin или же файл трека в формате .gpx, снятый с устройства (не обязательно с Garmin’a). Иначе описываемый рецепт не сработает.
1. Идем сюда и качаем замечательную программку Garmin BaseCamp. Программа распространяется совершенно бесплатно, для владельцев Garmin’ов — абсолютно необходимая вещь, да и вообще полезная штука.
2. Запускаем программу. Выглядеть оно будет примерно так:

3. Если имеется подключенный к компьютеру Гармин — нажмите на кнопочу слева вверху «Получить с устройства».

Если же в наличии только файл .gpx — нужно перетащить его мышкой в папочку «Моя коллекция».
3. Создаем в «Моей коллекции» новую папку и перетаскиваем туда интересующие нас треки и маршрутные точки. Должно получиться нечто подобное:

4. Выделяем элементы трека (у меня он правда здесь один, так что я пропускаю этот этап), правым щелчком вызываем контекстное меню и выбираем Дополнительно -> Соединить выбранные треки.
Теперь по получившемуся единому треку щелкаем правой клавишей мыши и выбираем «Создать маршрут из выбранного трека»
В диалоговом окне убираем галочку «Автоматически выбирать количество точек» и вводим число 900 — это то, что уверенно помещается на один лист Гуглокарты.
5. Теперь можно смело удалять треки из текущей коллекции. (Правая клавиша — > Удалить). Они больше не понядобятся.
6. Далее необходимо экспортировать имеющиеся данные. Делаем как на картинке:

Оно само предложит использовать формат .gpx, с этим надо согласиться и сохранить файлик в место, где его легко найти.
7. Экспортированный файл необходимо отконвертировать в формат .kml, так как Гугл формат .gpx не понимать.
Сделать это можно с помощью онлайн-сервиса gpx2kml.com. Проверено — работает отлично.
8. Итак, у нас в руках заветный файлик с расширением .kml.
Осталось уже не так уж и много дел. Логинимся под своей учетной записью в Гугл (нет учетки? — давно пора сделать, делов на 5 минут).
Переходим в раздел Гуглокарт. Жмем сначала «My places / Мои места». Потом «Create map / Создать карту».

Вводим имя карты, комментирий. Я рекомендую отказаться от опции «Public / Публичное». В этом случае карта буде видна только там, где будет в явном виде проставлена ссылка (например, в ЖЖ).
9. Жмем на «Import / Импорт» и отдаем на съедение наш многострадальный файлик .kml.
Внезапно! На карте появляется наш трек!
Советую удалить мусор в описании карты, который туда понасыпал онлайн-конвертер. Жмем на «Save / Сохранить».
Сама по себе — карта готова.
10. Выбираем вид и масштаб карты, такой, каким мы хотим видеть карту в блоге и потом забираем ссылку на нее.

11. Для вставки карты в ЖЖ нужно перейти в режим редактирования записи HTML. Код вставки следующий:
Ссылка на карту, понятно, должна быть своя.