GAMEPAD TESTER
Testing your gamepad or controller is now made super easy using our online tool Gamepad tester, eliminating the need to install any third-party software.
START TEST
GAMEPAD TESTER
Testing your gamepad or controller is now made super easy using our online tool Gamepad tester, eliminating the need to install any third-party software.
Warning! No controller detected.
Try pressing buttons or moving analogs on your gamepad or controller.
STRIKE ANY KEY ON YOUR GAMEPAD AND NOTICE A LIGHTING UP.
What is a Gamepad Tester?
Gamepad tester is an online application that enables the users to readily test the working of the gamepads and controllers. It shows the current state of your gamepads, controllers, input, joysticks, and other devices. You can also view the functionalities of various buttons and other inputs like trigger buttons or shoulder buttons along with joysticks. It is easy to use and compatible with all types of controllers. Additionally, the gamepad tester will also aid users in debugging broken gaming controllers, hardware, and other input devices.
Let gamers fix their gamepad controllers working with minimal effort using this handy tool!
How to Test Gamepad?
Imagine purchasing a new gamepad or controller and inspecting that the character is moving when you aren’t pushing anything and the trigger buttons are not as accurate as they used to be. It would be something annoying. To avoid such a situation, examine your gamepad controller and continue playing uninterruptedly. All the players need to do is implement these below easy-to-follow steps:-
- Firstly, begin by pulling up the Gamepad tester webpage. Stay on the homepage only.
- If the controller you want to test isn’t connected to the computer, then a message pops up ‘no gamepad detected.’
- There are two ways to connect your controller to the pc. Either through a USB cord or by pairing it with your computer’s operating system using Bluetooth.
- If any of the controllers, especially the wireless controller, the ones that have no USB port in them, then connect their controller to the pc by pairing it with Bluetooth.
- Once the controller is paired or plugged into the pc, launch back the site to test your controller’s working.
- Hit the buttons, and the webpage will inspect the controller instantly and display some numbers, giving you the signals the controller is outputting.
- When you press any button on your controller or move the gamepad stick over the screen, you observe a blinking illustration, and a ‘controller detected’ message pops up, indicating the proper functioning of your controller.
How To Take a Controller Stick Drift Test?
- Connect your gaming controller to your computer via USB or Bluetooth, depending on the controller and your computer’s capabilities.
- Once your controller is detected, you should see a visual representation of the controller on the screen.
- Look for the sections corresponding to the analog sticks on the controller representation. They are labeled as «Left Stick» and «Right Stick.»
- Rest the analog sticks in their default or centered position without touching them. Observe the display on the screen to see if the stick positions remain centered or if there is any movement occurring without your input.
- Move each analog stick in different directions and release them. Pay close attention to the display to check for any drifting movement of the stick position.
- Repeat the movements and observations several times to ensure consistency and accuracy in your assessment.
Remember that this method provides a basic assessment, and for a more comprehensive evaluation, it’s advisable to test the controller with actual games or software on your gaming platform.
How Does Gamepad Test Work?
There is no rocket science behind the working algorithm of the gamepad tester. When users strike the button or move the gamepad sticks over the screen, it should display the movement of your analog stick on pc.
When we press the button and the gamepad is in appropriate working condition, then, the controller Detected message will pop up with the name of your controller on the gamepad server. If the user wants to examine multiple controllers or gamepads, they must proceed one by one.
Features of Gamepad Tester
Why choose our gamepad tester?
Как проверить работу контроллера
No Gamepad Controller Detected!
Vibration Status!
Online Gamepad Controller Vibration Test
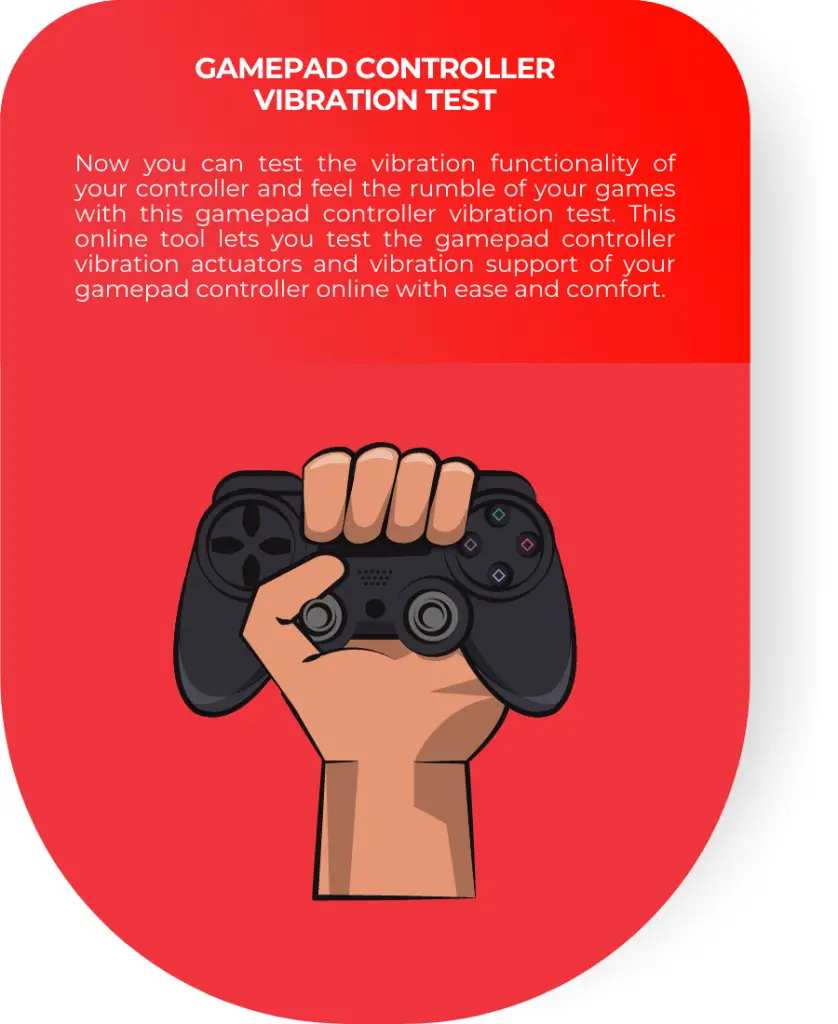
Now you can test the vibration functionality of your controller and feel the rumble of your games with this gamepad controller vibration test.
This online tool lets you test the gamepad controller vibration actuators and vibration support of your gamepad controller.
It works with any gamepad controller that uses the web gamepad API and supports vibration actuators, such as Xbox Controllers, PlayStation Controllers, and many others.
Debugging and Testing Gamepads Vibration Online
Test your gamepad controller’s vibration with ease using our online tool without the need for any software or drivers.
Simply connect your controller to your PC through USB or Bluetooth, and open this tool in your web browser. This tool will automatically detect your gamepad controller and display its current state.
This online tool will indicate if your controller supports vibration functionality and will show a message if it does not. With our user-friendly gamepad controller vibration testing tool, you can ensure that your controller is vibrating and enhance your overall gaming experience.
Features of This Gamepad Controller Vibration Test
Our Gamepad Controller Vibration Test tool is a versatile and hassle-free online tool you can use anywhere with an internet connection and web browser.
It quickly checks if your gamepad controller is connected, supports vibration functionality using gamepad controller haptic actuators, and troubleshoots issues like vibration failures.
You can also compare the vibration performance of your controller with others and adjust the vibration intensity to your preference.
Upon vibration, this tool simulates the vibration effect on the virtual gamepad in this test to enhance user experience.
So try this online tool now and ensure your gaming experience is as immersive and thrilling as possible with our easy-to-use and accurate online tool.
How to use this Gamepad Controller Vibration Test
Test your gamepad controller’s vibration easily using our Gamepad Controller Vibration Test.
Simply connect your controller to your PC via USB or Bluetooth, and navigate to this controller vibration test on our website.
This tool will automatically detect your controller and display its current state.
And then, click on the “▶” button to check your controller vibration features.
Our tool will test the vibration features of your controller and let you know if they work.
You can also observe the vibrating virtual controller along with your actual controller vibrating.
How can this test enhance my gaming experience?
This tool can enhance your gaming experience by ensuring your gamepad controller vibrates appropriately. This will make your gaming experience more immersive and thrilling. Additionally, this tool simulates the vibration effect on the virtual gamepad in the test, which further enhances the user experience.
What if my gamepad controller doesn’t support vibration functionality?
This Controller Vibration Test will indicate whether your controller supports vibration functionality. If it doesn’t, this tool will show a message indicating that your controller doesn’t support vibration.
What are the limitations of using this test?
This test uses the HTML5 Gamepad API, which browsers and operating systems do not universally support. This tool may not work accurately with specific devices due to limited or no support from browsers and operating systems, resulting in incompatible features or inaccurate results.
Как проверить работу контроллера
This Gamepad Test is safe and won’t harm your computer. This site consists of an extensive database of gamepad devices that people can test to see if they work with games.
How to test gamepad sticks?
In order to test the gamepad sticks, simply move them around, and this test will showcase or replicate their movements on the graph so you can observe each action along the axis.
How to test input lag on a gamepad?
Observe the timestamp in this test to learn about the timestamp of each input from your gamepad. Meanwhile, if you are using a wireless controller, ensure no other electronic device is interfering with your connection. In the case of wired controllers, invest in suitable devices and ensure your monitor and PC are in sync for the best results possible.
How to test buttons on the gamepad?
This fantastic test has made testing buttons on the gamepad super easy. Simply connect your device to your PC, tap on each button, and observe the demonstration on the test to verify their functionality.
Тест геймпада онлайн
При подключении этот тест отображает текущее состояние вашего геймпада, джойстика, контроллера, руля и подобных девайсов. Подойдёт для отладки и ремонта поломанных контроллеров, а также настройки эксперементального оборудования. Мы используем HTML5 Gamepad Api, поэтому поддерживаются только современные браузеры, советуем последнюю версию Google Chrome.
Подсоедините свой геймпад к компьютеру и нажмите кнопку на нём, чтобы начать.
Выберите контроллер
Количество кнопок:
Количество осей:
Вибросигнал:
Не поддерживается
Кнопки, крестовина и курки
Аналоговые стики
Дополнительные тесты
Погрешность стиков
Множитель дрифта
Левый стик:
Правый стик:
FAQ
Почему мой геймпад не отображается?
- Подключено ли устройство к сети / подключено ли оно через bluetooth.
- Нажмите несколько кнопок. На некоторых устройствах только определенные кнопки пробуждают API геймпада (например, формы на контроллерах PS3).
- Попробуйте поменять режим работы. Универсальные контроллеры могут переключаться между несколькими, к примеру: XINPUT (рекомендуемый режим для теста), DINPUT (устаревший), Switch.
- Закройте другие приложения, которые могут использовать геймпад.
- Перезапустите веб-браузер.
Какая информация показана здесь?
К компьютеру может быть подключено сразу несколько геймпадов. При запуске отображается первый из них и его текущее состояние. Если вы хотите проверить несколько разных, выберите любой из выпадающего списка вверху.
Аналоговые стики: текущее положение аналоговых входов геймпада.
Кнопки: Текущее положение кнопок нажата/отпущена. Сервис поддерживает аналоговые курки и кнопки, показывает их значение в зависимости от степени нажатия.
Как протестировать стики?
Поставьте галочку напротив пункта «Погрешность стиков», после чего отклоните стик максимально в сторону и медленно проведите его по окружности. Как только вы заполните круг, то получится итоговая погрешность в процентах, а также наглядное отклонение от идеальной окружности.
«Множитель дрифта» — величина, на которую увеличиваются данные с геймпада, чтобы отобразить оранжевые точки внутри круга. Отпустите стики, чтобы они вернулись ровно в центр, после чего станет заметно, в какую сторону отклоняется оранжевая точка. Учтите, что коэффициент усиливает реальные данные для наглядности дрифта, в игре дрифт будет равен значению 1.
Как настроить мёртвые зоны геймпада?
Dead Zone — необходимая для многих контроллеров и не слишком приятная софтовая фишка, призванная избавить игрока от дрифта, когда сбитая центровка стиков приводит к отклонению от центра, из-за чего происходит движение прицела, камеры или персонажа в случайном направлении, когда вы никуда не нажимаете. Хуже всего то, что постоянные игры сказываются на износе потенциометров внутри, что приводит к ещё большему дрифту и джиттеру (Jitter — рандомное дрожание).
Чтобы проверить мёртвые зоны, попробуйте медленно начать отклонять стик, следя за моментом, когда центральная точка в тесте отправится со своего места в желаемую сторону. Промежуток движения, когда ничего не происходит, и есть мёртвая зона.
- В настройках игры — большинство игр предлагает самостоятельно настроить комфортные значения не только чувствительности, но и необходимой нам зоны, а также ускорения.
- Через Steam — запускаете игру, вызываете оверлей стима (Shift+Tab), выбираете справа сверху конфигурацию контроллера.
- В настройках Windows — пишете в поиске «настройка игровых USB-контроллеров», заходите в свойства нужного устройства, далее вкладка Параметры и кнопка Откалибровать.
Где купить геймпад без мёртвых зон?
Например, нажав на баннер под этим абзацем. Только сначала дочитайте, как выбрать подходящий.
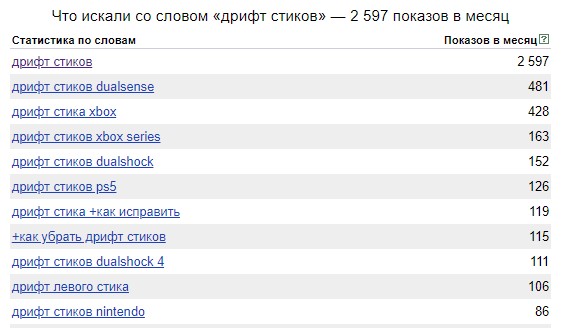
Не верьте обзорщикам, продавцам и «экспертам» с форумов, которые утверждают, что нет ничего лучше, чем оригинальный от PS или Бокса. Они действительно хороши, но Sony в Dualsense даже сделала Stick Module, угадайте для чего. Правильно, чтобы продавать их, как расходник. А ещё умельцы придумали впаивать в Xbox подстроечные резисторы, которые надо подстраивать по мере износа, чтобы компенсировать изменения. Лишь в одном Яндексе каждый месяц более 2000 запросов на тему неисправности, статистику англоязычной аудитории Google на западе можете поискать сами.
На момент написания этого материала (начало 2023 года), на рынке есть 2 геймпада с датчиками эффекта Холла, ещё для двух других выпускаются модули на замену родных. Скорее всего, со временем подобных устройств будет появляться больше, а вышеупомянутые девайсы неидеальны и имеют свои недоработки, поэтому никакая конкретная модель здесь не указана. Ищите самостоятельно подходящее вам устройство по запросу «Hall Effect Joystick» и изучайте отзывы, чтобы не разочароваться из-за других проблем.
Почему показатели осей не равны 0?
Даже если ваш геймпад полностью исправен и обладает высокоточными датчиками эффекта Холла, не подверженными дрифту, значения не должны быть всегда равны 0. Стики возвращаются в центр благодаря пружинке внутри, из-за чего не могут каждый раз быть идеально отцентрированными. Это нормально.
Какую погрешность считать нормальной?
Потенциометры дают искажения сигнала при работе и неизбежно изнашиваются в процессе использования. Новые геймпады Xbox Elite Series 2 и Sony DualSense показывают погрешность в районе 8%, которая, по мере износа, увеличивается. Дешёвые геймпады менее именитых производителей могут из коробки иметь 12-15% и заметные мёртые зоны. Контроллеры с датчиками Холла показывают погрешность около 0,5% и позволяют отключить мёртвые зоны. Но учтите, что идеальная окружность получается благодаря софтовой отсечке. Например, в режиме XInput погрешность 0,5%, но в другом режиме растёт до 8%. Производитель может и вовсе забить на это во всех режимах, поэтому, если у вас не вышло аномально высоких цифр, всё в порядке. Лучше обратите внимание на равномерность движения, симметрию заполнения и отсуствие джиттера.
Из-за чего нажатия кнопок не совпадают с индикацией на схеме?
Визуализация нажатий рассчитана на стандартную раскладку Xbox. Если вы используете иную раскладку, к примеру, джойкона Switch, то кнопки и оси могут не совпадать.
Работает ли вибрация?
Вибрация поддерживается во всех современных браузерах, кроме Safari.
Что насчет экспериментальных функций?
Такие функции, как Pose и HapticActuators пока что не получили широкого распространения, поэтому отсутствуют на странице.
Почему значения осей странные?
Не все контроллеры отображаются одинаково на разных устройствах, браузерах и ОС. Сайт просто отображает то, что возвращает Gamepad Api.