Photoshop за 60 секунд: Создаём Флаер используя Шаблон

Добро пожаловать на очередной урок из серии Photoshop за 60 секунд, в котором вы узнаете про техники, а также возможностях программы Photoshop всего за минуту!
Клубные / Корпоративные Флаера
Если вы еще не знакомы с широким разнообразием шаблонов и дизайнерских решений от сайта GraphicRiver, то приготовьтесь окунуться в мир потрясающих фраеров на различную тематику. В этом коротком видео, вы узнаете, как создать свой флаер с помощью шаблона Envato Market. В данном видео мы используем флаер Elektro Party Flyer в качестве примера.
Как Создать Свой Флаер из Шаблона
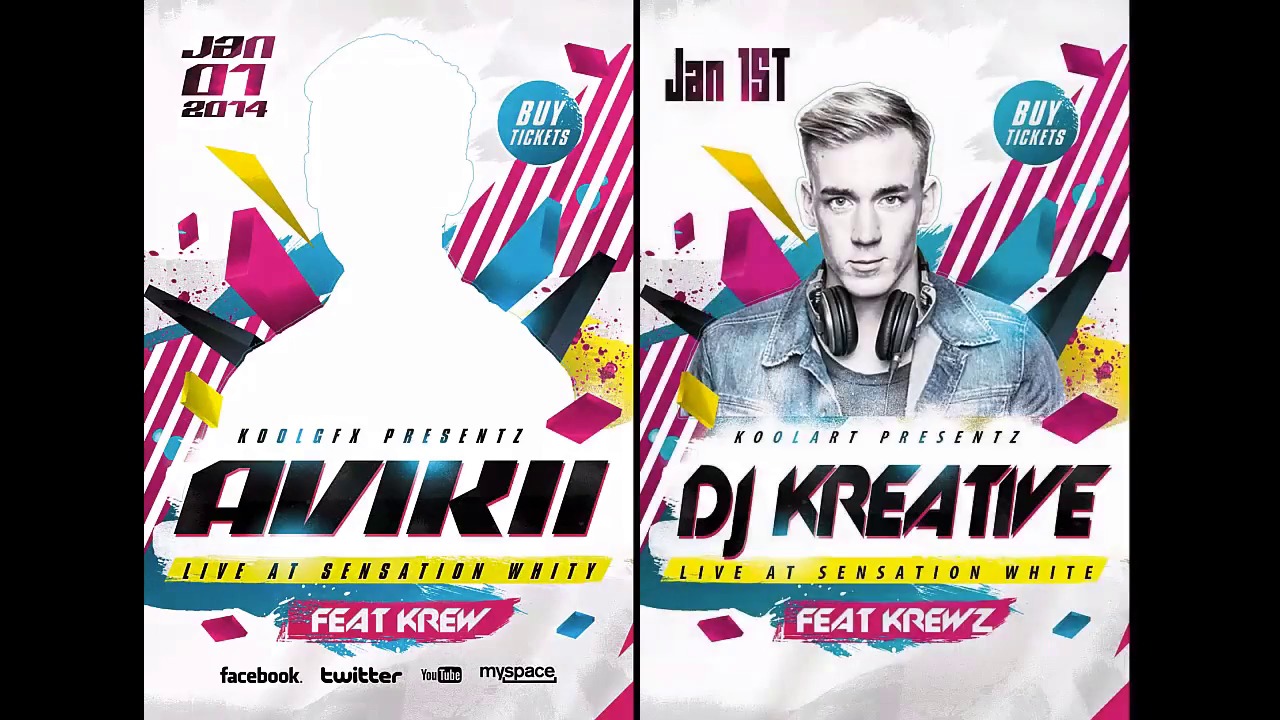
В шаблоне есть три основных элемента, которые вы, вероятно всего, захотите изменить: основное фото, цвета, а также несколько элементов дизайна. К счастью, вы можете быть уверены, что исходные материалы, которые вы приобретаете и скачиваете, хорошего качества, а также просты в редактировании.
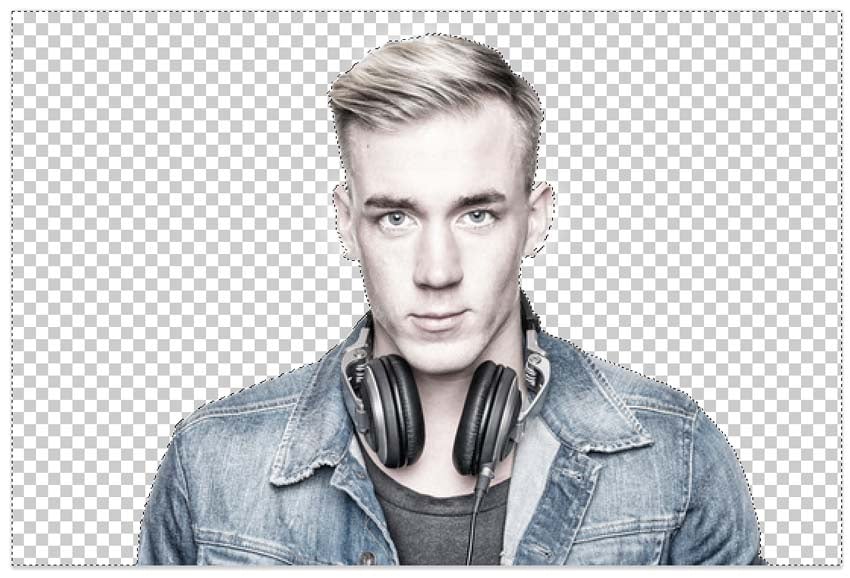
Но для того, чтобы заменить основное фото на шаблоне, вначале откройте своё исходное изображение, чтобы удалить белый задний фон с помощью инструмента Волшебная палочка (Magic Wand Tool (W). В данном случае, я использовала исходное изображение DJ Stock, взятое на сайте PhotoDune.
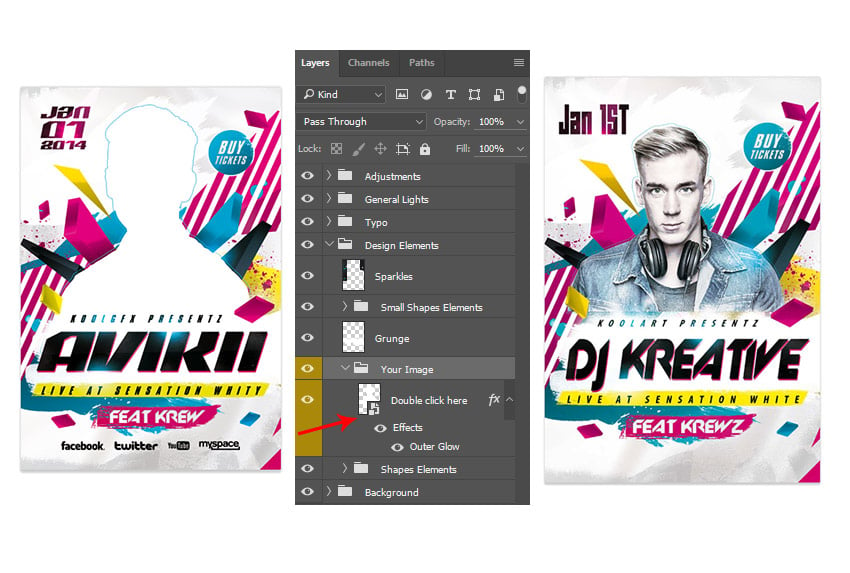
Теперь возвращаемся к нашему шаблону. Дважды щёлкните по Смарт-Объекту (Smart Object), который создан для основного фото, а затем просто Скопируйте (Copy) и Вклейте (Paste) свою фотографию на этот слой. Откорректируйте масштаб и расположение своей фотографии с помощью инструмента Свободная трансформация (Free Transform Tool (Ctrl+T) и не забудьте сохранить смарт-объект перед тем как закрыть его.
Поэкспериментируйте с различными настройками, чтобы попробовать другие дизайнерские решения, или обратитесь за помощью к дизайнерам от студии Envato Studio для дизайнерского решения с учётом ваших потребностей.
Немного информации
Хотите узнать больше про создание флаеров? Вы можете ознакомиться со следующими уроками, которые приведены ниже:
How to Create a Promotional Flyer in Photoshop
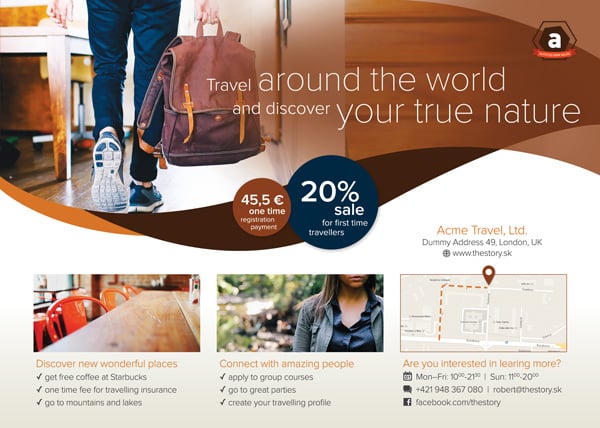
Photoshop is a great tool for graphic design, especially digital graphics that only are displayed on screen, in addition to its namesake tasks of tweaking photographs. But that’s not all it’s good for. With proper knowledge and thinking, you can use Photoshop to create stunning print designs as well.
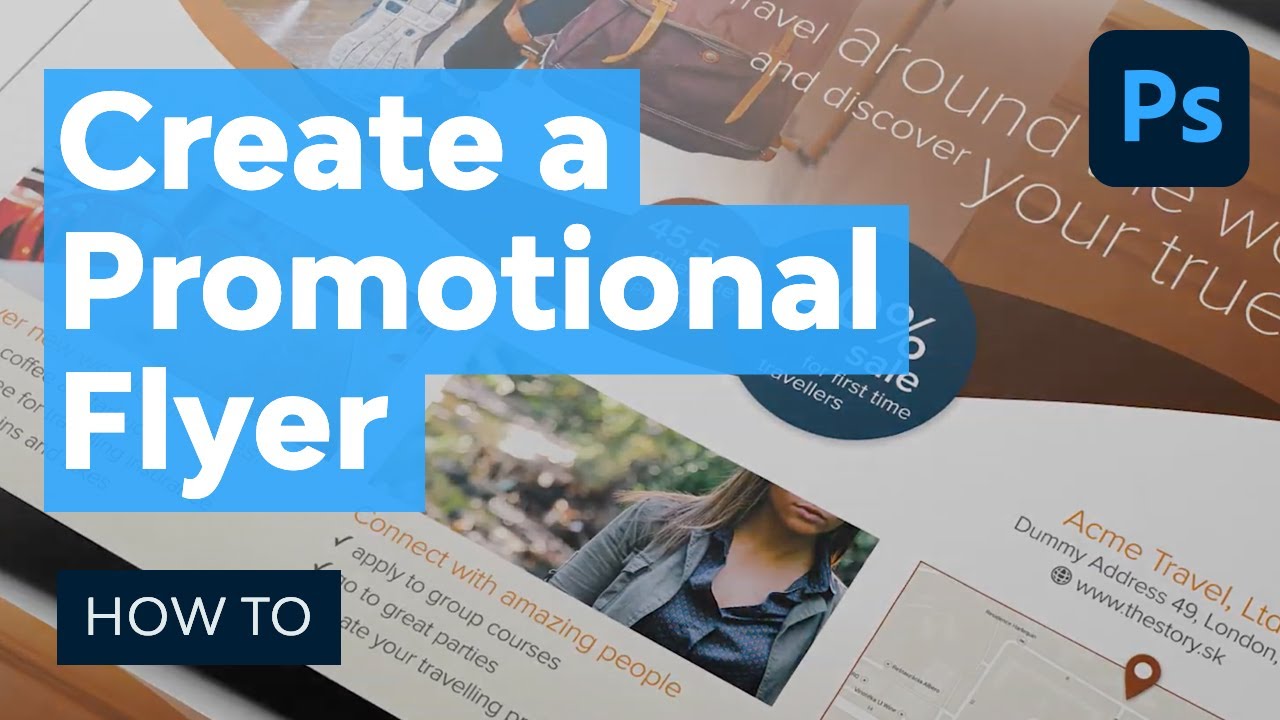
This tutorial will take you through the basic steps of creating the eye-catching flyer seen above, which can be printed right away in print-shop-ready CMYK colors, directly from Photoshop. You can follow this tutorial to make this exact flyer, or tweak the steps with the content and colors you want to get the flyer style you’d like using the same methods.
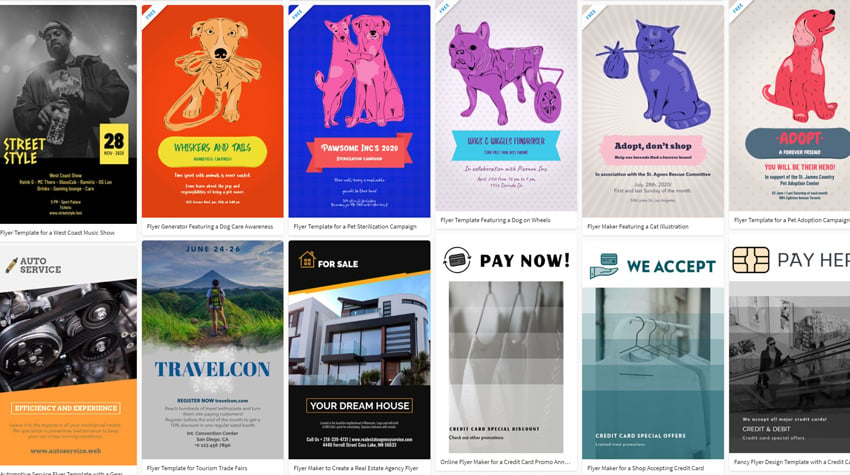
Don’t have access to Photoshop? Or maybe you are short on time? If so, I have a great option for you as well! Placeit offers hundreds of professionally made flyer templates that you can customize to fit your exact needs! No design skills required! Placeit is quick, easy, and requires no extra software. Create mockups, logos, videos & designs in seconds!
Otherwise, this tutorial will show you a professional workflow. Let’s get started!
Follow along with us over on our Envato Tuts+ YouTube channel:
Tutorial Assets
This tutorial uses royalty-free images from Envato, along with some custom-made vector icons that I have created in Illustrator specifically for this project. You’ll find each of them, along with a completed PSD file you can use to compare with your work, in the download on this tutorial’s sidebar.
This tutorial also uses the Proxima Nova Font Family, which comes with an Adobe Creative Cloud subscription. You can sync that font to your computer and use it with this tutorial, or use another similar typeface of your own.
1. Hot to Set Up a Document With Guides
Step 1
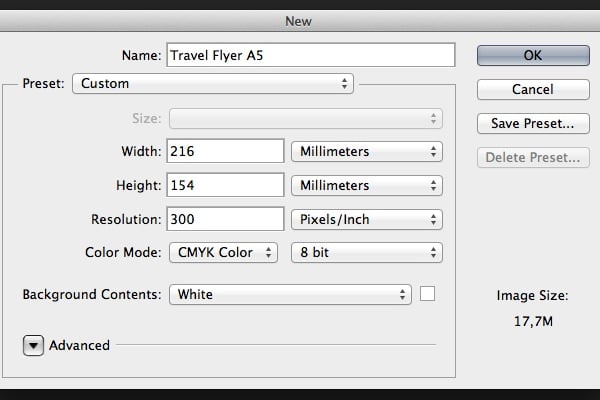
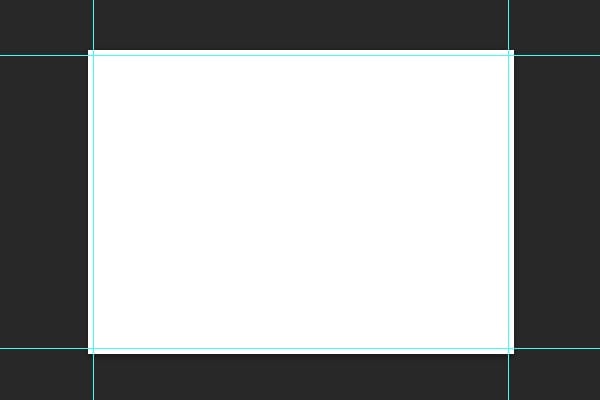
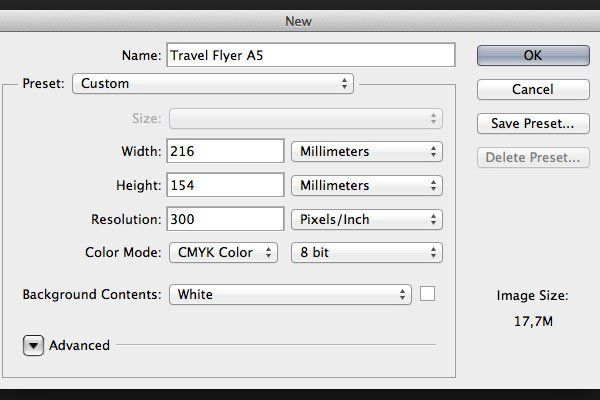
First, set up a document with the correct size and settings for print. Create a new document in Photoshop, and set its dimensions to 216 x 154 mm. These dimensions represent A5 paper size with a 3 mm bleed added to each edge. Since we are going to create artwork for print, set the Color Mode to CMYK and Resolution to 300 Pixels/Inch.
Step 2
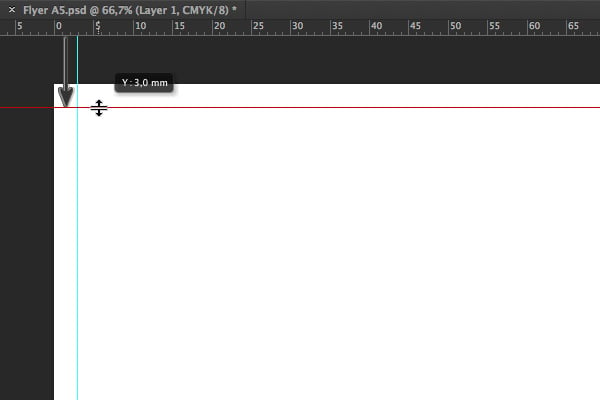
Create new guides that will represent the bleed area. Illustrator and InDesign have this function built in, but in Photoshop, we have to create it ourselves. Use the Move Tool (V) and the Shift key to create a horizontal guide by dragging the cursor from the top ruler. Make sure that the guide is located 3 mm along on the Y-axis.
Step 3
Repeat the same process to create guides along each edge of the document. Make sure that each guide is inset 3 mm from its corresponding edge.
2. How to Create a Background
Step 1
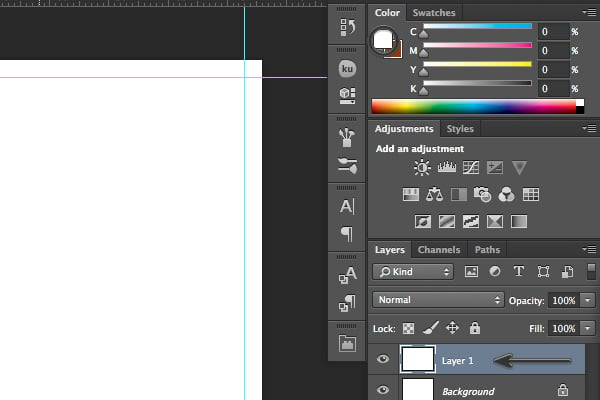
Press Shift-Command-N to create a new Layer. Fill it with White as the Foreground Color (Alt-Backspace). Make sure that you have the CMYK Sliders turned on so you’re using print colors.
Step 2
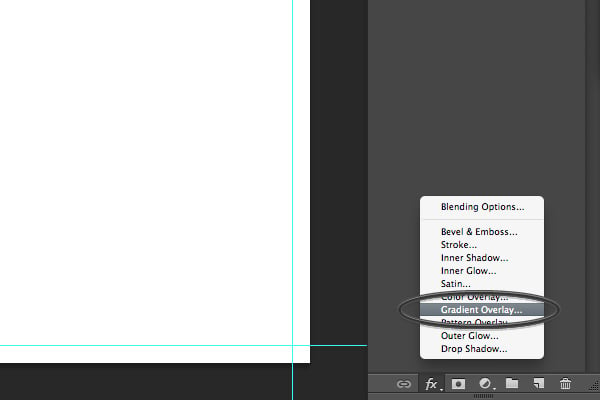
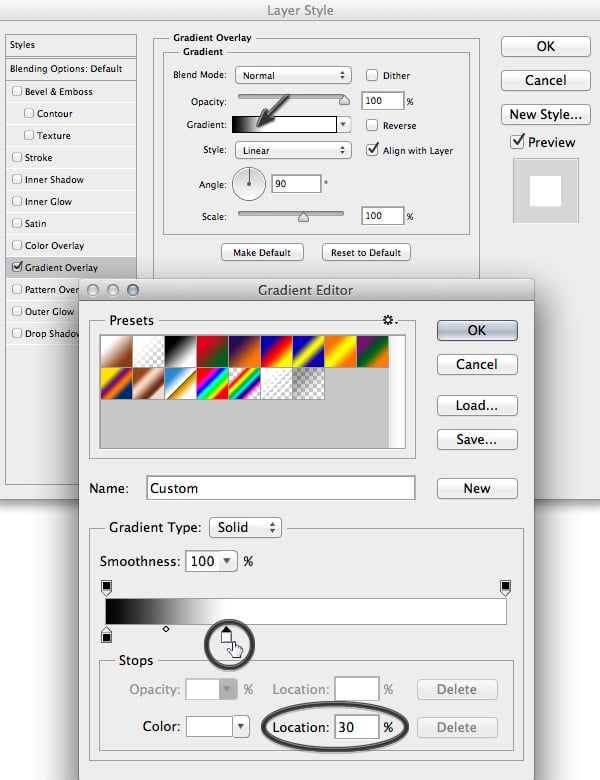
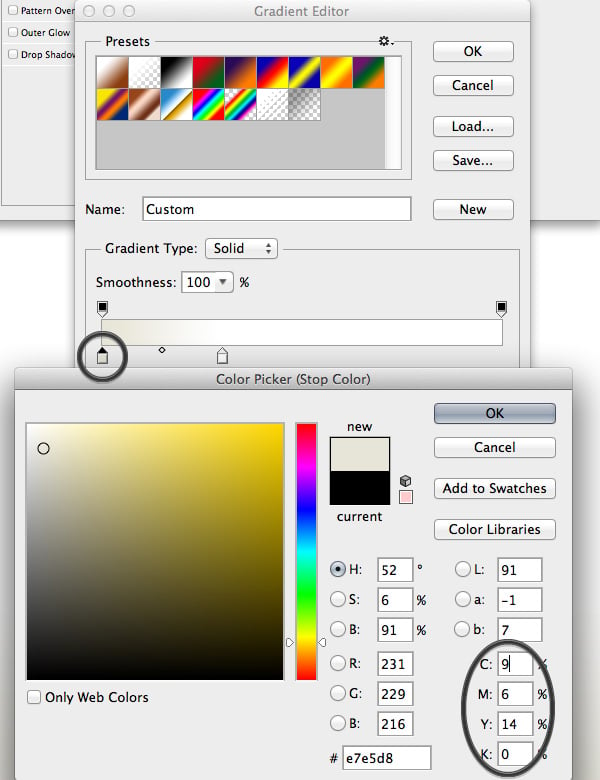
Create a new Gradient Overlay. In the Layer Style panel, edit the Gradient. Set the white slider Location to 30%. Change the color of the black slider to Pale Yellow (C=9 M=6 Y=14 K=0).
Step 3
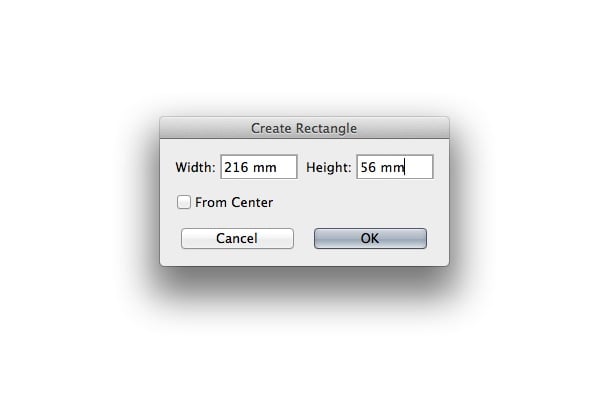
Use the Rectangle Tool (U) to create a new rectangle. Set its size to 216 mm by 56 mm.
Step 4
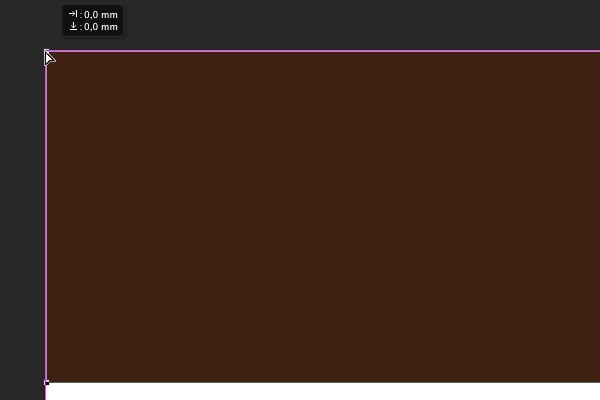
Align the rectangle to the left top corner of the document. Fill it with Dark Brown (C=49 M=74 Y=80 K=70).
Step 5
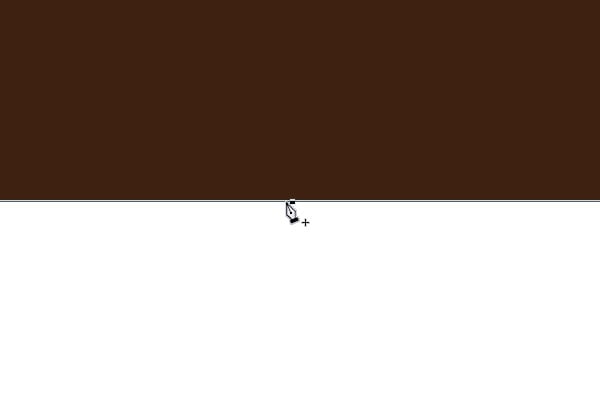
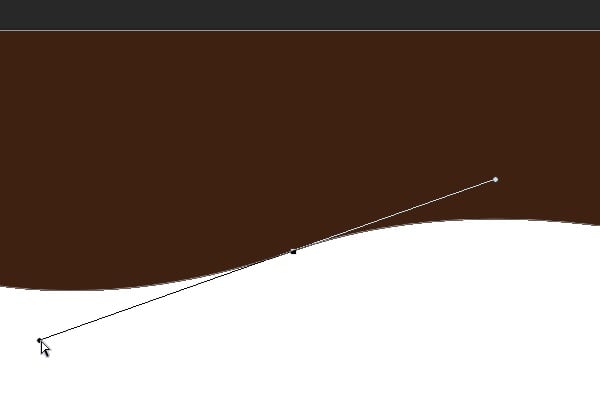
Use the Pen Tool (P) to add a new anchor point at the lower edge of the rectangle.
Step 6
With the Direct Selection Tool (A), play around with the anchor handles to create a nice Bezier curve.
Step 7
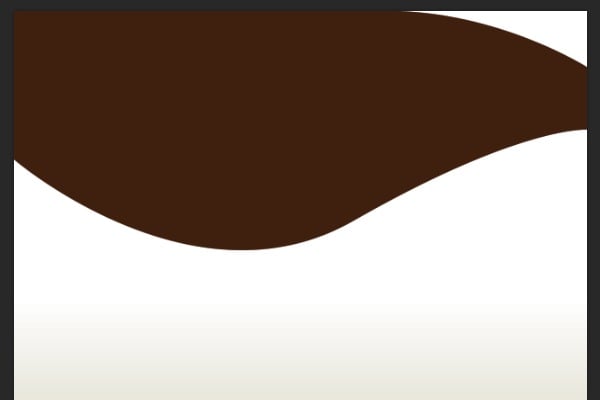
Follow the same steps to adjust the rectangle into the shape shown below.
Step 8
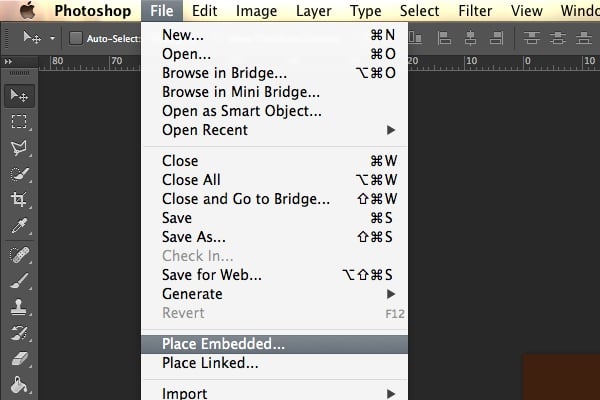
Go to File > Place Embedded. , and then select the people-1.jpg image from the Resource Pack.
Step 9
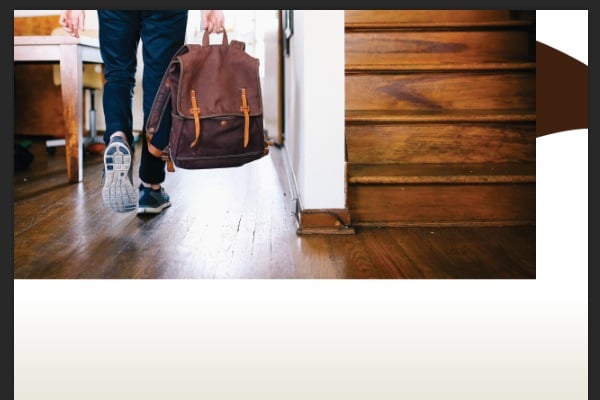
Use the Move Tool (V) to move the photo around the document. Place it in the upper top corner as shown below.
Step 10
Create a new rectangle with the Rectangle Tool (U). Set its size to 216 mm by 100 mm.
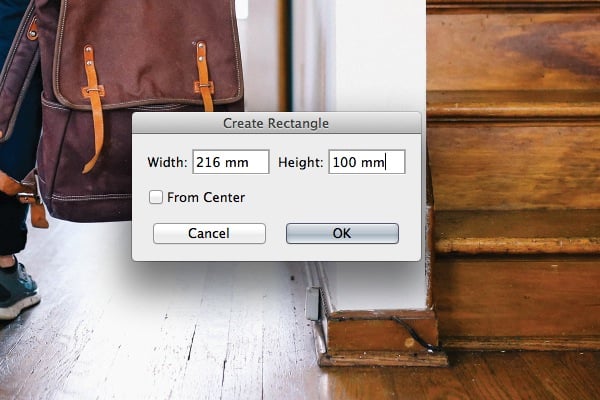
Step 11
Use the Direct Selection Tool (A) to place the rectangle directly above the photo in the upper left corner.
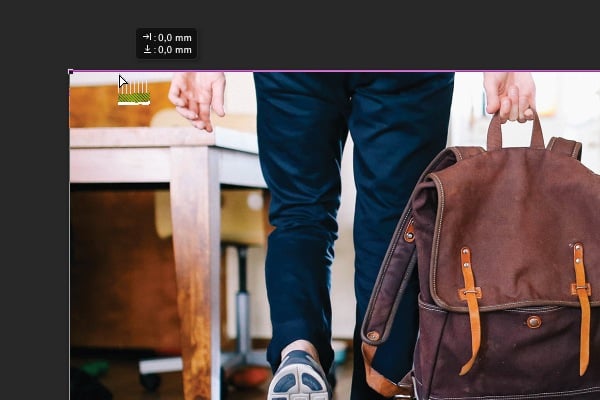
Step 12
In the Rectangle Tool panel options, select Mask. This will create a vector mask applied to the layer with the photo.
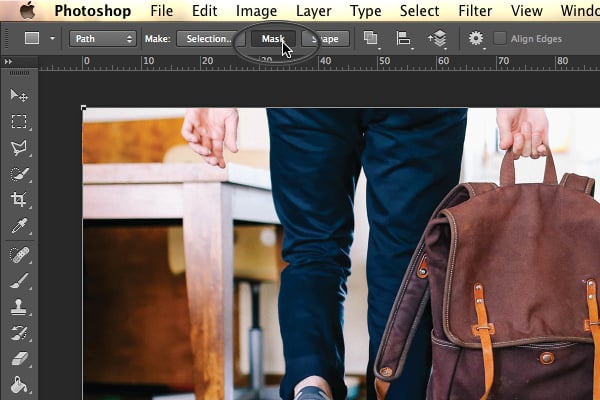
Step 13
Add a new anchor point to the mask with the Pen Tool (P). Create a curvy Bezier curve with the Direct Selection Tool (A).
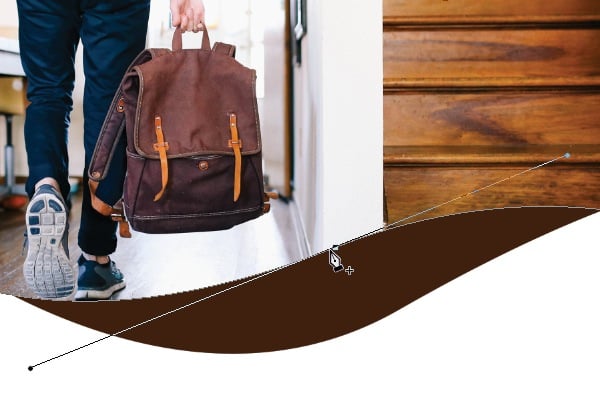
Step 14
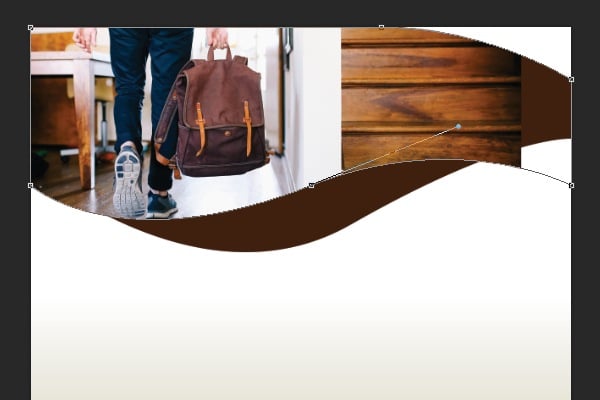
Using the same tools, the Pen Tool and the Direct Selection Tool, try to adjust the mask into the shape shown below. Notice the position of the anchor points and the simplicity of the shape. The fewer anchor points you use, the smoother the final mask will appear.
Step 15
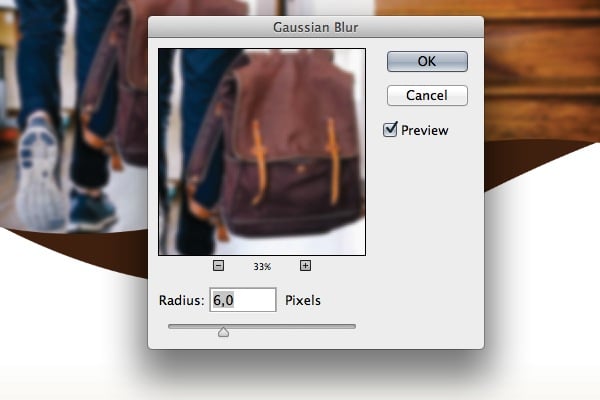
Go to Filter > Blur > Gaussian Blur. Set the Radius to 6.
Step 16
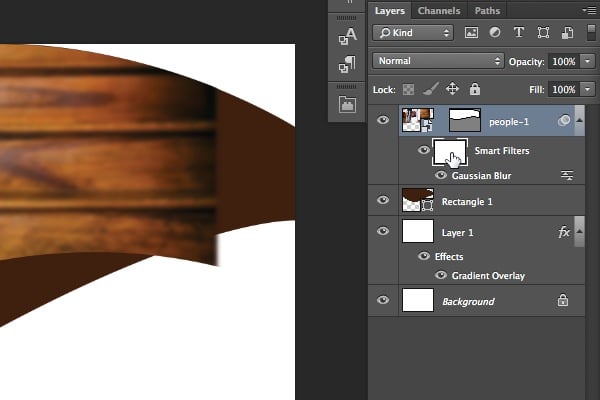
Select the Smart Filters mask. Use the Gradient Tool (G) to fade the mask from left to right.
Step 17
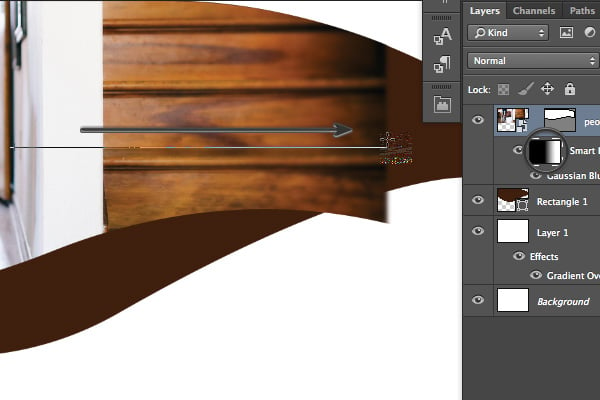
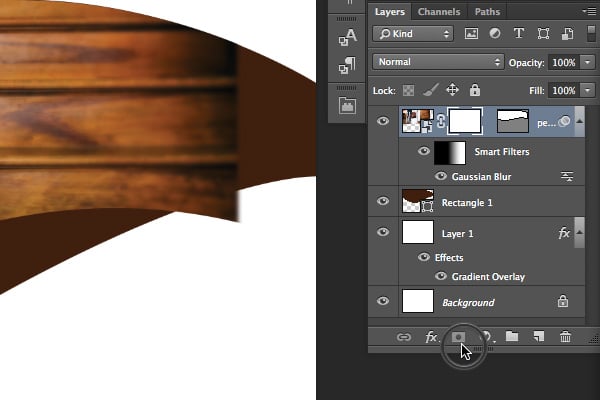
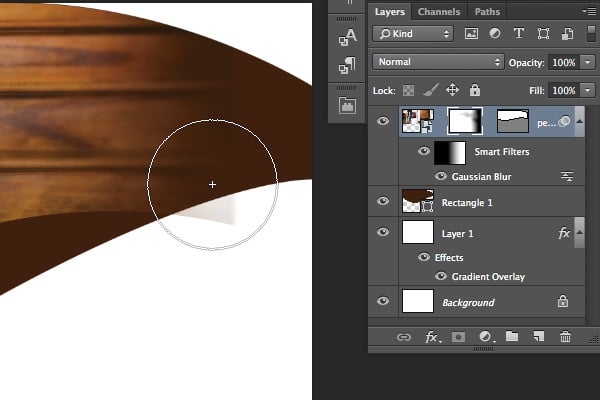
Create a new Layer Mask. Use the Brush Tool (B) to fade the stairs on the photo. Use some basic instinct and creativity.
Step 18
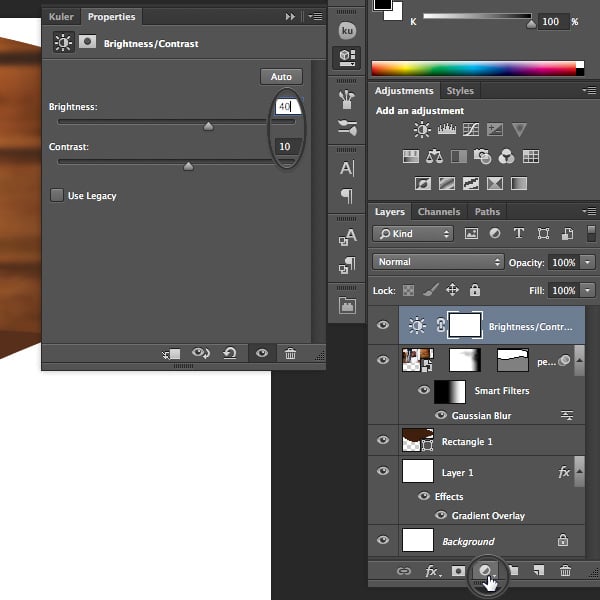
Create a new Brightness/Contrast Adjustment Layer by clicking the sun icon in the Adjustments panel. Set the Brightness to 40 and Contrast to 10.
Step 19
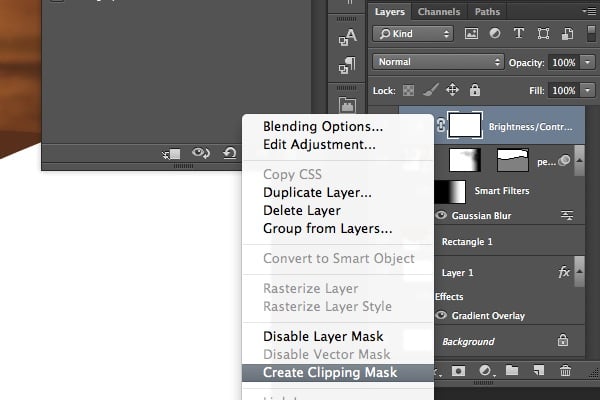
Right-click on the Adjustment Layer and select Create Clipping Mask. This will apply the new brightness settings only to the photo below.
Step 20
Create a new Solid Color. Set the Color Fill to Brown (C=30 M=80 Y=100 K=30).
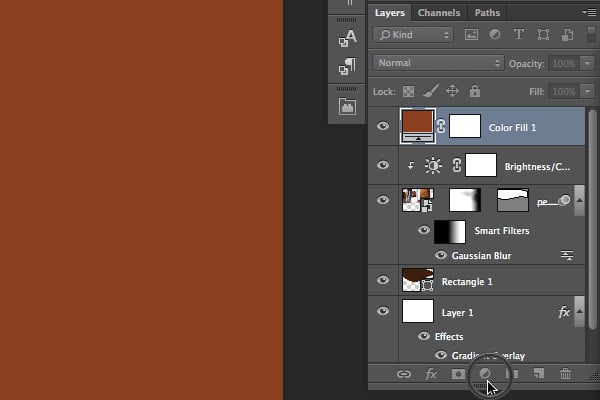
Step 21
Click on the vector mask from the photo layer. Hold the Alt key and drag the mask over the brown Color Fill. This action will duplicate the selected mask.
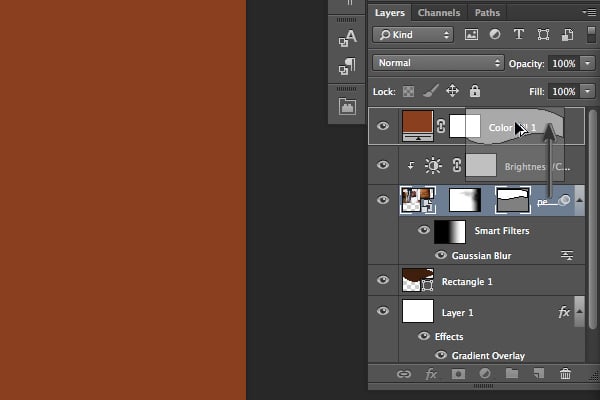
Step 22
Use the Direct Selection Tool (A) and drag the top-right anchor point to the upper right corner.
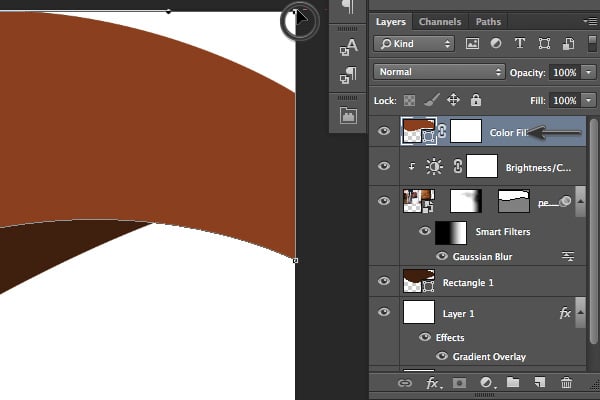
Step 23
Use the Brush Tool (B) to reveal some areas of the photo beneath the brown fill. Set the Layer Opacity to 75%.
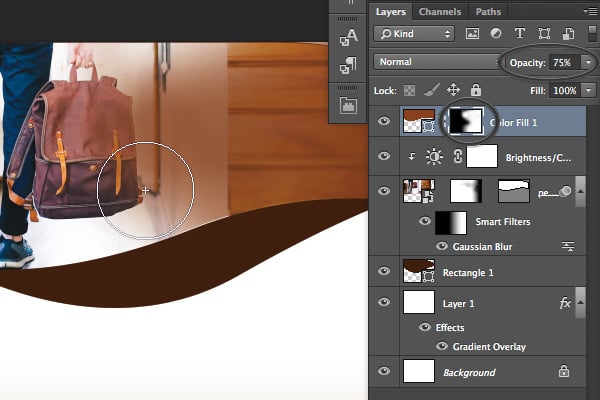
Step 24
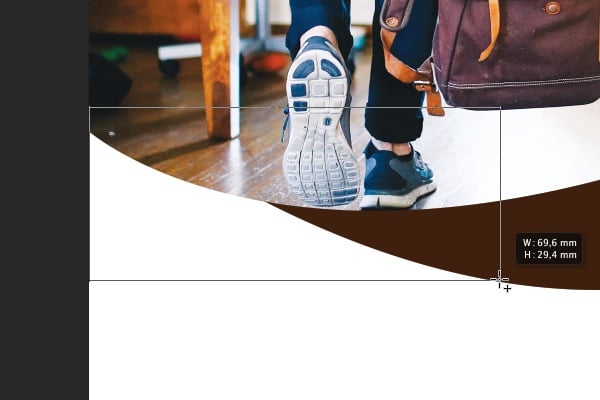
Draw a new rectangle with the Rectangle Tool (U).
Step 25
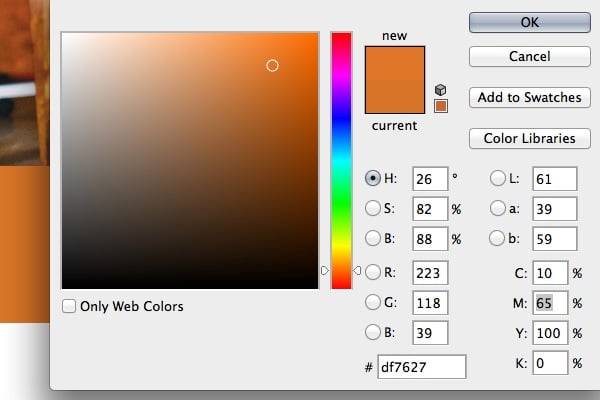
Fill the rectangle with Light Brown Color (C=10 M=65 Y=100 K=0).
Step 26
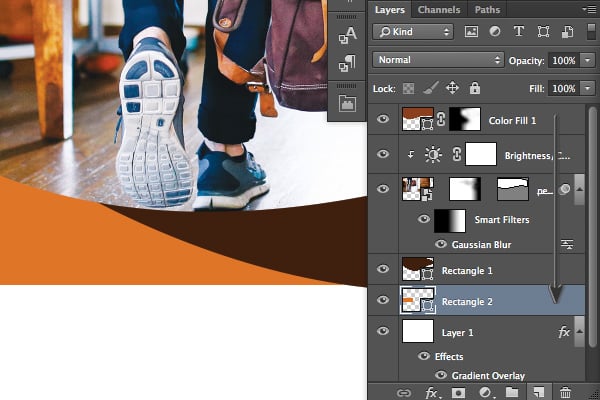
Place the layer with the light brown rectangle beneath the dark brown rectangle.
Step 27
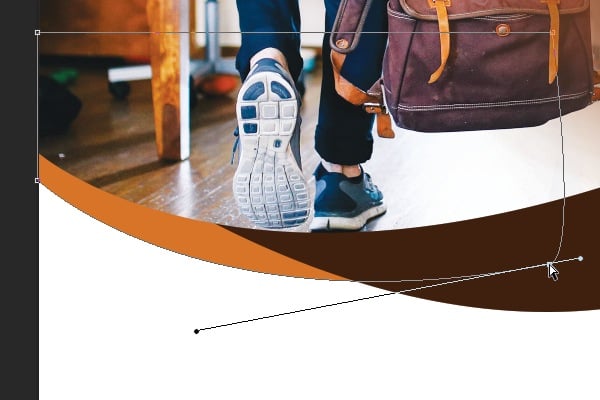
Use the Pen Tool (P) with the Direct Selection Tool (A) to adjust the rectangle into a curved shape, as shown below.
3. How to Add Text and a Logo
Step 1
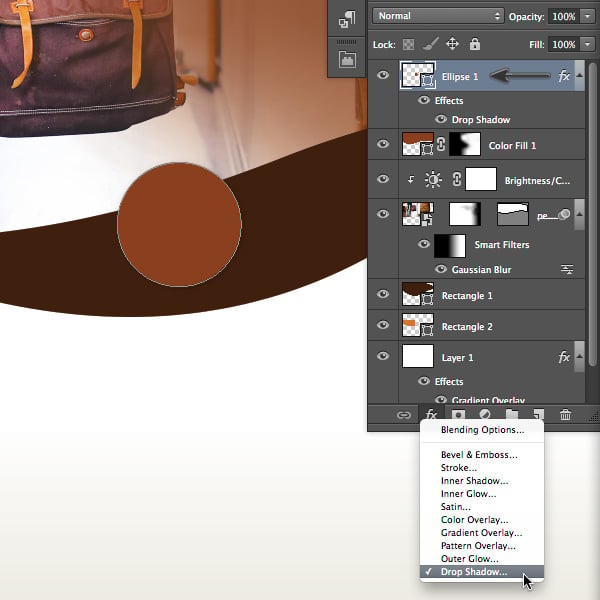
Create a new Ellipse (U). Set its dimensions to 248 px by 248 px. Fill it with Brown Color (C=30 M=80 Y=100 K=30).
Step 2
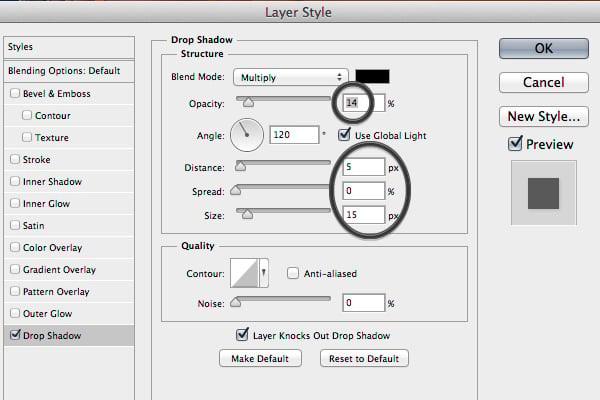
Add a Drop Shadow effect. Set the Opacity to 14%, Distance to 5 px, and Size to 15 px.
Step 3
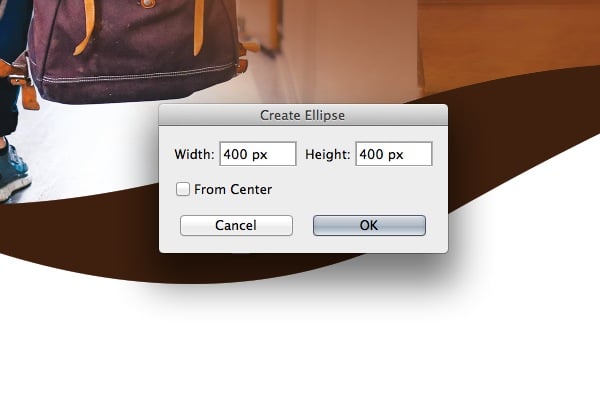
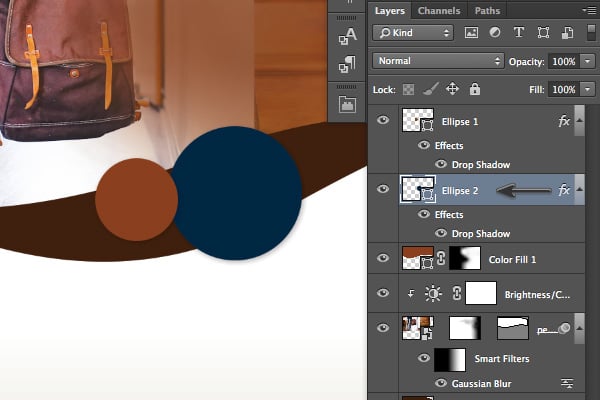
Create a new Ellipse (U). Set its dimensions to 400 px by 400 px. Fill it with Dark Blue Color (C=100 M=80 Y=45 K=50).
Step 4
Use the same Drop Shadow effect and apply it to the ellipse. You can either recreate create the shadow or right-click and select Copy Layer Style and then paste the layer style on the other ellipse. Put the layer with the dark blue ellipse beneath the one with the brown ellipse.
Step 5
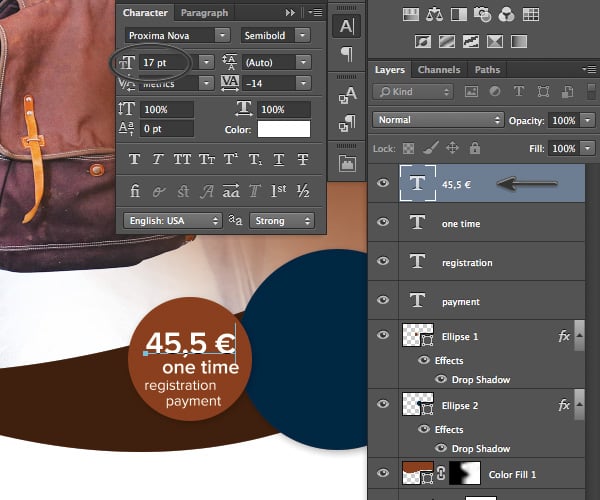
Add text with the Type Tool (T). This tutorial uses the Proxima Nova family. The top title Size is 17 pt. Add the rest of the text, with each one on a separate layer. Use the Move Tool (V) to place each line accordingly, as outlined in the image shown below.
Step 6
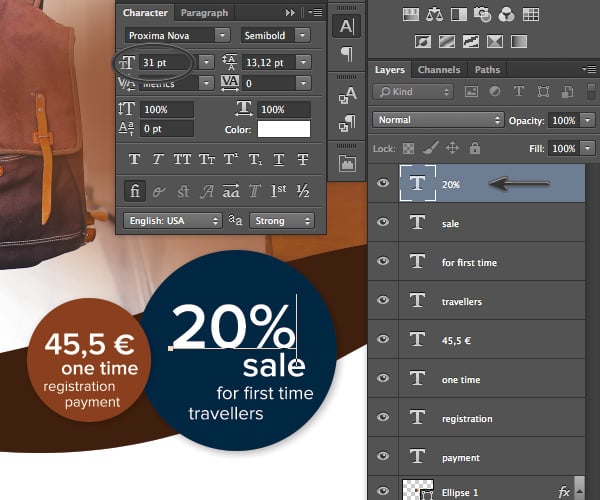
Repeat the same process to add new text. Set the Size of the first line to 31 pt.
Step 7
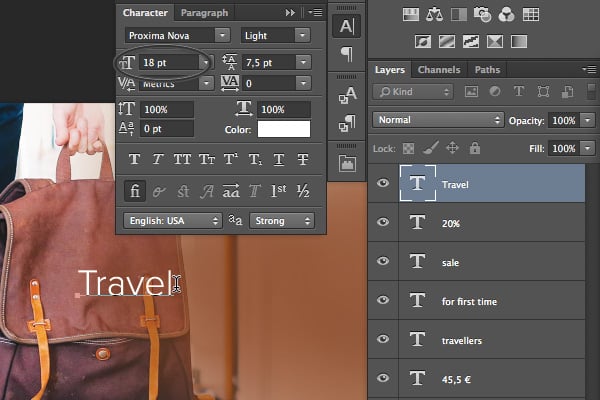
Create a new title using the Type Tool (T). Set the Font to Proxima Nova Light and the Size to 18 pt.
Step 8
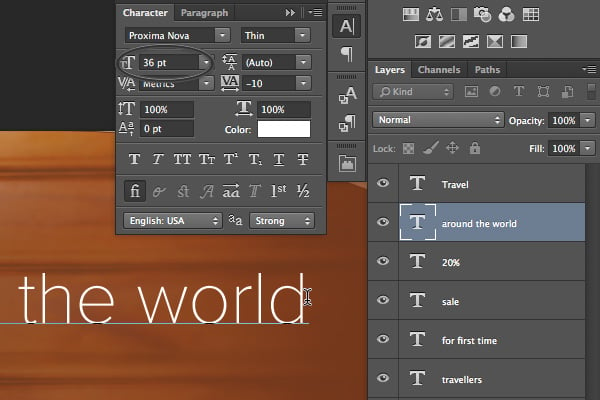
Add the subtitle, again, using the Type Tool (T). Set the Size to 36 pt. Adjust the Character Tracking to -10.
Step 9
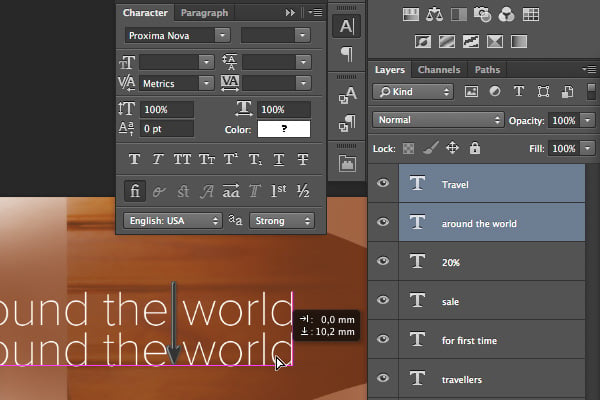
Select both text layers. Hold down the Alt key and Drag the text to duplicate both lines below.
Step 10
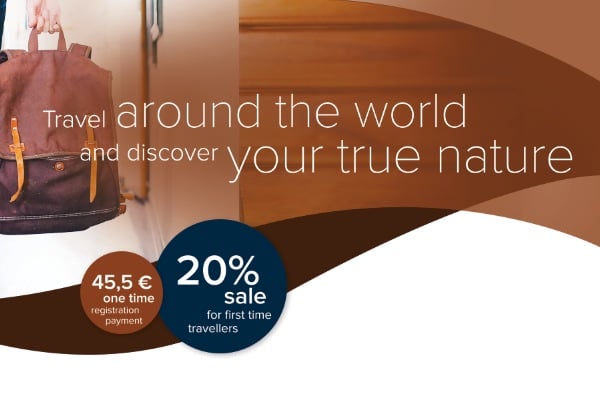
Again, use the Type Tool (T) to rewrite the text according to the image shown below. Position the text with the Move Tool (V).
Step 11
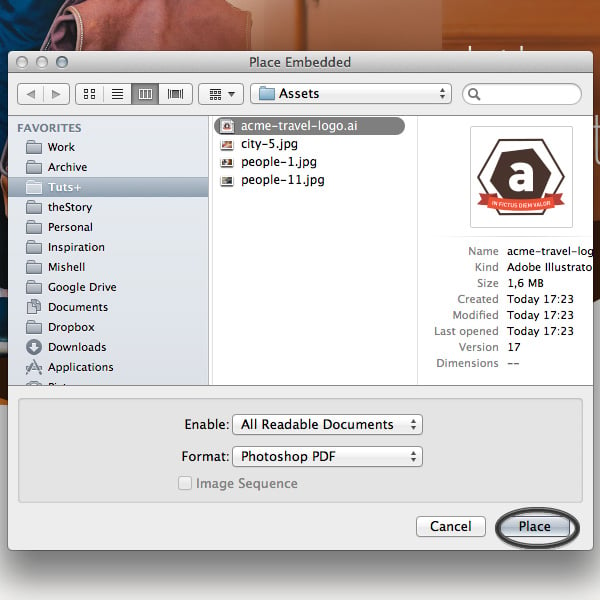
Go to File > Place Embedded and place the vector logo acme-travel-logo.ai into the document.
Step 12
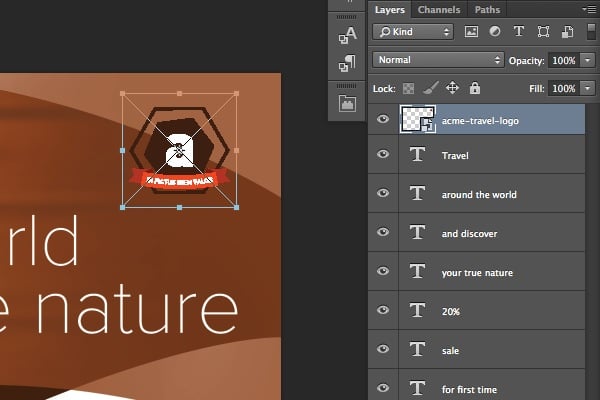
Scale down the vector logo and position it at the upper right corner.
Step 13
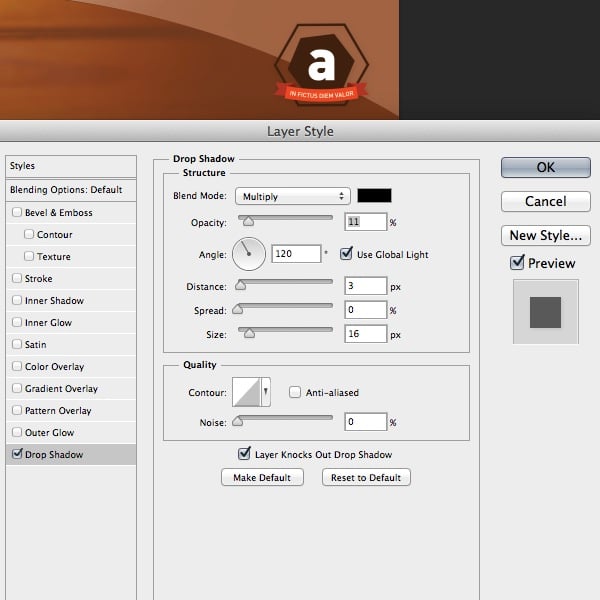
Add the Drop Shadow effect. In the Layer Style panel, set the Opacity to 11%, Distance to 3 px, and Size to 16 px.
4. How to Add the Bottom Photographs
Step 1
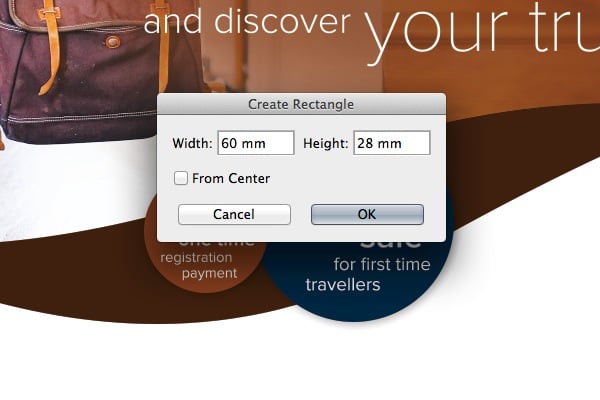
Create a new Rectangle (U). Set its Size to 60 px by 28 px.
Step 2
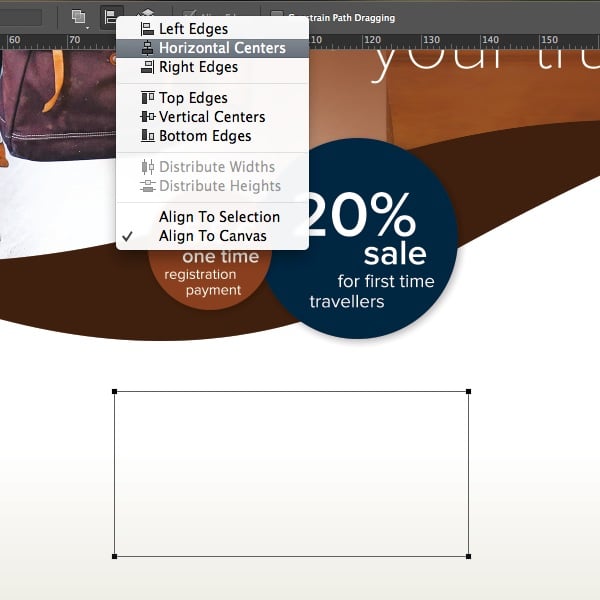
Select the rectangle shape with the Direct Selection Tool (A). In the Align panel, set Horizontal Centers.
Step 3
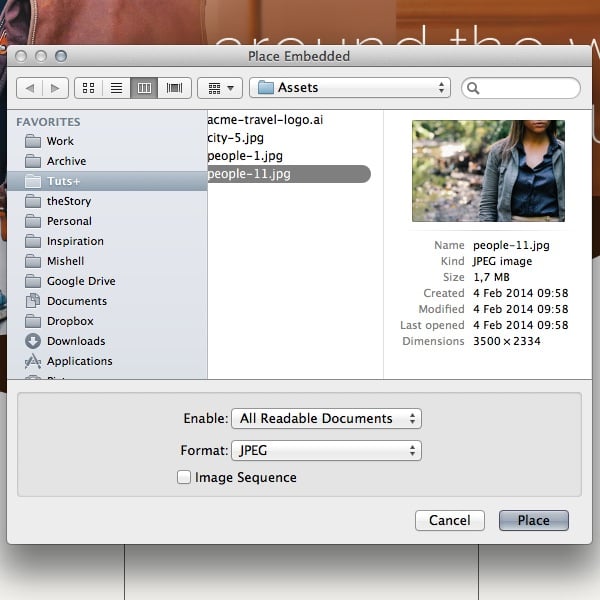
Go to File > Place Embedded and place the people-11.jpg photo from the Resource Pack.
Step 4
Scale down the image and place it directly in the rectangle.
Step 5
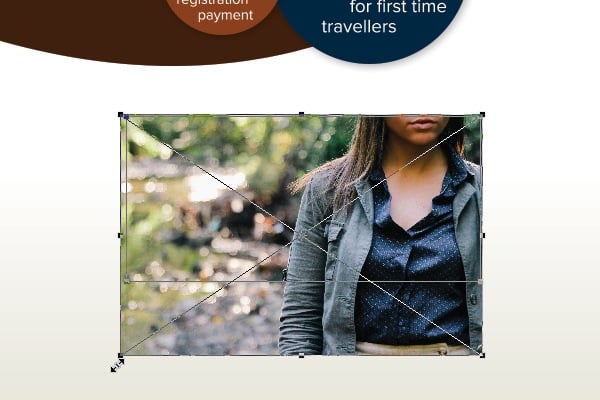
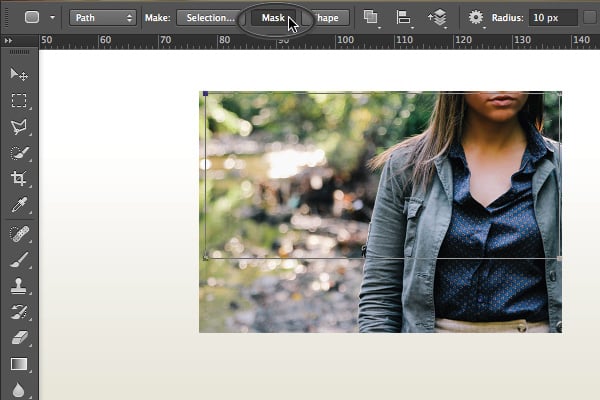
Activate the Rectangle Tool (U), and in the options panel, click Mask. This action will create a vector mask from the rectangle and apply it to the photo.
Step 6
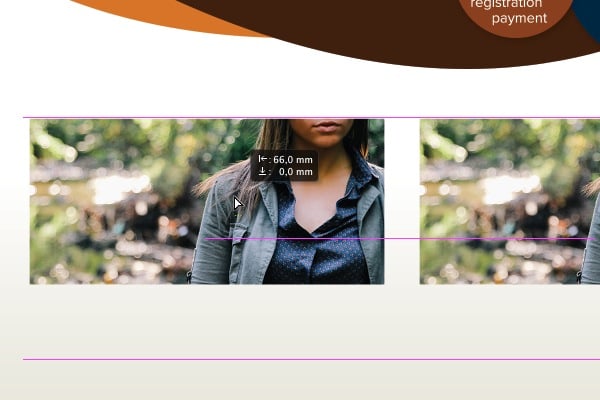
With the photo layer still selected, hold Alt-Shift and drag the photo to duplicate it.
Step 7
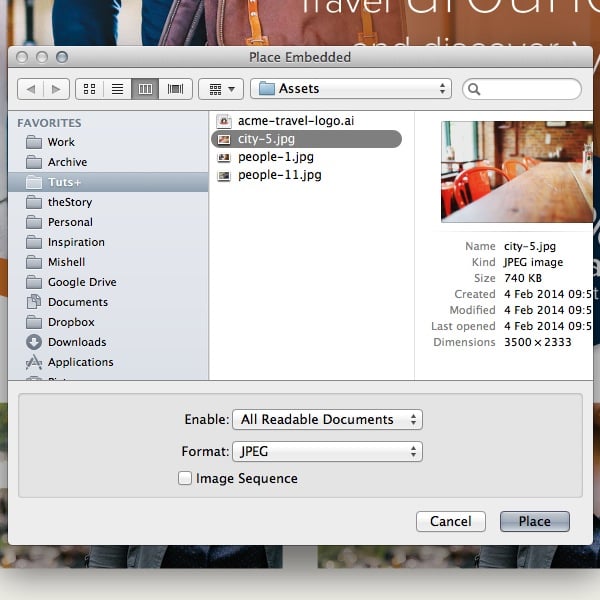
Go to File > Place Embedded. Select the city-5.jpg photo from Resource Pack and add it to the document.
Step 8
Scale down the image and place it above the duplicated photo with the woman.
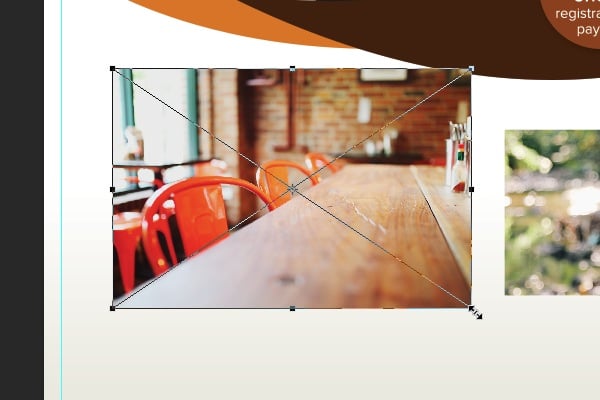
Step 9
Grab the mask from the duplicated photo with the woman and place it into the new image, and then delete the people-11-copy layer.
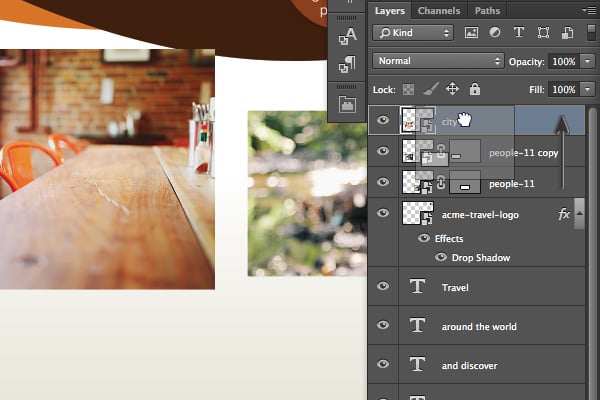
Step 10
Repeat Steps 7 to 9 to add the map screenshot into the document, this time placing the map picture.
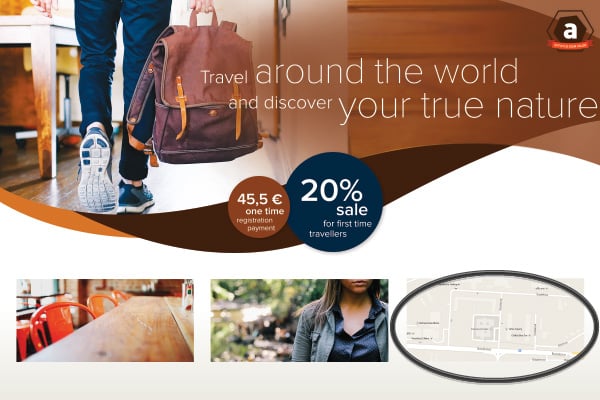
Step 11
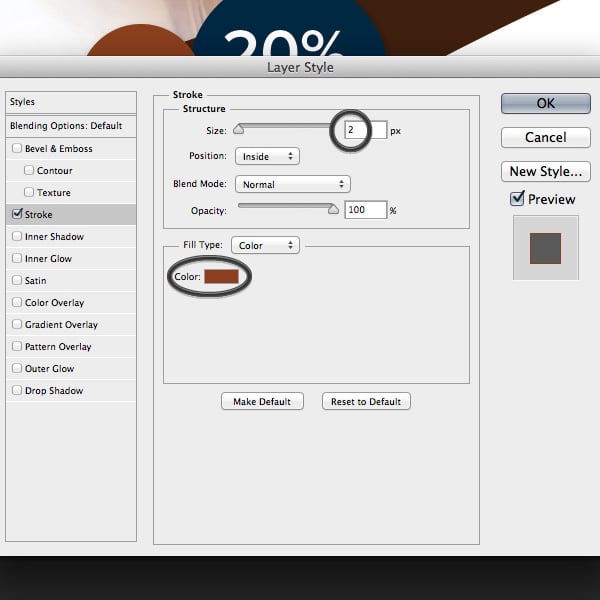
Select the map-screenshot layer and add a Stroke from the effects button in the Layers panel.
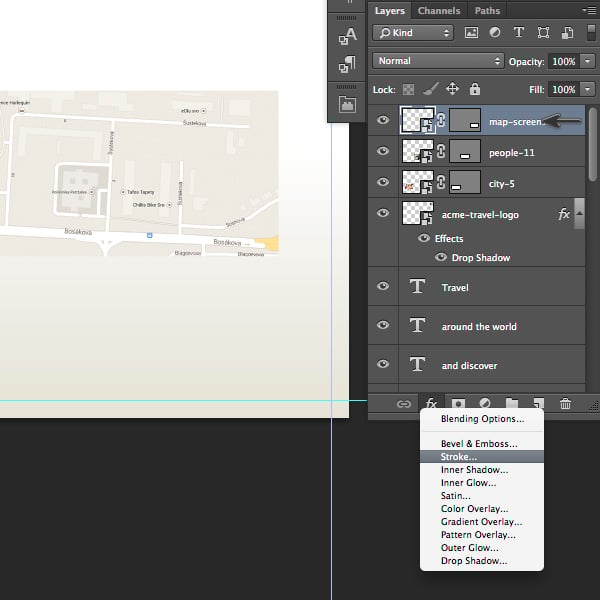
Step 12
Set the Stroke Size to 2 px. Adjust the Position to Inside and set the Color to Brown (C=30 M=80 Y=100 K=30).
5. How to Add the Bottom Text
Step 1
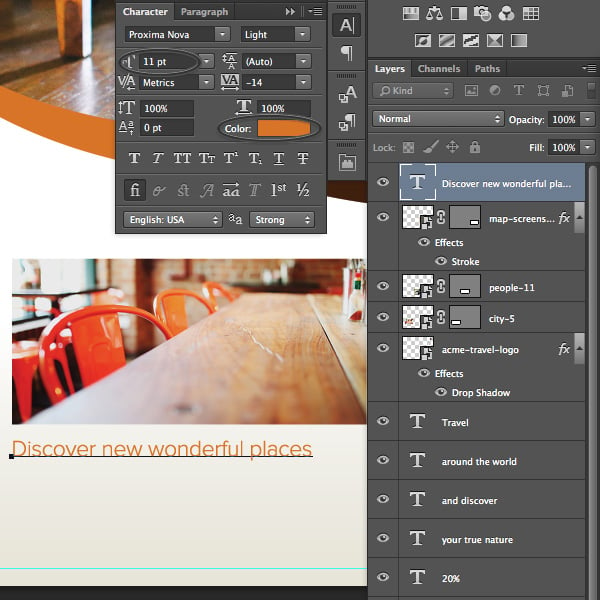
Use the Type Tool (T) to create a new instance of text. Set its size to 11 pt and its Color to Light Brown (C=10 M=65 Y=100 K=0).
Step 2
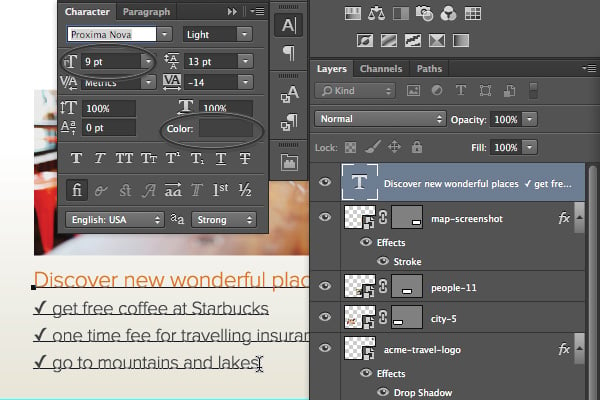
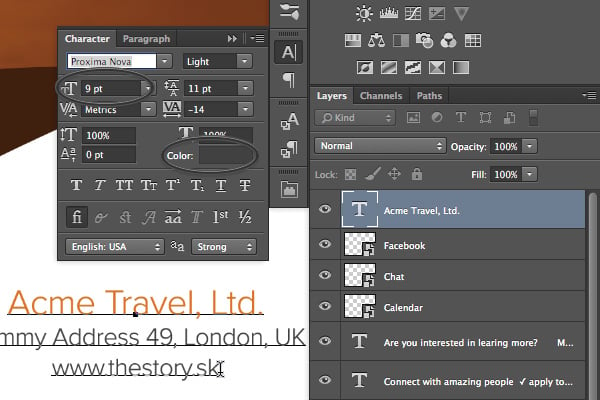
Add more lines. Set the Size to 9 pt, adjust the Leading to 13 pt, and change the Color to Gray (K=90).
Step 3
Follow the same process to create a new block of text. Place them beneath the photo with the woman and the map screenshot.
Step 4
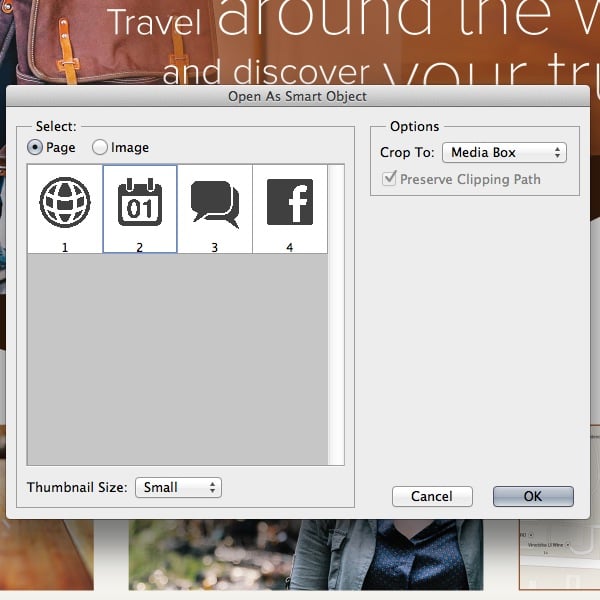
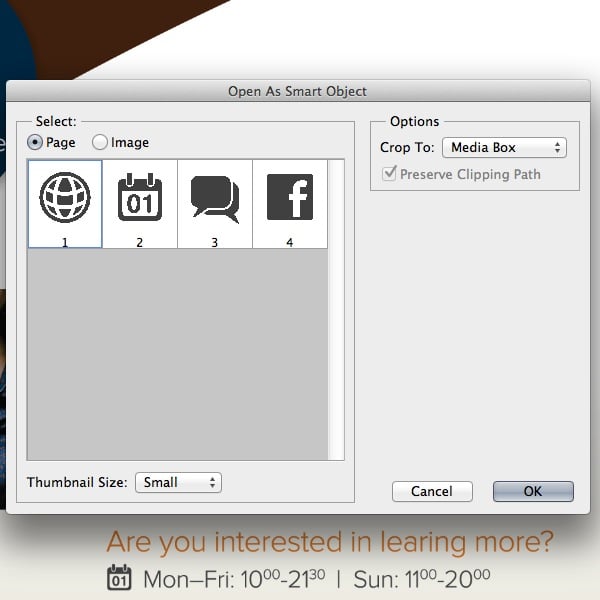
Go to File > Place Embedded. Select icons.ai to import the icons into the document. A new contextual window will appear. Select the Calendar Icon and click OK.
Step 5
Scale down the icon and place it next to the first line with the time information.
Step 6
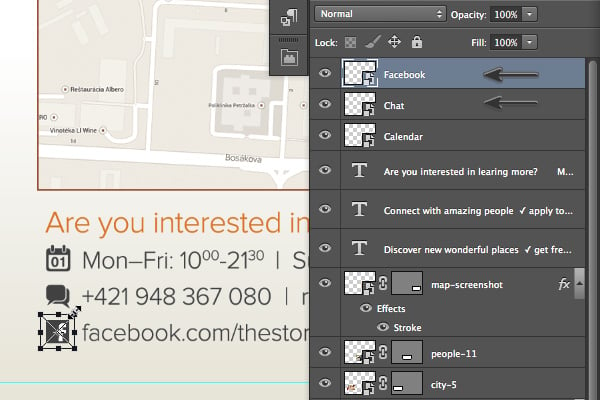
Repeat the same process to import the rest of the icons and place them accordingly next to each line.
Step 7
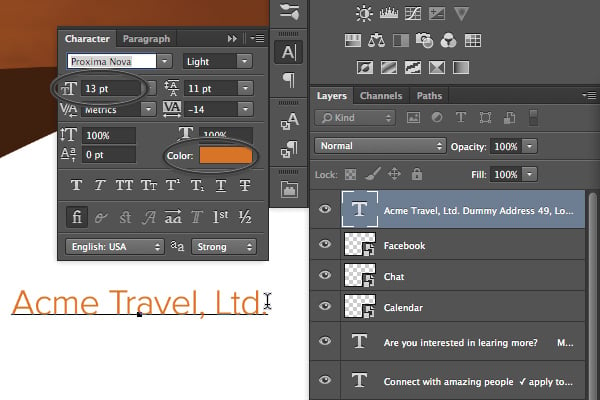
Use the Type Tool (T) to add new text. Place it over the map screenshot. Set the Size to 13 pt, adjust the Leading to 11 pt, and change the Color to Light Brown (C=10 M=65 Y=100 K=0).
Step 8
Follow the same process to add new lines of text for the address. Set the Size to 9 pt and change the Color to Gray (K=90).
Step 9
Go to File > Place Embedded. , select icons.ai again, and import the Globe Vector Icon into the document.
Step 10
Scale down the icon and place it next to the web address.

Step 11
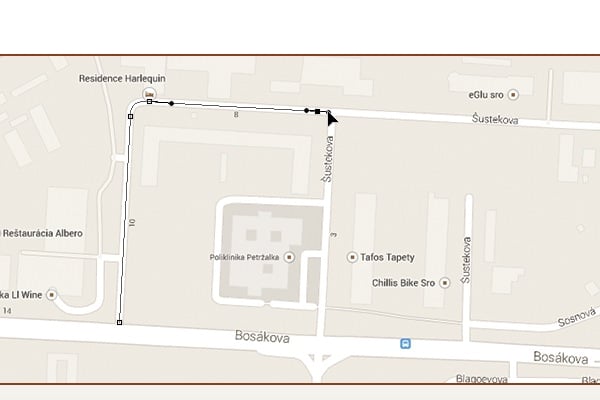
Activate the Pen Tool (P) and create a vector shape that will represent a direction on the map.
Step 12
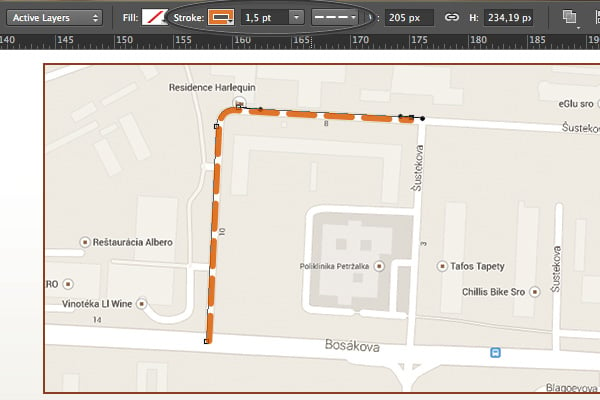
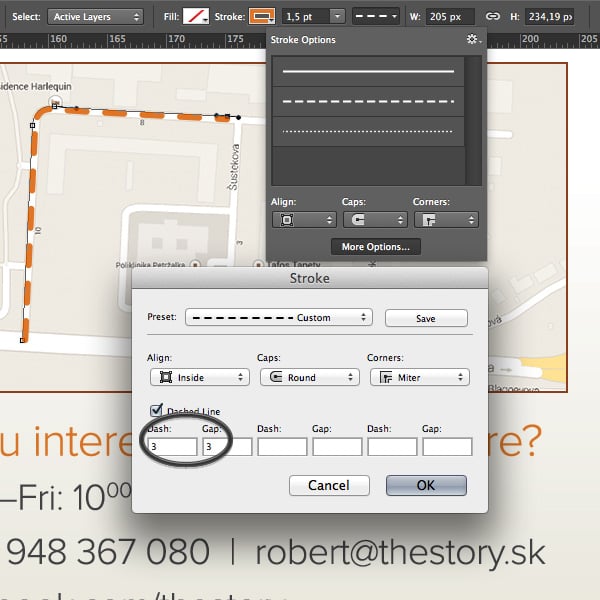
In the Options panel, set the Stroke to Dashed and Color to Light Brown (C=10 M=65 Y=100 K=0). Adjust the Stroke Width to 1.5 pt.
Step 13
Go to Stroke Options > More Options. , set Caps to Round, and adjust Dashed Line: Dash to 3 and Gap to 3.
Step 14
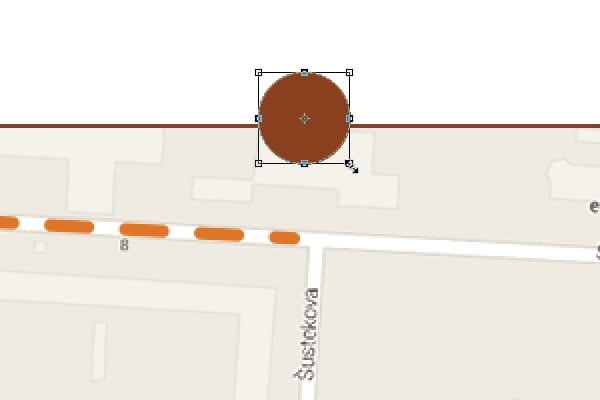
Create a new Ellipse (U). Set the Color to Brown (C=30 M=80 Y=100 K=30).
Step 15
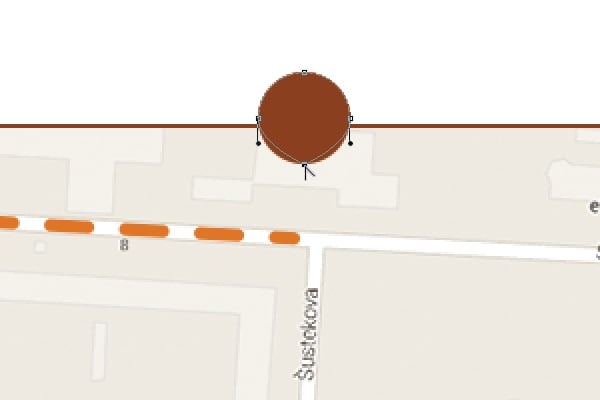
Activate the Pen Tool (P). Hold the Alt key and click on the bottom anchor point. This will convert the anchor point from smooth to corner.
Step 16
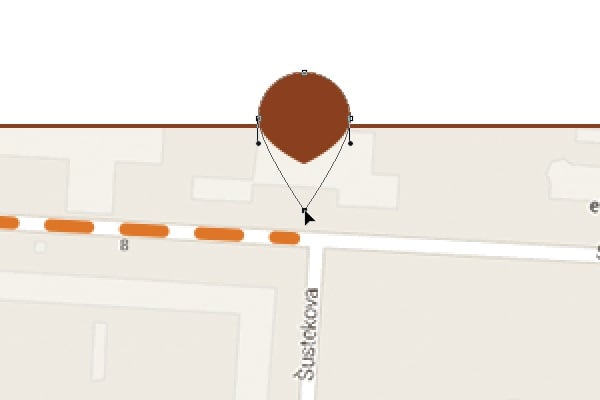
With the Direct Selection Tool (A), move the converted anchor point down.
Step 17
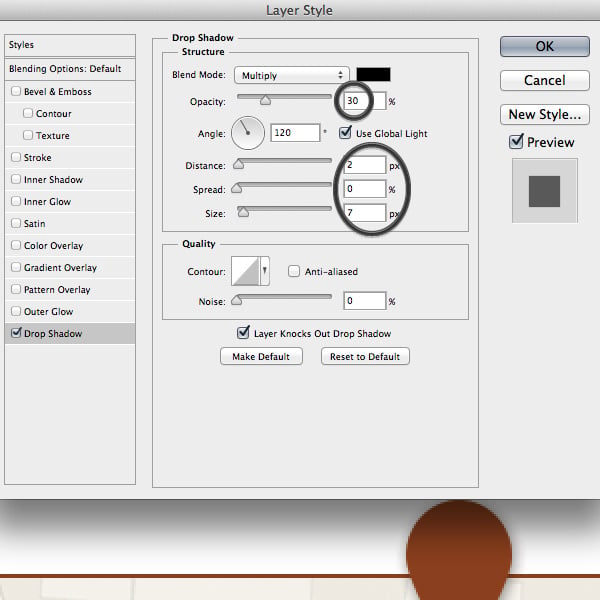
Add the Drop Shadow effect to the pin. Use the settings shown below to make it subtle.
Step 18
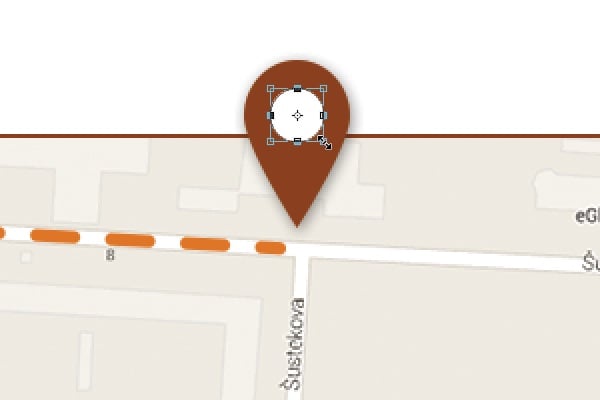
Again, create a new Ellipse (U) with a Fill Color of White. Place the ellipse into the center of the pin. And that’s the final touch to our flyer design.
Conclusion
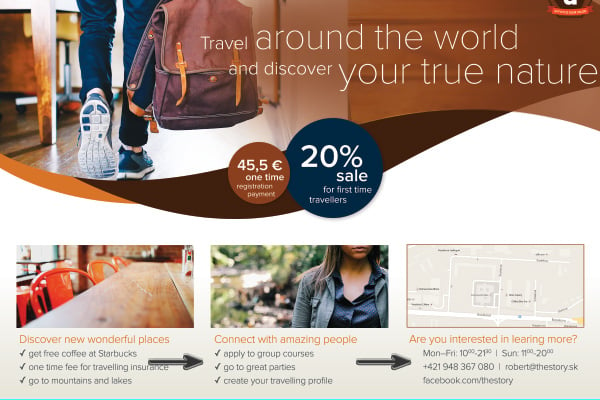
Congratulations! If you’ve followed the tutorial up to this point, you should have a nice design of a promotional flyer completed.
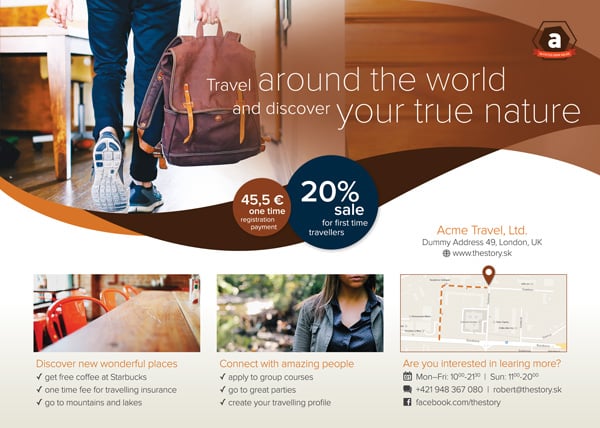
Remember: every time you design images for digital print, you have to think in CMYK colors in order to achieve the best results. Don’t forget to add a bleed to the canvas (at least 3 mm from each edge). If you are unsure about some advanced technical parameters, it is always good to consult directly with the printing company to avoid mistakes.
In the next tutorial in this series, we will take a look at how to impose this flyer into InDesign and prepare a print-quality PDF. In the meantime, if you have any questions about creating a print design in Photoshop, leave a comment below and we’d be glad to help you out.
Save Time With Placeit!
Save time, but still get a design that is completely unique to you by designing your flyer with one of the dozens of professionally made flyer templates on Placeit! They are the perfect jumping-off point for your business flyer or promotion. Here are a few of my personal favorite flyers you can check out on Placeit right now!
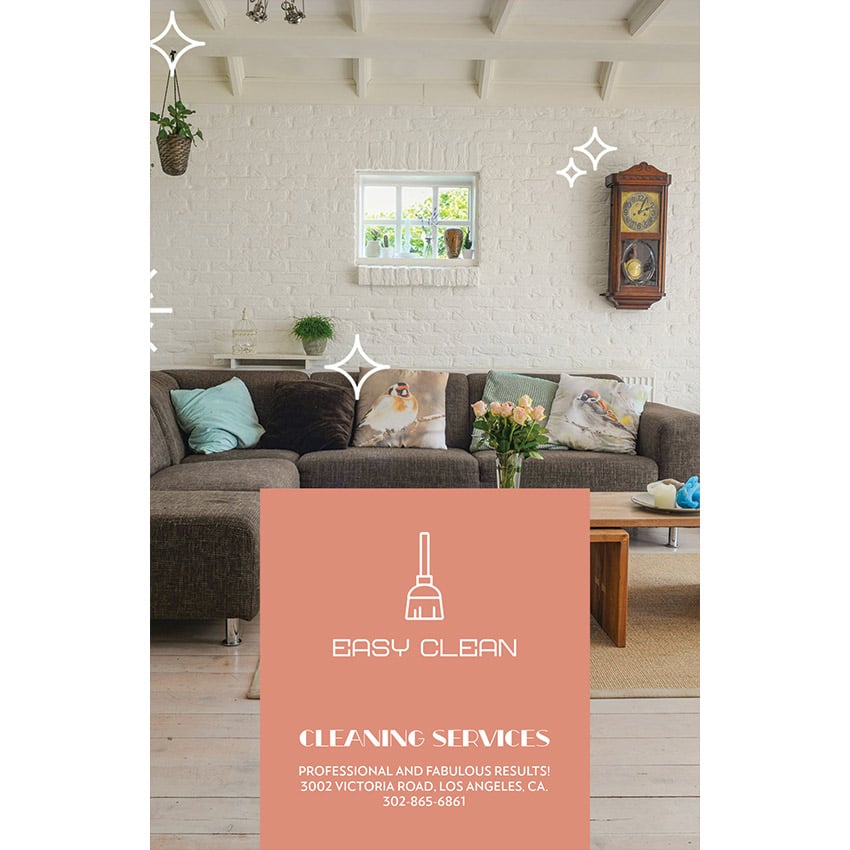
Cleaning Services Flyer Creator With a Simple Broom Icon
This flyer offers a clean and minimal design perfect for either an at-home startup or an established business! It includes a modern logo that fits the design perfectly, but can also be swapped out with your own quickly and easily!
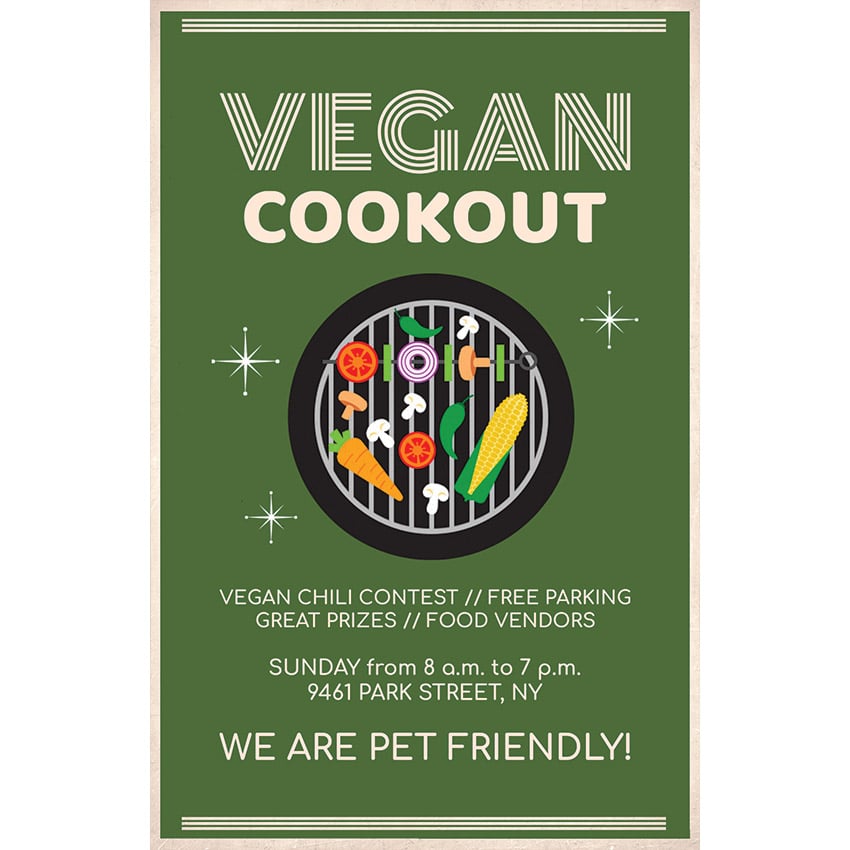
Vegan BBQ Flyer Template
Let everyone know about your upcoming food festival with this vintage-inspired flyer template. The vector shapes bring color to the flyer, while still keeping the spotlight on all the crucial information. It could also be easily transformed into a restaurant flyer in just a few clicks!
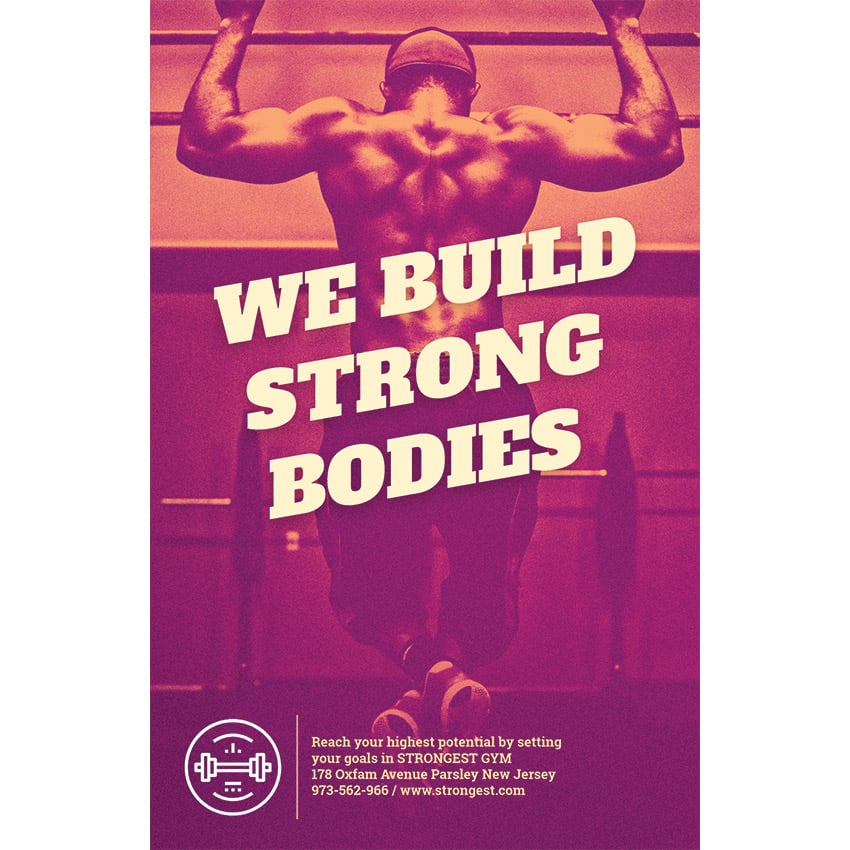
Gym Flyer Design Template
Bring business to your gym with this high-contrast, ultra-modern flyer template. Placeit has dozens of different images with the same high-contrast neon colors to choose from, making it a great choice if you like to refresh your flyer design on a regular basis.
Flyer Maker to Create a Real Estate Agency Flyer
This real estate flyer design template is the perfect mix of professional and modern design, with clean lines and bold text. Swap in your own images to showcase a new house!

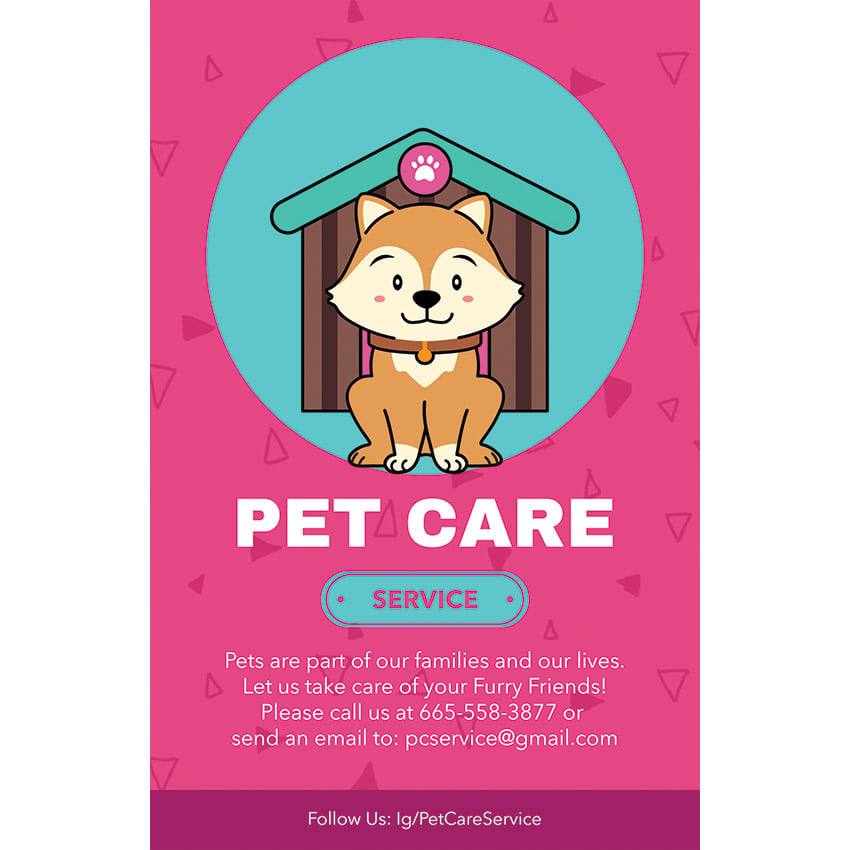
Flyer Template for a Pet Care Service With a Dog Illustration
Promote your pet care business with this ultra adorable pet care service flyer template! The bold colors and cute dog illustrations will grab the attention of all pet parents. You can choose other animals as well.
Need even more? Check out some of these other great resources below!
Как создать рекламную листовку в Photoshop
Photoshop отличный инструмент для графического дизайна в дополнение к задаче по доводке фотографий, особенно если графика предназначена для просмотра на мониторах. Но он хорош не только для этого. С соответствующими знаниями и навыками можно делать великолепные работы для печати.
В этом уроке вы пройдёте базовые шаги по созданию привлекательных листовок в цветовом режиме CMYK, готовых к выводу на печать прямо из Photoshop Вы можете в точности повторять урок или, следуя ему по шагам, изменять содержимое и цвета листовки по своему вкусу.
Ресурсы урока
В этом уроке используются бесплатные картинки из Envato и несколько векторных иконок, созданных мною в Illustrator специально для данного проекта. Вы можете их найти и скачать из боковой панели урока вместе с готовым файлом PSD для сравнения со своей работой.
Здесь применяются шрифты Proxima Nova Font Family, взятые из Typekit или по подписке Adobe Creative Cloud. Шрифты можно синхронизировать с вашим приложением или использовать аналогичные свои.
Создание документа с направляющими
Шаг 1
Сначала создайте документ нужного размера с настройками для печати. Размеры нового документа Photoshop установим 216×154 mm. Это размер бумаги A5 с отступом в 3 мм на край. Поскольку мы создаём документ для печати, задайте цветовой режим CMYK и разрешение 300 Pixels/Inch.
Шаг 2
Создадим направляющие, чтобы видеть края отступа В приложениях Illustrator и InDesign эта опция встроена, а в Photoshop сделаем сами. С помощью Move Tool (V) и клавиши Shift перетащите горизонтальную направляющую из верхней линейки. Убедитесь, что направляющая расположена в 3 мм по оси Y.
Шаг 3
Повторите эту процедуру для создания направляющих остальных кромок документа. Убедитесь, что каждая направляющая отстоит на 3 мм от соответствующего края.
Создание заднего фона
Шаг 1
Нажмите комбинацию Shift-Cmd-N для создания нового слоя. Залейте фон белым цветом (Alt-Backspace). Убедитесь, что в настройках стоят цвета CMYK Sliders, поскольку вы создаёте документ для печати.
Шаг 2
Создайте новый корректирующий слой Gradient Overlay. В панели Layer Style Panel выберите Gradient. Установите значение белого цвета Location на 30%. Значение чёрного цвета измените на Pale Yellow (C=9 M=6 Y=14 K=0).
Шаг 3
С помощью инструмента Rectangle Tool (U) создайте прямоугольник. Его размер 216 mm на 56 mm.
Шаг 4
Выровняйте прямоугольник по верхнему левому краю документа. Залейте цветом Dark Brown (C=49 M=74 Y=80 K=70).
Шаг 5
Инструментом перо Pen Tool (P) добавьте точку на нижней грани прямоугольника.
Шаг 6
С помощью Direct Selection Tool (A) поиграйте ручками опорной точки для создания кривой Bezier.
Шаг 7
Выполните те же шаги с верхней гранью для придания прямоугольнику нужной формы.
Шаг 8
Пройдя по File > Place Embedded. , выберите people-1.jpg картинку из Resource Pack.
Шаг 9
Пользуясь инструментом Move Tool (V) переместите фото на документ. Расположите в верхнем углу, как показано на рисунке.
Шаг 10
Сделайте ещё один прямоугольник с помощью Rectangle Tool (U). Задайте ему размер 216 mm на 100 mm.
Шаг 11
Инструментом Direct Selection Tool (A) поместите прямоугольник точно над фото в верхнем левом углу.
Шаг 12
В верхней панели опций Rectangle Tool Panel нажмите Mask. Этим вы добавите векторную маску для слоя с фото.
Шаг 13
Возьмите Pen Tool (P) и поставьте опорную точку на маске. Сделайте кривую с помощью Direct Selection Tool (A).
Шаг 14
Уже знакомыми инструментами Pen Tool и Direct Selection Tool попытайтесь придать маске форму, как показано ниже. Обращайте внимание на положение опорных точек и простоту формы. Чем меньше опорных точек, тем плавнее получатся очертания маски.
Шаг 15
Пройдите в Filter > Blur > Gaussian Blur. Назначьте Radius на 6.
Шаг 16
Выберите Smart Filters. Инструментом Gradient Tool (G) направляйте осветление к правому краю.
Шаг 17
Добавьте маску слоя Layer Mask. Инструментом Brush Tool (B) нарисуйте штрихами плавный переход. Действуйте по своему вкусу и ощущениям.
Шаг 18
Создайте слой Brightness/Contrast Adjustment Layer, кликнув по значку sun на панели выбора настроек. Установите Brightness на 40 и Contrast на 10.
Шаг 19
Щелчком правой кнопки по Adjustment Layer назначьте Create Clipping Mask. Это позволит применить новые настройки яркости только к нижнему снимку.
Шаг 20
Создайте слой Solid Color. Подберите цвет Brown (C=30 M=80 Y=100 K=30).
Шаг 21
Кликните по векторной маске на слое с фото. Зажмите клавишу Alt и перетащите её на коричневый Color Fill. Маска будет скопирована.
Шаг 22
Инструментом Direct Selection Tool (A) переместите опорную точку в правый верхний угол.
Шаг 23
Кистью Brush Tool (B) смешайте некоторые детали фото с коричневым слоем. Прозрачность слоя Layer Opacity задайте 75%.
Шаг 24
Нарисуйте ещё один прямоугольник Rectangle Tool (U).
Шаг 25
Залейте его цветом Light Brown Color (C=10 M=65 Y=100 K=0).
Шаг 26
Расположите этот слой под слоем с тёмно-коричневым прямоугольником.
Шаг 27
С помощью инструментов Pen Tool (P) и Direct Selection Tool (A) сделайте кривую, как на нижнем рисунке.
Добавление текста и логотипа
Шаг 1
Нарисуйте фигуру Ellipse (U). С габаритами 248 px на 248 px. Залейте цветом Brown Color (C=30 M=80 Y=100 K=30).
Шаг 2
Добавим эффект тени Drop Shadow. Прозрачность 14%, расстояние 5 px и размер 15 px.
Шаг 3
Сделаем ещё один Ellipse (U). С размерами 400 px на 400 px. Зальём Dark Blue Color (C=100 M=80 Y=45 K=50).
Шаг 4
Применим к нему тот же эффект тени Drop Shadow. Можно настроить тень ещё раз вручную или, кликнув правой кнопкой, выбрать из списка Copy Layer Style и скопировать готовый эффект на новый слой. Круг синего цвета помещаем под слоем с коричневым.
Шаг 5
Добавляем текст инструментом Type Tool (T). В этом уроке применяются шрифты семейства Proxima Nova. Размер заголовка Top Title Size is 17 pt. Добавляйте строки текста, каждый на отдельном слое. Перемещайте их с Move Tool (V) на нужные места, как показано ниже.
Шаг 6
То же самое повторите для нового текста. Размер size первой строки 31 pt.
Шаг 7
Создаём новый заголовок инструментом Type Tool (T). Возьмите шрифт Proxima Nova Light и размером в 18 pt.
Шаг 8
Тем же инструментом Type Tool (T), добавьте подзаголовок. Его размер на 36 pt. Поправьте Character Tracking до -10.
Шаг 9
Выберите оба слоя с текстом. Зажмите клавишу Alt и переместите drag строки вниз.
Шаг 10
Ещё раз, с помощью Type Tool (T) перепишите текст, как показано ниже. Расположите его инструментом Move Tool (V).
Шаг 11
Зайдите в File > Place Embedded и переместите в документ векторную картинку с логотипом acme-travel-logo.ai.
Шаг 12
Масштабируем логотип и размещаем в правом верхнем углу.
Шаг 13
Назначим ему эффект Drop Shadow. В панели стилей слоя Layer Style Panel, установим Opacity на 11%, Distance на 3 px, and Size на 16 px.
Добавление нижних снимков
Шаг 1
Создаём новый прямоугольник Rectangle (U). Его размеры size to 60 px на 28 px.
Шаг 2
Инструментом Direct Selection Tool (A) выделим линии прямоугольника. В панели выравнивания выберем выравнивание Horizontal по центрам.
Шаг 3
Идём в File > Place Embedded и перемещаем people-11.jpg photo из Resource Pack.
Шаг 4
Масштабируем кадр и помещаем ровно в прямоугольник.
Шаг 5
Активируйте инструмент Rectangle Tool (U), а в панели опций нажмите Mask. Из прямоугольника будет создана векторная маска для снимка.
Шаг 6
Находясь на слое с фото, нажмите Alt-Shift и переместите для создания копии.
Шаг 7
Зайдите на File > Place Embedded. Найдите city-5.jpg photo на Resource Pack и добавьте его в документ
Шаг 8
Подогнав фото по размеру, поставьте его над копией снимка с девушкой.
Шаг 9
Схватите маску копии фото с девушкой и поместите в новую картинку, затем удалите слой people-11-copy.
Шаг 10
Повторите шаги с 7 по 9 для добавления скриншота карты.
Шаг 11
Выделим слой map-screenshot и добавим ему эффект Stroke.
Шаг 12
Ширина обводки Stroke Size будет 2 px. Задайте Position на Inside цвет Color на Brown (C=30 M=80 Y=100 K=30).
Добавление текста внизу
Шаг 1
Задайте новые параметры текста с помощью Type Tool (T). Его размер 11 pt и цвет Color будет Light Brown (C=10 M=65 Y=100 K=0).
Шаг 2
Добавим ещё строки. Назначим Size на 9 pt, их Leading до 13 pt и поменяем Color на Gray (K=90).
Шаг 3
Новые блоки с текстом сделайте таким же способом. Поместите их под фото с девушкой и скриншотом карты.
Шаг 4
Пройдите по File > Place Embedded. выделите icons.ai для импорта в документ. Появится новое окно контекста. Выделите иконку Calendar Icon и кликните OK.
Шаг 5
Масштабируйте иконку для размещения в строке с расписанием.
Шаг 6
Повторите процедуру с другими иконками, каждую для своей строчки.
Шаг 7
Возьмём Type Tool (T) и добавим текст. Поставьте его на скрин с картой. Размер Size на 13 pt, Leading на 11 pt и цвет Color на Light Brown (C=10 M=65 Y=100 K=0).
Шаг 8
Повторите эти действия для создания новых строк текста с адресом. Их размер Size на 9 pt и цвет Color на Gray (K=90).
Шаг 9
Из File > Place Embedded. , выберите icons.ai и импортируйте Globe Vector Icon в документ.
Шаг 10
Подгоните по размеру и поместите перед web адресом.
Шаг 11
Активируйте Pen Tool (P), чтобы нарисовать линию направления по карте.
Шаг 12
Меняем в Options Panel со сплошной линии Stroke на Dashed и Color на Light Brown (C=10 M=65 Y=100 K=0). Ширина Stroke Width на 1,5 pt.
Шаг 13
Зайдите в Stroke Options > More Options. , и задайте Caps на Round и Dashed Line: Dash на 3 и Gap на 3.
Шаг 14
Создадим ещё Ellipse (U). Назначим Color на Brown (C=30 M=80 Y=100 K=30).
Шаг 15
Активируем Pen Tool (P). Зажимаем клавишу Alt и кликаем по нижней опорной точке. Этим превращая её из плавной в угловую.
Шаг 16
Инструментом Direct Selection Tool (A) сдвигаем точку вниз.
Шаг 17
Добавим эффект тени Drop Shadow. Примените указанные внизу настройки, чтобы сделать её лёгкой.
Шаг 18
Снова делаем Ellipse (U) и заливаем Fill Color цветом White. Помещаем его в центр указателя. Это будет конечной точкой нашего дизайна листовки.
Заключение
Поздравляю! Если вы дошли до этого места, то получили отличный дизайн готовой рекламной листовки.
Помните: для подготовки дизайна в печать надо настраивать цвета CMYK с целью добиться лучшего результата для восприятия. Не забудьте добавить отступ на холсте (по крайней мере 3 мм от каждого края). Если вы не знаете некоторых технических тонкостей, будет полезно обратиться за консультацией в типографию, чтобы избежать ненужных ошибок и сложностей.
В следующем уроке этой серии мы рассмотрим, как поместить эту листовку в InDesign и подготовить на печать в формате PDF. А сейчас, если возникли вопросы по печати в Photoshop, оставляйте комментарии ниже и мы будем рады вам помочь.
Делаем рекламный флаер в Фотошоп
В этом уроке вы узнаете, как создать креативный рекламный флайер готовый к печати.

Материалы для урока:
Подготовка документа
Шаг 1
Создаем новый документ размером 216х154 миллиметров. Это размер формата А5 с отступами по краям в 3 мм. Так как данная работа предназначена для печати, устанавливаем цветовой режим на CMYK и разрешение на 300 пикселей/дюйм.
Шаг 2

Добавляем направляющие, чтобы отметить отступы по краям. Используем инструмент Move Tool (V) (Перемещение) и клавишу Shift, чтобы откорректировать положение направляющих.
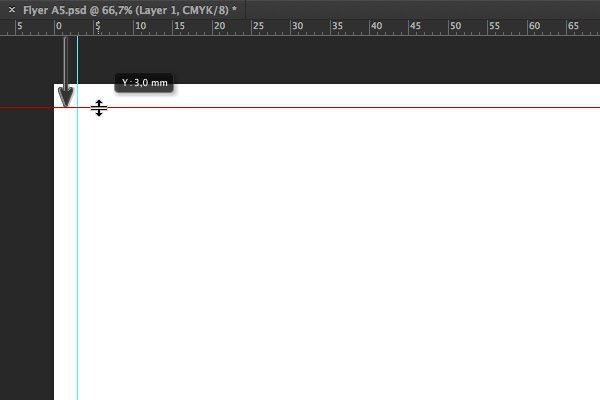
Шаг 3
Добавляем направляющие по всем сторонам документа.
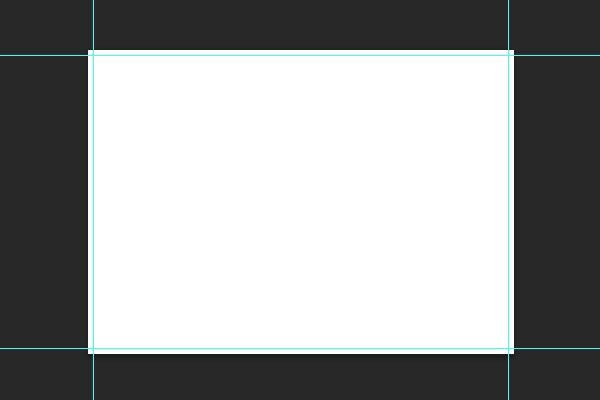
Создаем фон
Шаг 1
Жмем Shift+Ctrl+N, чтобы создать новый слой. Заливаем его белым цветом (Alt+Backspace). Убедитесь, что на панели Color (Цвет) установлены ползунки CMYK.

Шаг 2
Кликаем на кнопку Add a Layer Style (Добавить стиль слоя) внизу панели слоев и выбираем Gradient Overlay (Перекрытие градиентом). Белый ползунок ставим на 30%. Цвет черного ползунка меняем на бледно-желтый (C=9 M=6 Y=14 K=0).


Шаг 3

С помощью Rectangle Tool (U) (Прямоугольник) создаем прямоугольник. Размер вводим 216 х 56 мм.

Шаг 4
Привязываем прямоугольник к верхнему левому углу документа. Заливаем его темно-коричневым (C=49 M=74 Y=80 K=70).

Шаг 5

С помощью Pen Tool (P) (Перо) добавляем узелок на нижней части прямоугольника.

Шаг 6

С помощью Direct Selection Tool (A) (Частичное выделение) начинаем редактировать направляющие узелка, чтобы создать кривую Безье.

Шаг 7
Продолжаем редактировать прямоугольник, как показано ниже.

Шаг 8
Переходим File — Place Embedded (Файл — Поместить встроенные), затем выбираем изображение people-1.jpg из набора, который вы должны были скачать в начале урока.

Шаг 9
Используем Move Tool (V) (Перемещение), чтобы разместить фото в верхнем левом углу, как показано ниже.

Шаг 10
С помощью Rectangle Tool (U) (Прямоугольник) создаем прямоугольник в режиме Path (Контур). Размер вводим 216 х 100 мм.

Шаг 11
С помощью Direct Selection Tool (A) (Частичное выделение) перемещаем прямоугольник прямо на фото в верхнем левом углу.

Шаг 12
Активируем Rectangle Tool (U) (Прямоугольник) и на верхней панели параметров инструмента кликаем по кнопке Mask  (Маска). В результате на слое с фотографией появится векторная маска.

Шаг 13
С помощью Pen Tool (P) (Перо) добавляем новый узелок на маске. Затем, используя Direct Selection Tool (A) (Частичное выделение), создаем кривую Безье.

Шаг 14
Используя те же инструменты (Перо и Частичное выделение), редактируем маску, как показано ниже. Обратите внимание на положение узелков и на простоту формы. Чем меньше узелков, тем более гладким и аккуратным будет результат.

Шаг 15
Переходим Filter — Blur — Gaussian Blur (Фильтр — Размытие — Размытие по Гауссу). Устанавливаем Radius (Радиус) на 6.

Шаг 16
Кликаем по маске смарт-фильтра и заливаем ее черно-белым градиентом от левого края к правому.


Шаг 17

Добавляем к фото новую слой-маску. Мягкой кисточкой (В) аккуратно стираем правый край.

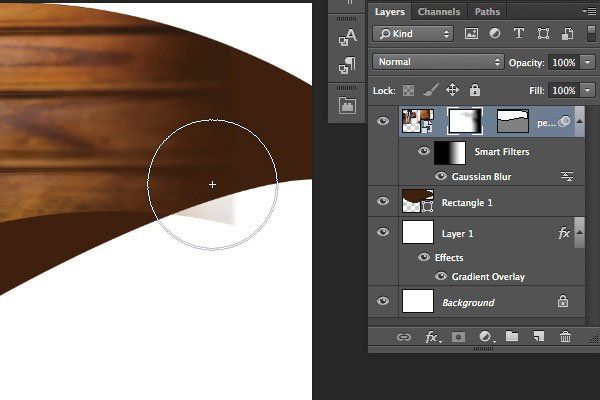
Шаг 18
Создаем корректирующий слой Brightness/Contrast (Яркость/Контрастность). Для этого кликаем на иконку Create new fill or adjustment layer (Создать новую заливку или корректирующий слой). Устанавливаем Brightness (Яркость) на 40 и Contrast (Контрастность) на 10.

Шаг 19
Кликаем правой кнопкой по корректирующему слою и выбираем Create Clipping Mask (Создать обтравочную маску). Благодаря этому, коррекция будет действовать только на фото ниже.
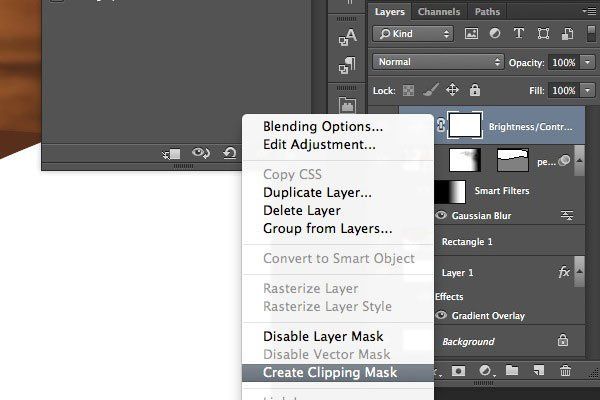
Шаг 20
Кликаем на кнопку Create new fill or adjustment layer (Создать новую заливку или корректирующий слой) внизу панели слоев и выбираем Solid Color (Цвет). Цвет заливки устанавливаем на коричневый (C=30 M=80 Y=100 K=30).

Шаг 21
Жмем по векторной маске фотографии. Зажимаем клавишу Alt и перетаскиваем маску на слой с цветовой заливкой. В результате маска скопируется.

Шаг 22
С помощью Direct Selection Tool (A) (Частичное выделение) перетаскиваем правый верхний узелок в угол.

Шаг 23
Берем кисть (В) и редактируем маску, чтобы убрать часть заливки. Непрозрачность коричневого слоя установите на 75%.

Шаг 24
Берем Rectangle Tool (U) (Прямоугольник) и рисуем новый прямоугольник.
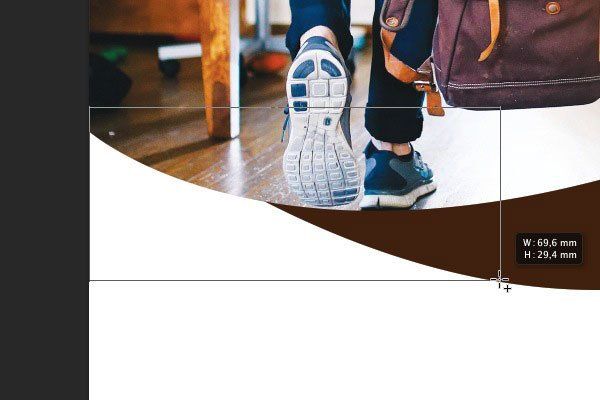
Шаг 25
Заливаем прямоугольник светло-коричневым цветом (C=10 M=65 Y=100 K=0).

Шаг 26
Размещаем слой со светлым прямоугольником под темным.
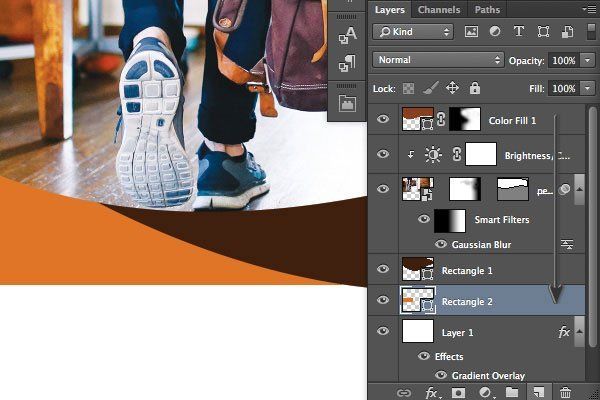
Шаг 27
С помощью Pen Tool (P) (Пера) и Direct Selection Tool (A) (Частичное выделение) редактируем прямоугольник, как показано ниже.

Добавляем текст и логотип
Шаг 1

Создаем окружность с помощью Ellipse Tool (U) (Эллипс). Размер фигуры — 248 х 248 px. Заливаем ее коричневым цветом (C=30 M=80 Y=100 K=30).

Шаг 2
Добавляем стиль слоя Drop Shadow (Тень). Устанавливаем Opacity (Непрозрачность) на 14%, Distance (Расстояние) на 5 px и Size (Размер) на 15 px.


Шаг 3
Создаем еще одну окружность размером 400 х 400 px. Заливаем ее темно-синим цветом (C=100 M=80 Y=45 K=50).

Шаг 4
Ко второй окружности также применяем стиль слоя Drop Shadow (Тень). Для этого кликаем правой кнопкой по слою с первой окружностью и выбираем Copy Layer Style (Копировать стиль слоя), затем правой кнопкой по второй и выбираем Paste Layer Style (Вставить стиль слоя). Синюю окружность размещаем под коричневой.

Шаг 5
С помощью Type Tool  (T) (Текст) пишем текст. В этом уроке использован шрифт Proxima Nova. Размер текста с ценой 17 pt. Все строки создаем как отдельные слои. С помощью Move Tool (V) (Перемещение) размещаем текст в окружности, как показано ниже.

Шаг 6
Добавляем текст на синей окружности. Размер самого крупного текста 31 pt.

Шаг 7
Продолжаем добавлять текст. Шрифт — Proxima Nova Light, размер — 18 pt.

Шаг 8
Пишем еще текст. Размер — 36 pt. Устанавливаем Tracking (Трэкинг) на -10.

Шаг 9
Выделяем оба текстовых слоя. Зажимаем клавишу Alt и тянем их ниже, чтобы дублировать.

Шаг 10
С помощью Type Tool (T) (Текст) редактируем дубликаты текста, как показано ниже.

Шаг 11
Переходим File — Place Embedded (Файл — Поместить встроенные) и в открывшемся окне выбираем файл acme-travel-logo.ai.

Шаг 12
Уменьшаем размер логотипа и размещаем его в верхнем правом углу.

Шаг 13
Добавляем стиль слоя Drop Shadow (Тень). Устанавливаем Opacity (Непрозрачность) на 11%, Distance (Расстояние) на 3 px и Size (Размер) на 16 px.

Добавляем фотографии
Шаг 1
Создаем прямоугольник с помощью Rectangle Tool (U) (Прямоугольник) размером 60 х 28 px.

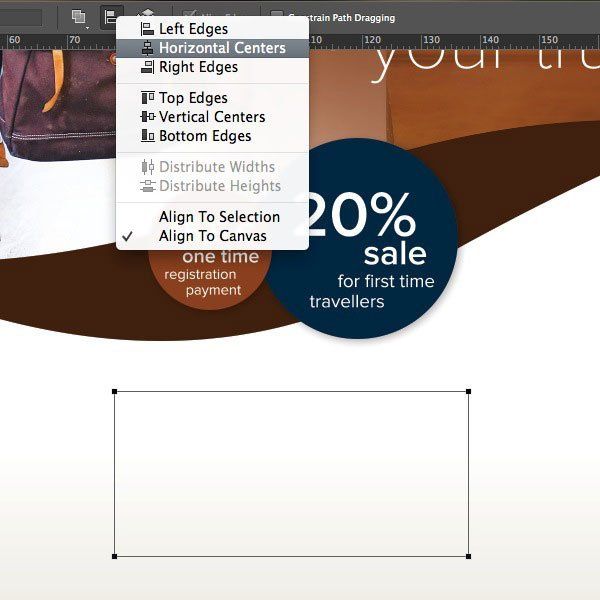
Шаг 2
С помощью Direct Selection Tool (А) (Частичное выделение) выделяем прямоугольник и на верхней панели в меню выравнивания выбираем Horizontal Centers (Центры по горизонтали).
Шаг 3
Переходим File — Place Embedded (Файл — Поместить встроенные) и добавляем к документу файл people-11.jpg.

Шаг 4
Уменьшаем размер изображения и размещаем на прямоугольнике.

Шаг 5
Активируем Rectangle Tool (U) (Прямоугольник) и на панели параметров инструмента жмем на кнопку Mask (Маска). Это функция сделает из прямоугольника векторную маску и применит ее к фото.

Шаг 6
Зажимаем Alt+Shift и перетягиваем фото, чтобы дублировать его.

Шаг 7
Переходим File — Place Embedded (Файл — Поместить встроенные) и выбираем изображение city-5.jpg.

Шаг 8
Уменьшаем фото и размещаем его над слоем с копией предыдущего фото с девушкой.

Шаг 9
Хватаем маску копии фото с девушкой и перетаскиваем ее на новое фото, затем удаляем слой people-11-copy.
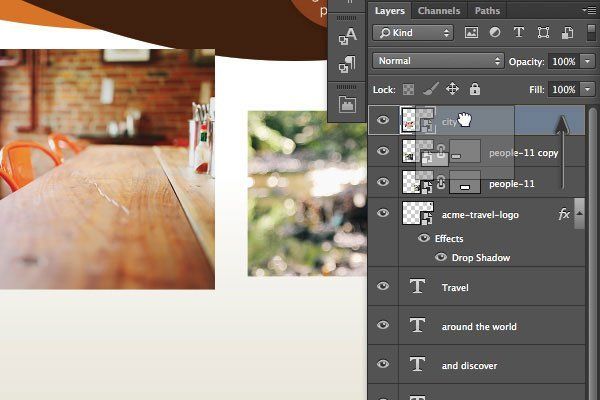
Шаг 10
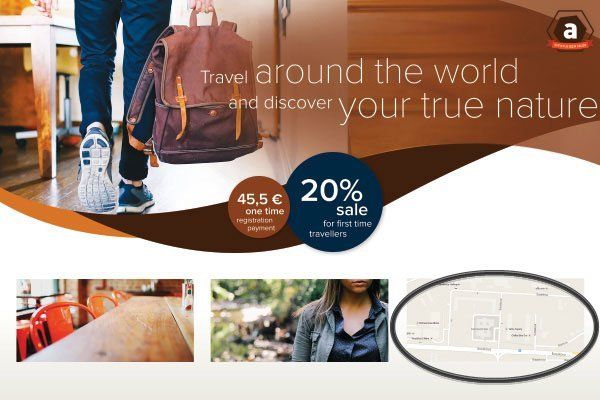
Повторяем шаги 7-9 и добавляем карту.
Шаг 11
Выделяем слой с картой и добавляем стиль слоя Stroke (Обводка).

Шаг 12
Размер обводки устанавливаем на 2 px. Меняем Position (Положение) на Inside (Внутри) и выбираем коричневый цвет (C=30 M=80 Y=100 K=30).

Добавляем текст внизу
Шаг 1
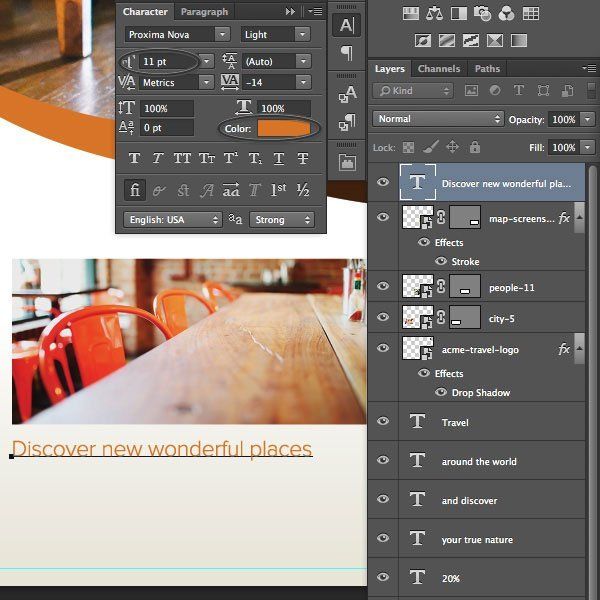
Используя Type Tool (T) (Текст) снова пишем текст. Размер — 11 pt, цвет — светло-коричневый (C=10 M=65 Y=100 K=0).
Шаг 2
Добавляем больше текста. Размер — 9 pt, Leading (Интерлиньяж) — 13 pt, цвет — серый (K=90).

Шаг 3
Добавляем еще два блока текста. Размещаем их под фото с девушкой и картой.

Шаг 4
Переходим File — Place Embedded (Файл — Поместить встроенные) и выбираем файл icons.ai. Появится диалоговое окно, в котором мы должны выбрать иконку календаря и нажать ОК.

Шаг 5
Уменьшаем иконку и размещаем ее у текста с картой.

Шаг 6
Импортируем остальные иконки и добавляем их к другим строкам текста.

Шаг 7
С помощью Type Tool (T) (Текст) пишем еще текст. Размещаем его над картой. Устанавливаем размер на 13 pt, Leading (Интерлиньяж) на 11 pt и цвет на светло-коричневый (C=10 M=65 Y=100 K=0).

Шаг 8
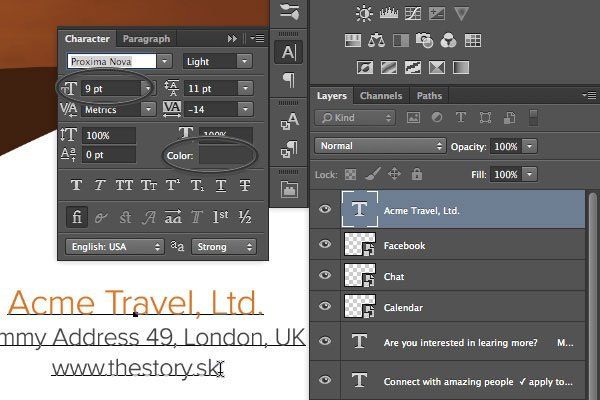
Пишем адрес. Размер — 9 pt, цвет — серый (K=90).
Шаг 9
Переходим File — Place Embedded (Файл — Поместить встроенные) и снова выбираем файл icons.ai. Импортируем иконку глобуса.

Шаг 10
Уменьшаем иконку и размещаем возле веб-адреса.

Шаг 11
Активируем Pen Tool (Р) (Перо) и создаем линию, чтобы показать направление движения на карте.

Шаг 12
На панели параметров устанавливаем Stroke (Обводка) на Dashed (Пунктир) и цвет на светло-коричневый (C=10 M=65 Y=100 K=0). Ширину обводки устанавливаем на 1.5 pt.

Шаг 13
Переходим в параметры обводки и жмем на кнопку More Options (Дополнительные параметры). Устанавливаем Caps (Концы) на Round (Закругленные), Dash (Штрих) и Gap (Интервал) на 3.

Шаг 14
Создаем новую окружность с помощью Ellipse Tool (U) (Эллипс). Устанавливаем цвет фигуры на коричневый (C=30 M=80 Y=100 K=30).

Шаг 15
Активируем Pen Tool (P) (Перо). Зажимаем клавишу Alt и кликаем по нижнему узелку. В результате этот узелок из плавного станет острым.

Шаг 16
С помощью Direct Selection Tool (A) (Частичное выделение) тянем узелок вниз.

Шаг 17
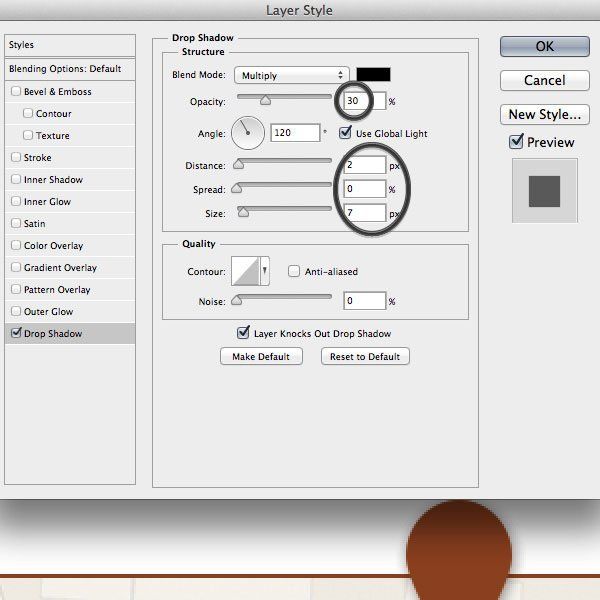
Применяем к маркеру стиль слоя Drop Shadow (Тень).
Шаг 18
В центре маркера рисуем еще одну окружность белого цвета.

Помните, что все работы, которые предназначены для печати, должны быть в цветовом режиме CMYK. Также не забывайте добавлять отступы по краям (минимум 3 мм с каждого края).
Автор: Robert Sarudy
Переводчик: Daewon
122 тыс. 44 Печать Жалоба