[7 Fixes] Error Compiling Movie in Premiere Pro in Various Cases
If you’re a video editor, you may have encountered the dreaded «Error Compiling Movie» message when trying to export your project from Adobe video editing software. This error message can occur in several different forms, including «Premiere Pro Error Compiling Movie,» «Adobe Media Encoder Error Compiling Movie Unknown Error,» «Error Compiling Movie Disk Full,» and many others. In this article offered by MiniTool video making software, we’ll discuss some of the common causes of these errors and offer some tips on how to resolve them.
#1 How to Solve Error Compiling Movie Disk Full
One of the most common causes of the “Error Compiling Movie” message is insufficient disk space. If your computer’s hard drive is full or nearly full, your video editing software may not be able to write the temporary files needed to export your project. To resolve this issue, try freeing up some disk space by deleting old files or transferring them to an external hard drive.
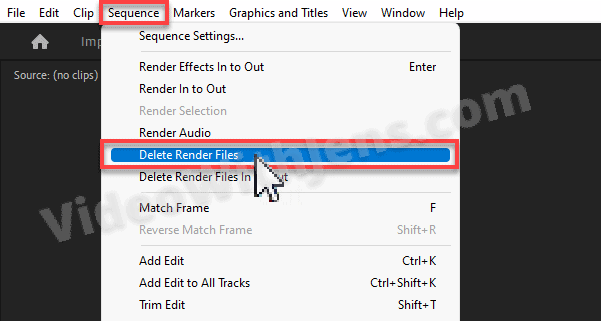
Another potential cause of this error message is a problem with the video preview. If you’re using Premiere Pro, try disabling the video preview by going to the Sequence menu and selecting Delete Render Files. This will clear out any preview files that may be causing issues.
![[Causes + Solutions] How to Fix Premiere Pro Export Error Code 3?](https://images.minitool.com/moviemaker.minitool.com/images/uploads/2023/03/premiere-pro-export-error-code-3-thumbnail.png)
[Causes + Solutions] How to Fix Premiere Pro Export Error Code 3?
What’s the “Premiere Pro export error code 3” problem? What are the possible reasons that may cause the issue? How to deal with this error?
#2 How to Fix Error Compiling Movie Export Error Error Completing Render
If you’re still experiencing the error message, you may want to try rendering your video using Adobe Media Encoder instead of Premiere Pro. To do this, right-click on your sequence in the Premiere Pro timeline and select Export > Media. In the Export Settings dialog box, select Queue to open Adobe Media Encoder. From there, you can choose the format and settings for your exported video and start the render process.
#3 Method for Premiere Pro Error Compiling Movie Accelerated Renderer Error
Additionally, some users have reported encountering the “Error Compiling Movie” message specifically when using GPU acceleration to render their videos. If this is the case for you, try disabling GPU acceleration in your video editing software and see if the error message still occurs. You can do this by going to the Preferences menu and selecting Media. From there, you can uncheck the option for “Enable accelerated Intel h.264 decoding (requires restart).”
#4 solution for Error Compiling Movie Render Error Render Returned Error
In some cases, the “Error Compiling Movie” message can also be caused by an error in the render process. For example, the “Error Compiling Movie, Render Error” message indicates that there was an error in the rendering process, and the “Render Returned Error” message indicates that the render process was unable to complete. If you encounter these errors, try changing the render settings, such as the bitrate or resolution, and see if the error message still occurs.
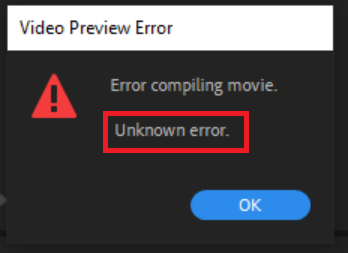
#5 How to Handle Adobe Premiere Error Compiling Movie Unknown Error
If you’re seeing an “Unknown Error” message when trying to export your video, it may be a problem with the source footage you’re using. Try importing your footage into a new project and see if the error message still occurs. If it does, try transcoding your footage into a different format or using a different clip altogether.
Fix Clipping Audio in Premiere Pro, Audition, Audacity, or Video
What is clipping or peaking audio? How to fix clipping audio in Adobe Premiere Pro? How to fix peaking audio in Adobe Audition or Audacity?
#6 Error Compiling Movie Software Render Error Fix
If you’re using a third-party plugin or effect in your project, it’s possible that this could be causing the “Error Compiling Movie” message. Try removing any third-party plugins or effects from your project and see if the error message still occurs. You can also try disabling all plugins and effects in your video editing software and see if the error message still occurs. If it doesn’t, try re-enabling the plugins and effects one by one to identify which one is causing the issue.
Another possible cause of this error message is a problem with the software itself. If you’re using an outdated version of your video editing software, you may encounter compatibility issues when exporting your project. Make sure to regularly update your software to the latest version to ensure the best performance and stability.
Other possible causes of the “Error Compiling Movie” message include problems with your graphics card or video drivers, conflicts with other software running on your computer, or issues with your computer’s RAM or CPU. It’s worth noting that the “Error Compiling Movie” message may not always indicate a problem with your video editing software. In some cases, it could be a sign of hardware failure or a corrupted file.
Lastly, it’s important to note that the “Error Compiling Movie” message can occur for a variety of reasons, and the solutions outlined in this article may not work for everyone. If you’re still experiencing the error message after trying these solutions, consider reaching out to the support team for your video editing software or seeking help from online forums and communities. By working with others who have experienced similar issues, you may be able to identify and resolve the problem more effectively.
How to Fix Distorted, Unwanted, and Low-Quality Audio in Premiere Pro?
How to fix audio in Premiere Pro like distorted audio, unwanted noise, or low-quality sound? You can do the fixing with Adobe Premiere Pro.
Another Way to Deal with Error Compiling Movie Problem
In addition to the above tries, one extra thing you can do is to give up Adobe Premiere Pro and turn to one of its alternatives such as MiniTool MovieMaker, an easy-to-use free Windows program that enables you to create a stunning video within a few clicks. All you need to do is to pick up a template that suits you and import your media files.
If you want to set every effect by yourself, you can start from scratch and pick up your favorite transitions, filters, texts, motions, stickers, as well as music. Many parameters are at your editing including the aspect ratio, saturation, contrast, brightness, playback speed, etc. of the video.
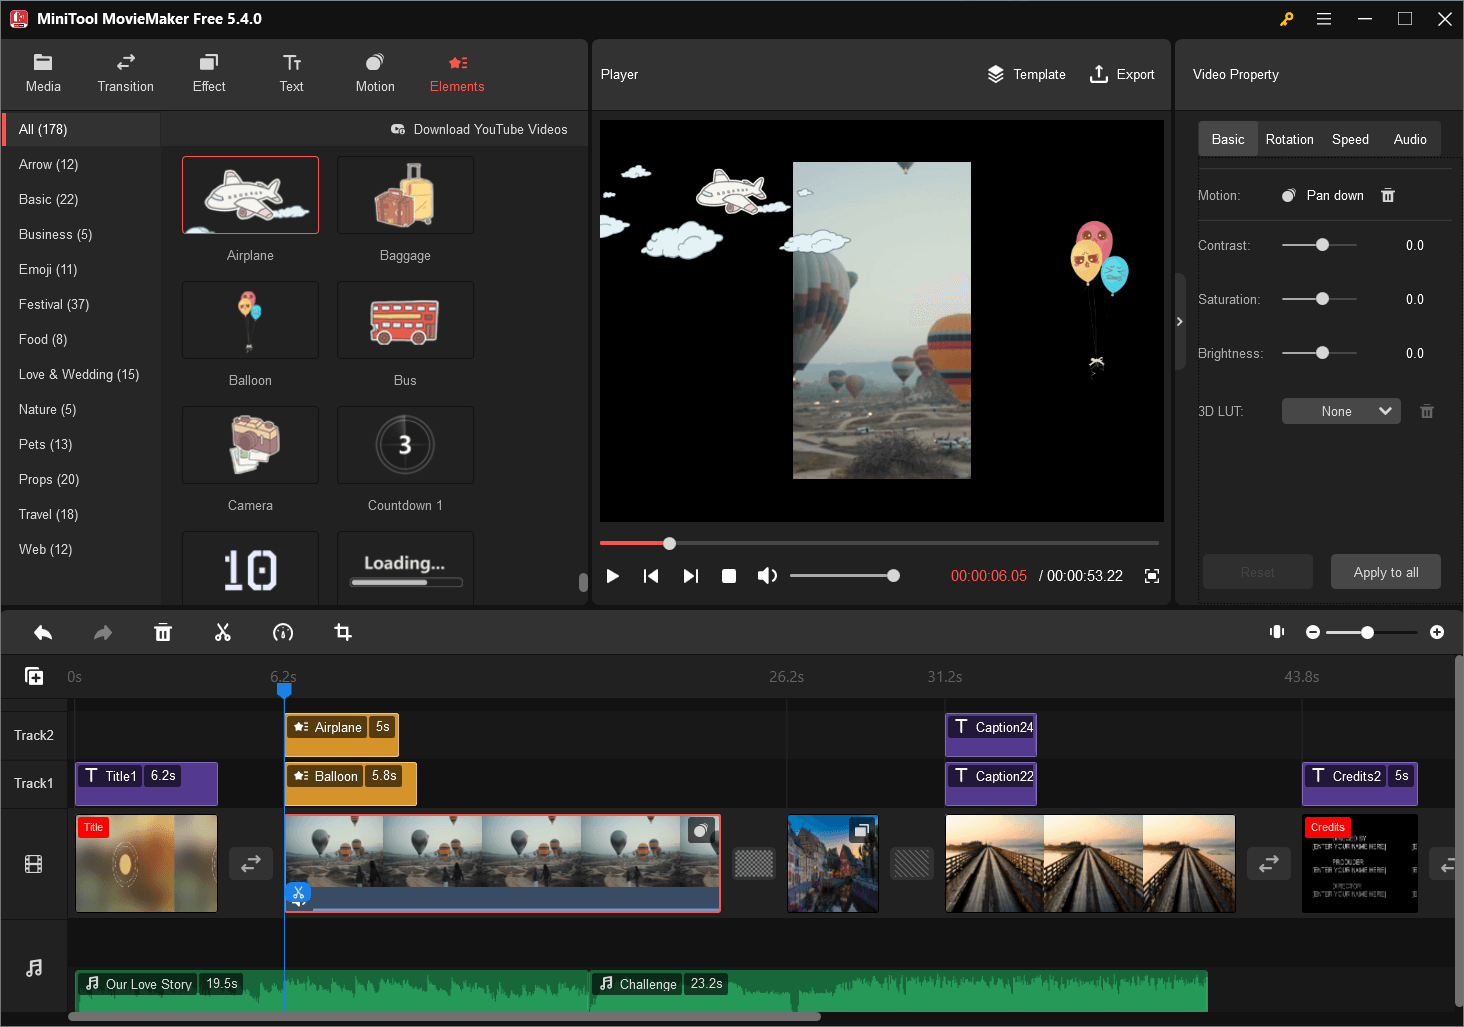
Besides, MiniTool MovieMaker supports export a video in various file formats and make it compatible with players on different devices like PCs and mobile phones.
Conclusion
In summary, the “Error Compiling Movie” message can be caused by a variety of factors, including insufficient disk space, problems with the video preview, issues with source footage or hardware, software compatibility issues, and errors in the render process. By following the tips and solutions outlined in this article, you should be able to identify and resolve many of the common causes of this error message. Remember to save your work frequently, make a backup copy of your project, and seek professional help if needed. With patience and persistence, you can successfully export your videos without encountering this frustrating error message.
Also Read
- Adobe Integrates Firefly AI Tool to Simplify Video Editing
- [7+1 Ways] How to Fix Adobe Media Encoder Error Code 3?
- 5 Ways to Fix Adobe Media Encoder Crashes When Rendering
- Adobe Media Encoder Not Activated & How to Get It for Free?
- [9 Ways] Fix Adobe Media Encoder Not Connecting to Project
About The Author
Helen Graduated from university in 2014 and started working as a tech editor in the same year. Her articles focus on video creation, editing, and conversion. She also has a good knowledge of disk management and data backup & recovery. Through an in-depth exploration of computer technology, Helen has successfully helped thousands of users solve their annoying problems.
5 Effective Ways To Fix “Error Compiling Movie Premiere Pro”
If you are a professional video editor then you might have encountered an “Error Compiling Movie. Unknown Error” while trying to compile or edit a movie in Adobe Premiere Pro. Well, it’s one of the dreadful error as when it occurs all your efforts and editing vanishes in a few minutes. But nothing to worry! Here are the few troubleshooting fixes applying which you can easily get rid of this problem.
So, let’s get started…….!
To fix corrupted, choppy, pixelated, jerky or grainy videos, we recommend this tool:
This software will repair flickery, stuttery, jerky, unplayable videos and supports all popular video formats. Now repair your corrupt and broken videos in 3 easy steps:
- Try this Video Repair Tool rated Great on Pcmag.com.
- Click Add File to add the video you want to repair.
- Select Repair to start the repair process and save the repaired video on the desired location after the repair is done.
What Does “Error Compiling Movie. Unknown Error” Mean?
“Error Compiling Movie. Unknown Error” is an error message that simply indicates that your video editing software fails to process your request of editing or compiling a video file in Premiere Pro. This unknown error will not let you edit or compile your movie or video file completely.
This error message can appear due to several unknown reasons. Some of them are mentioned here below.
Why Does It Say Error Compiling Movie Premiere Pro?
- Having insufficient storage space on your disk you’re trying to render your video file.
- Duplicate files might exist in the same location and with a same name.
- You might be using an outdated version of the Adobe Premiere Pro.
- Your video file name might contain some special characters in it.
- Due to the unsupported frame size of the video file.
Any of the above-listed reasons can cause this issue. After knowing the causes, now it’s time to learn the solutions to fix this issue.
How To Solve “Error Compiling Movie Premiere Pro”?
Here is the list of some of the troubleshooting fixes that will help you to fix Adobe premiere pro error compiling movie unknown error. No matter whether you are Windows or Mac user, these solutions will work in all scenarios.
List of Solutions:
- Re-launch the Adobe Premiere Pro
- Use the Latest Version of Premiere Pro
- Convert Video File Format To Fix Compiling Movie. Unknown Error
- Check the Name of Video File
- Remove the Effects & Special Features
#1: Re-launch the Adobe Premiere Pro
Since you are receiving the error while working on Adobe Premiere Pro, so firstly you should close and restart the Premiere pro to get rid of this problem.
Sometimes, continuous use of the Premiere Pro could lead to several kinds of errors and issues within the app that can be easily resolved by re-launching the Adobe Premiere Pro.
Before exiting Premiere Pro, make sure to save all your editing progress otherwise you’ll lose your entire progress. First of all, close the Adobe Premiere Pro, wait for some time then restart the software again.
#2: Use Latest Version of Premiere Pro
If you are using the older version of the premiere pro then you may encounter several kinds of error and bugs including error compiling movie Premiere Pro.
So, here I will suggest you to install the latest version of the Adobe Premiere Pro to deal with this issue.
Follow the step-by-step instructions to know how to do so:
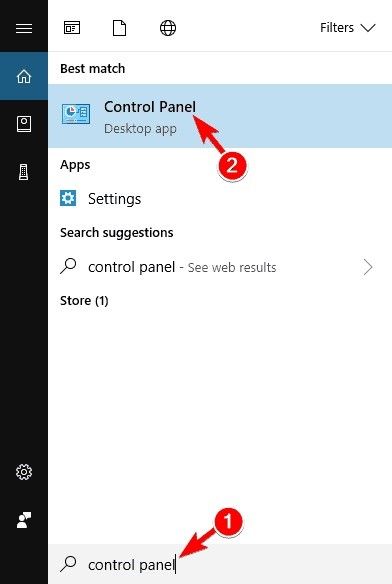
- First of all, you need to press Windows+ S keys together on your PC.
- Then, type control panel in a search box & click on the desired result to open it.
- Here, you need to choose view by Category then navigate to Programs and Features.
- Make a right-click on the Adobe Premiere software and select Uninstall.
Once the program is uninstalled successfully, restart your system then visit our official download page to install the latest Adobe Premiere software. After installing the program, just insert your licence key in order to activate your Adobe Premiere.
#3: Convert Video File Format To Fix Error Compiling Movie. Unknown Error
You can also try to fix the “Compiling Movie. Unknown Error” on Premiere Pro by changing the file format of your video file.
Sometimes, it happens that your Premiere Pro doesn’t support the specific file format because of which you are not able to compile or export your video clip.
In such a situation, you should convert the file format of your video to another format that has been widely supported by Premiere pro such as – MOV, AVI, and WMV.
#4: Check the Name of Video File
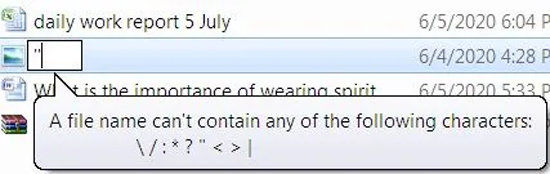
Sometimes, an inappropriate name for the video file could lead to such kind of errors and issues. So, here you need to make sure that your file name doesn’t contains any special characters (such as \ / : * ? < >|).
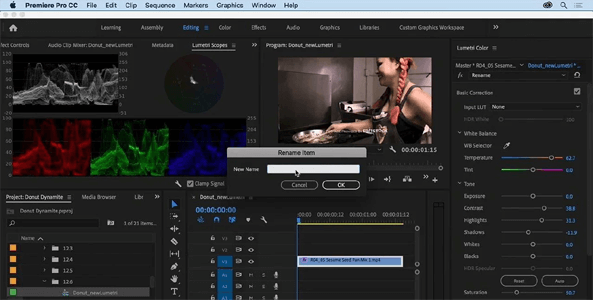
In case, you find some special characters are used in your file name then either try to remove it or rename your file to fix this error. This is because your system will not able to read the special characters involved in the file name.
#5: Remove the Effects & Special Features
Adobe Premiere Pro offers its users the most advanced effects & special features for movies or video editing. But sometimes these effects and special features can affect the rendering of video & can cause error compiling issues.
Therefore, if you have added some advanced effects or special features to your video file, try removing it to fix premiere error compiling movie unknown error.
After making these changes, save your video file then restart the Premiere Pro and try to compile the movie again.
Recommended Solution to Repair Corrupted/Damaged Video Files
Even after trying the above-listed fixes, if the error is not solved, there is a chance that your movie file is corrupted. In such a situation, you should choose the best Video Repair Tool to fix the corruption issue.
This tool will help you to repair all kinds of corrupted, damaged, broken, or inaccessible video files. It always has a user-friendly interface and is 100% safe to use. And the best thing is that, this software is available for both Windows and mac users.


* Free version of this program only previews repaired videos.
So, without wasting your time, quickly download this Video Repair Tool and fix your corrupted video file with ease.
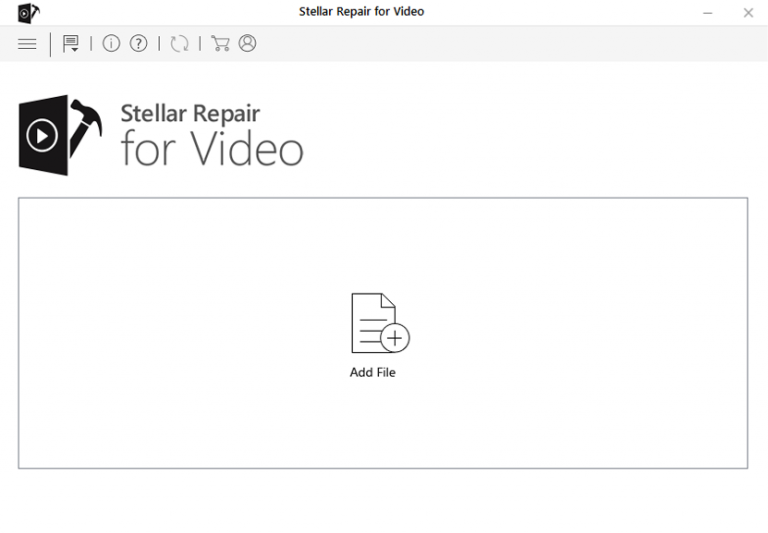
Step 1: Download, install and launch Video Repair software on your system. Click on ‘Add Files‘ to add corrupted video files.
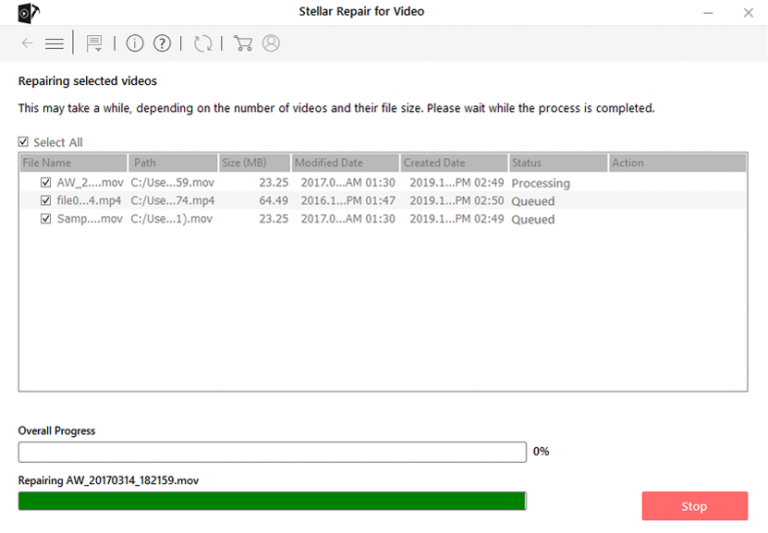
Step 2: Click on ‘Repair‘ button to begin the repairing process. This start repairing your added video files one by one.
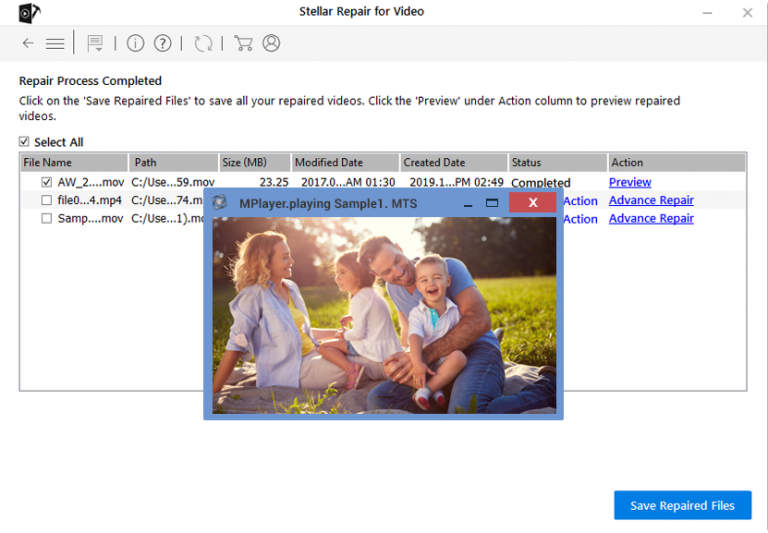
Step 3: You can click on ‘Preview‘, in order to preview the repaired video file within the software and click on ‘Save Repaired Files‘ button to save the repaired videos at desired location.
FAQs [Frequently Asked Questions]
Why Is My Video Not Rendering In Premiere Pro?
You may unable to render your video file in Adobe premiere Pro either due to corrupted or missing video files. To fix this issue, you need to find your missing video file then re-link it again.
What Video Format Should I Use For Premiere Pro?
Some of the supported file formats that you can use for Adobe Premiere Pro are AVI, MP4, WMV or TIFF.
Why Can’t I Import MOV Files Into Premiere?
Sometimes, you may fail to import your MOV files into Premiere Pro because some necessary codecs are missing from the video file or the video file is unsupported by Premiere Pro. By transcoding the MOV file via VideoProc Converter, you will able to import your MOV files into Premiere Pro.
How Do I Fix The Rendering Problem In Premiere Pro?
Whether it’s a common Premiere Pro issue or a rendering problem it can be easily solved by restarting the adobe Premiere pro software. All you need to do is, save your video file, close the program, and restart it again after sometime and your problem will be solved.
Time To Sum Up
It’s quite frustrating when you’re trying to compile, render or export your important video file and getting stuck with an Error Compiling Movie Premiere Pro. Luckily, there are a handful of ways that can help you to deal with this error.
In this article, I have gathered 5 tested and tried ways to fix error compiling movie Premiere Pro. If you are currently dealing with this error, then you must try out the given solutions one by one until and unless the error is fixed.
However, in case of video file corruption issue, you can use an advance Video Repair Tool. This tool will help you to fix all sorts of video related issues.


Taposhi is an expert technical writer with 5+ years of experience. Her in-depth knowledge about data recovery and fascination to explore new DIY tools & technologies have helped many. She has a great interest in photography and loves to share photography tips and tricks with others.
«Error compiling movie» during render or export in Adobe Premiere Elements
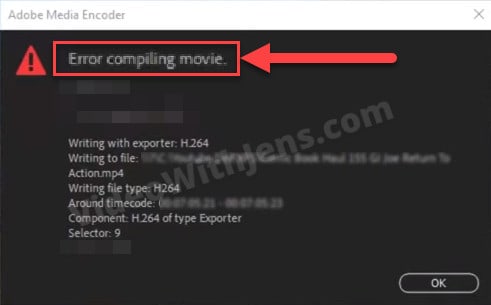
«Error compiling movie. Unknown error» when rendering or exporting
The error can be followed by this message:
«Sorry, a serious error has occurred that requires Adobe Premiere Elements to shut down. We will attempt to save your current project.»
This document is about Adobe Premiere Elements. For a related document about Adobe Premiere Pro, see this page.
Important: Always restart the computer after a problem occurs to refresh its memory. Continuing to work without restarting the computer can compound the problem.
Render the project timeline
Prerendering the project timeline helps you to detect and eliminate problems with particular project media or effects. If an error or problem occurs when you render the timeline, then troubleshoot the media or effect in the timeline. To render, ensure that the work area selection encompasses the entire timeline and under the Timeline pop-up menu, select Render work area.
Convert your file to DV AVI (Windows only)
If you are working with a file that is different from the rest of your footage, convert the file to the DV AVI format.
- Create an Adobe Premiere Elements project with the same settings as your clip.
- Import only the clip and add it to the timeline/sceneline.
- Click Export & Share and select Devices >Computer >720 X 480 resolution.
- Select AVI format from the Format dropdown list., type in a filename, and choose a location to save the file. Click Save.
- Open your original Premiere Elements project. Under the Project tab, right-click the original file and choose Replace Footage. Select the file created in step 4.
Remove irregular clips
This type of error is commonly caused by a particular clip in your project. Using footage that is different from most of your clips (for example, from a different camera, different format, different codec, different frame size, different frame rate), could be the source of the issue.
If possible, try removing such clips from your timeline or sceneline and render or export your project again.
Troubleshoot footage or assets used in the project.
- Open the project with the issue in Adobe Premiere Elements.
- Save your original project, and create a copy of it called test by choosing File > Save As and renaming the project test.
- In the test project, delete everything in the project from the halfway point to the end
- Click Export & Share tab and select Disc. Select the DVD or Blu-ray settings you want, select Disc from the Type dropdown list, and then click Burn:
- If the error happens again, repeat Steps 2, 3 and 4, testing again with the other (first) half of the content from the timeline.
- If the error no longer occurs, add back the clips that you removed in small groups and test after each addition. When the error happens again, one of the most recent clips added back to the timeline is the cause.
- Once you identify the problem clip, return to your original project and remove or replace the problem clip or file.
- Save the corrected version of the project and export it to DVD or Blu-ray disc.
Remove effects
Remove all of the following video effects from long clips:
- Auto Levels
- Auto Color
- Auto Contrast
- Shadow/Highlight
Auto Levels, Auto Color, Auto Contrast, and Shadow/Highlight are modified effects from Adobe Photoshop.
To remove a video effect, do the following:
1. Select the clip on the timeline/sceneline. Click Edit > Applied Effects panel to open it.

2. Click the Eye to disable the effect or right-click (Ctrl+click) the effect and choose Clear.
![]()
Quit any applications that could be interfering with the render process
If you are using GPU (your video adapter) based effects and transitions (all 3D effects and transitions use the GPU), then make sure that you do not use other GPU intensive applications. (Don’t use video games, screen savers, and so on.) Do not allow your system to be locked or hibernate while rendering the timeline or during export.
Use a different codec for your export
If you have customized your Share settings to use a third-party codec (changed by using the Advanced button of the Share settings), try exporting using one of Adobe Premiere Elements built-in presets.
Disable Auto Save
The Auto Save feature could interfere with the export process. Turn it off if you are experiencing problems when you export to your hard disk, DVD, or tape.
To disable Auto Save, do the following:
Premiere Pro “Error Compiling Movie” Solved by Adobe Expert

Unable to export or render in Premiere Pro? Doing so results in the message “Error Compiling Movie”?
If so, you are not alone.
Contrary to what many say, no solution will work for everyone.
This is because the “Error Compiling Movie” is not a specific error but more of a category name for many export/render-related errors.
Down below, you’ll find the most common errors in this category:
Here’s a video version of the article:
Error Code 4
If you are facing this error, you are in luck! As this is usually a quick fix.
The error code 4 means that you are out of disc space, or in other words, there is not enough disc space for the render/export to complete. So you need to free up disc space.
However, instead of just deleting a bunch of precious files on your storage unit, there may be some better ways to do it:
- Delete Media Cache (builds up over time).
- Export to another Drive.
- Free Up Space on Your Drive.
- Change Media Cache Location.
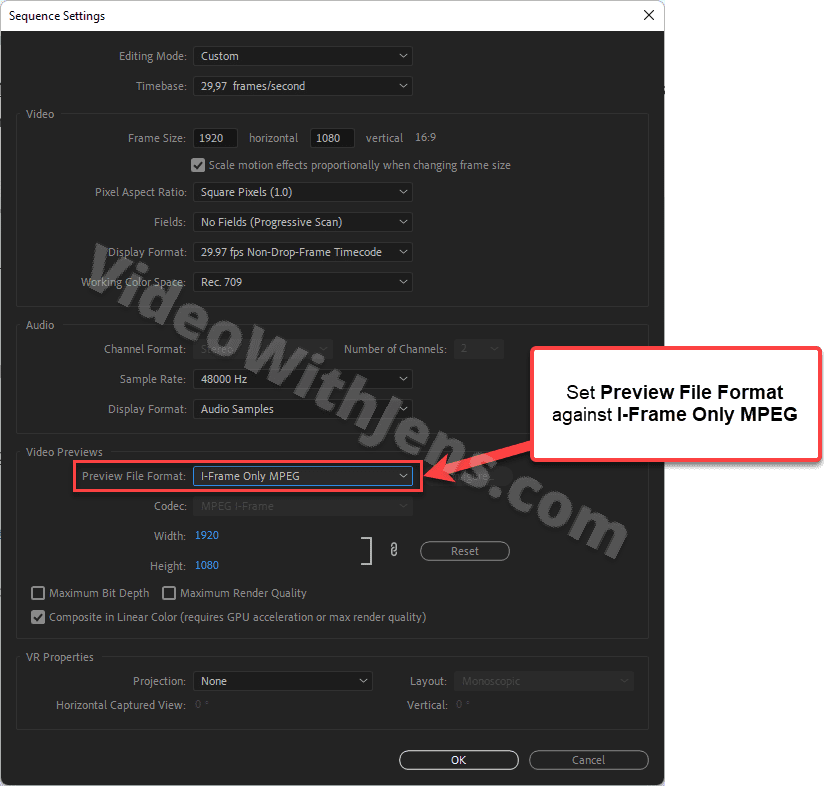
Error Code 19
Most frequently seen when rendering the sequence/trying to create video previews.
To fix this error click on Sequence > Sequence Settings, and set the Preview File Format against I-Frame Only MPEG > click OK.
Error Code -1609629690, Accelerated Renderer Error
This accelerated renderer error is commonly seen when your GPU has too much to handle.
However, it’s also seen as due to bugs or a corrupted sequence. In the Adobe community, users reported that closing all applications and services from Adobe Creative Cloud has fixed the error.
To check if the latter solution works for you, do as follows:
- Close Premiere Pro.
- Open the Task Manager (Windows) or the Activity Monitor (macOS).
- Close all applications and services from Adobe Creative Cloud.
- Applications like Premiere, Photoshop, etc.
- The services usually have the same logo.
- Launch Premiere Pro.
- Click on File >Project Settings >General, and set Renderer against CUDA, Metal, or Open CL.

Error Code -1609629695, GPU Render Error
This error is related to graphics card issues. However, why it happens is heavily debated on various forums across the internet.
Thus, it’s also come up with creative ways of solving it.
The most popular solution is to copy the clips to a new sequence.
Here’s a quick guide on how to do it:
- Select the timeline panel by clicking on it.
- Click on File >New >Sequence, and choose the correct settings.
- Press the keyboard shortcut “Ctrl/Command + A” to select all clips (old sequence), and press “Ctrl/Command + C.”
- Open the new sequence, and press “Ctrl/Command + V” to paste the clips.
- Adjust audio levels if necessary.
General Solutions to Solve “Error Compiling Movie”
Test the solutions below if you cannot find your error in the list above.
These solutions have worked for thousands of users getting the “Error Compiling Movie.”
1. Restart Your Computer
Obvious, yes. Effective, yes.

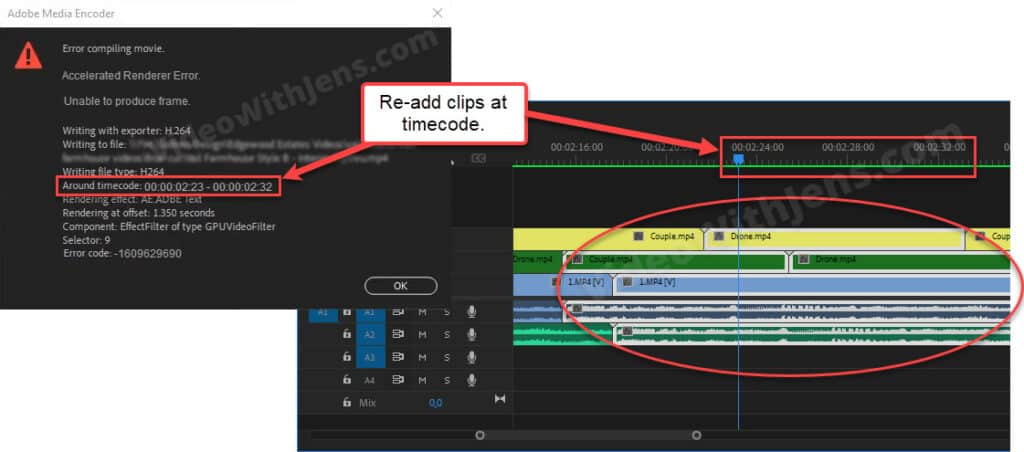
2. Check the Timecode
These error types usually include a timecode, which tells you where the error was triggered.
The timecode gives you valuable information, making it easier to troubleshoot.

Check the sequence where the error was triggered. Are there any particular elements that stand out?
Things to look for:
- Corrupt clip: is there any clip that starts around the time code? If so, you may try to re-add it, and if that doesn’t work, transcode it to ensure it’s not corrupt.
- Unsupported Media: Ensure the clip has the correct format, codec, framerate, resolution, etc.
- You should also make sure it does not have a variable frame rate.
- Ensure the filename does not have any special characters.
- Transcode the image using professional software.
That’s just some examples of things to look for.
If you can’t find anything special, some users have reported that simply re-adding all clips located at the timecode solved the error. You could also try to transcode the clips to ensure they have all the correct settings.
3. Copy Clips to a New Sequence
This solution has done wonders for a lot of people, not only to fix this error but all kinds of errors.
The reason is that it’s a quick way of fixing a corrupt sequence, which happens from time to time.
Click on File > New > Sequence > Choose Sequence Preset > Click OK.
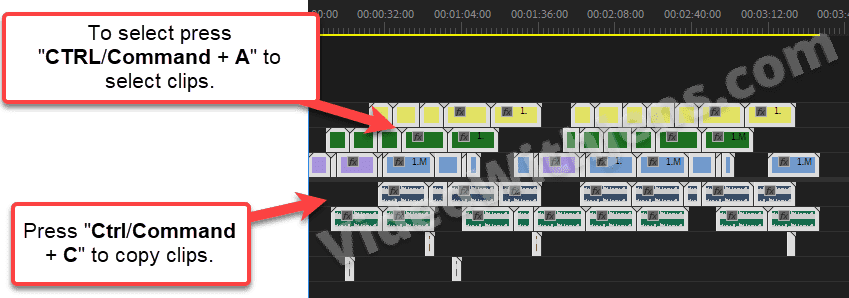
Select the timeline panel, and open the old sequence.
Then press “Ctrl/Command + A” to select clips and “Ctrl/Command + C” to copy them.
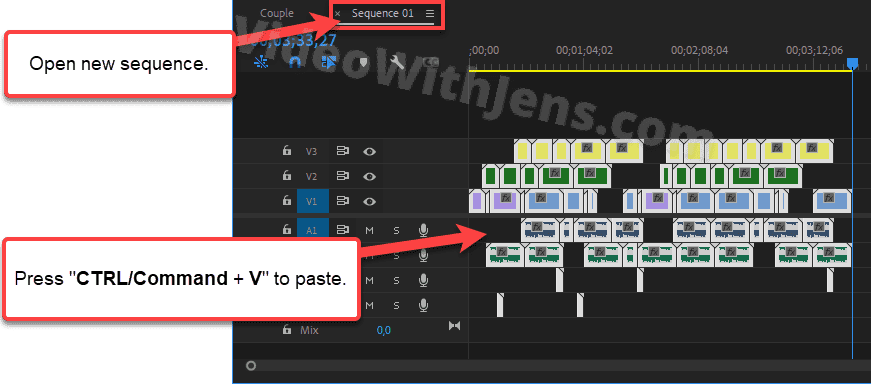
Next, open the new sequence, and press “Ctrl/Command + V” to paste the clips.
NB : You might have to re-adjust the audio levels.
4. Use Software Encoding
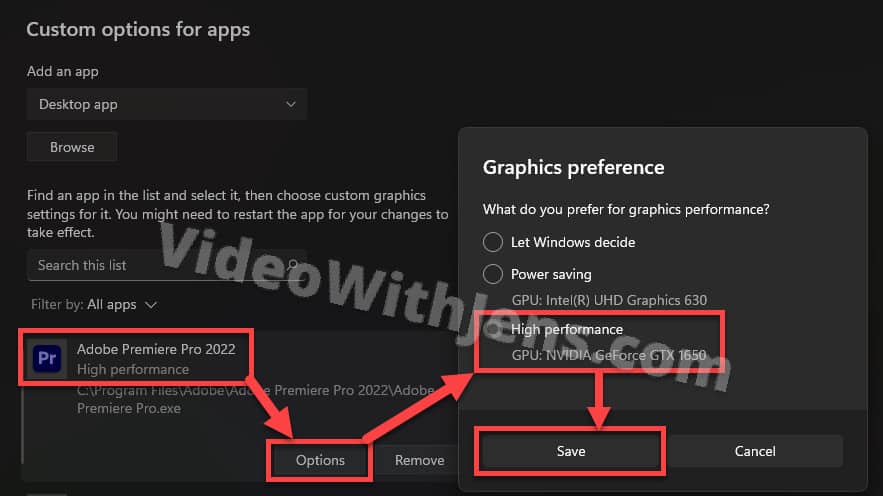
Since this error often happens because of the GPU, rendering/exporting without it using only the CPU should solve the error for many of you.
This is more of a workaround than a solution since we basically ignore the issue. It will also result in increased render/export times.
However, it might be worth doing this if you are in a hurry.
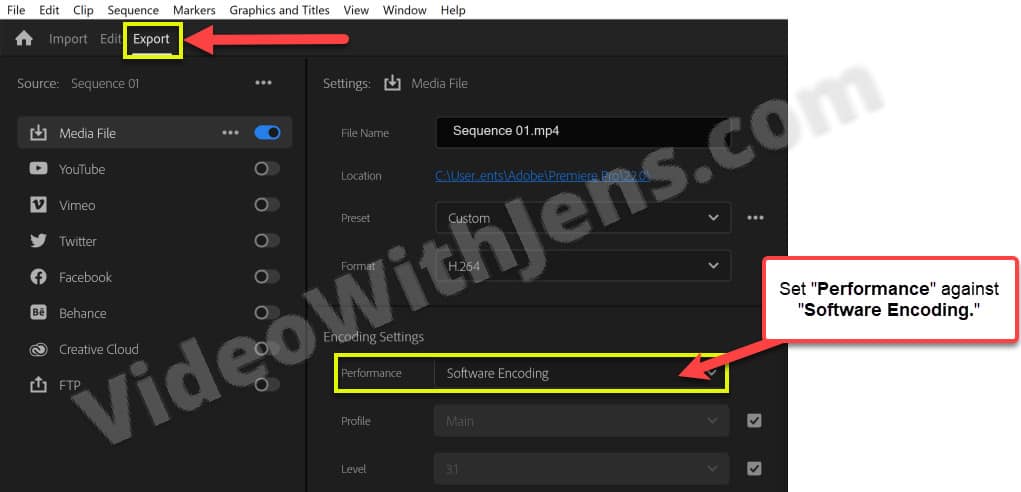
If the error happens when you are exporting the project from Premiere Pro, set the Performance against Software Encoding, located under Encoding Settings in the export tab:
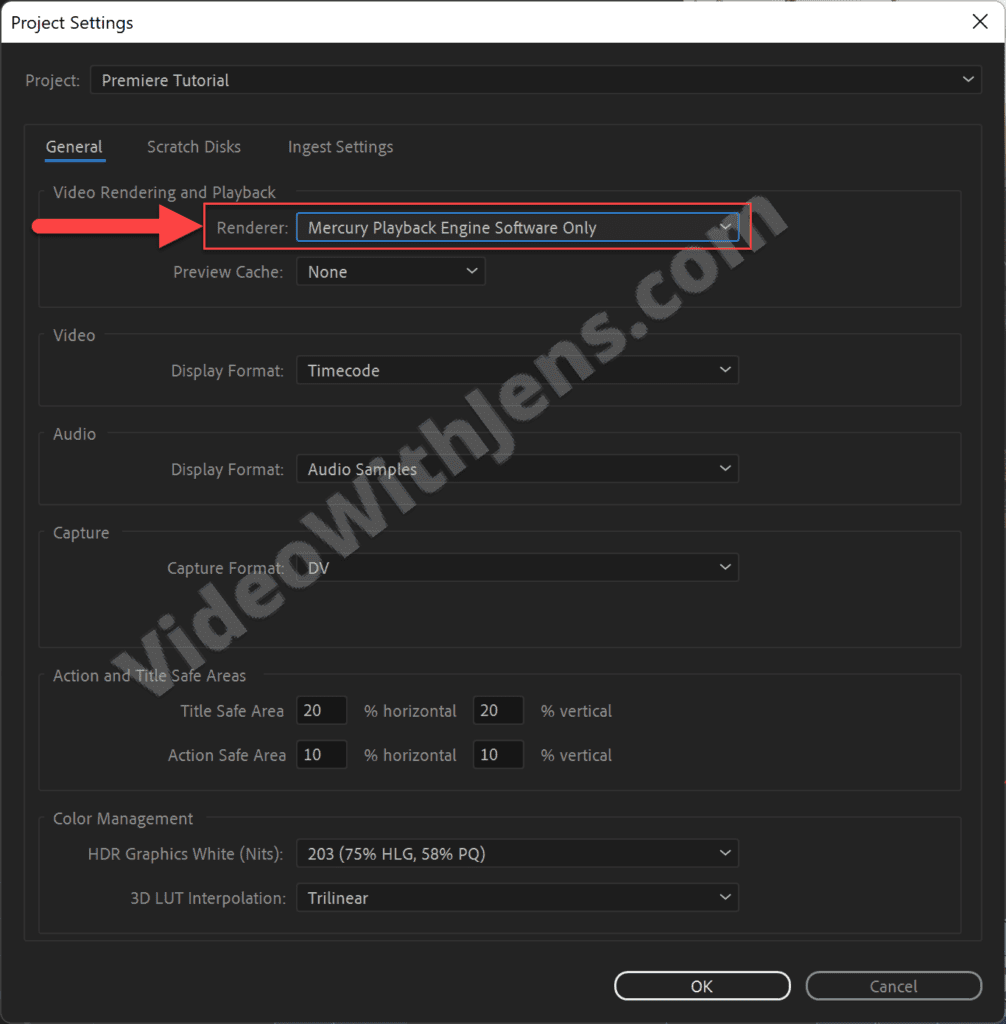
If the error happens when rendering the sequence, click on File > Project Settings > General, and set Renderer against “…Software Only.”
If the error still pops up, click Edit > Preferences > Media, uncheck Hardware accelerated decoding, and restart Premiere Pro.
Once that’s done, try to render!
5. Smart Rendering
Smart rendering is reported to work if you cannot export from Premiere Pro.
It will not work if you cannot render, as this solution depends on it; in that case, skip to the next solution.
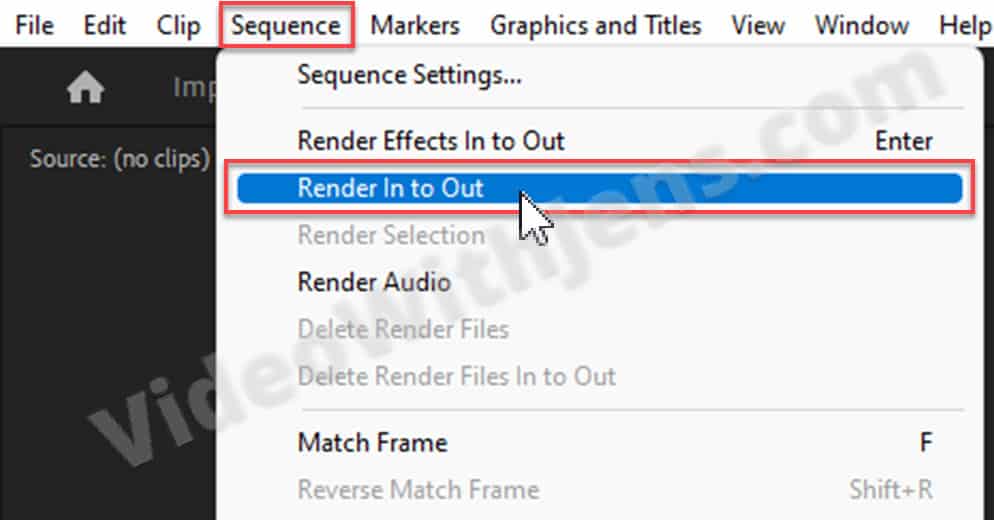
Select the Timeline Panel, click on Sequence > Render In to Out, and wait for it to finish:
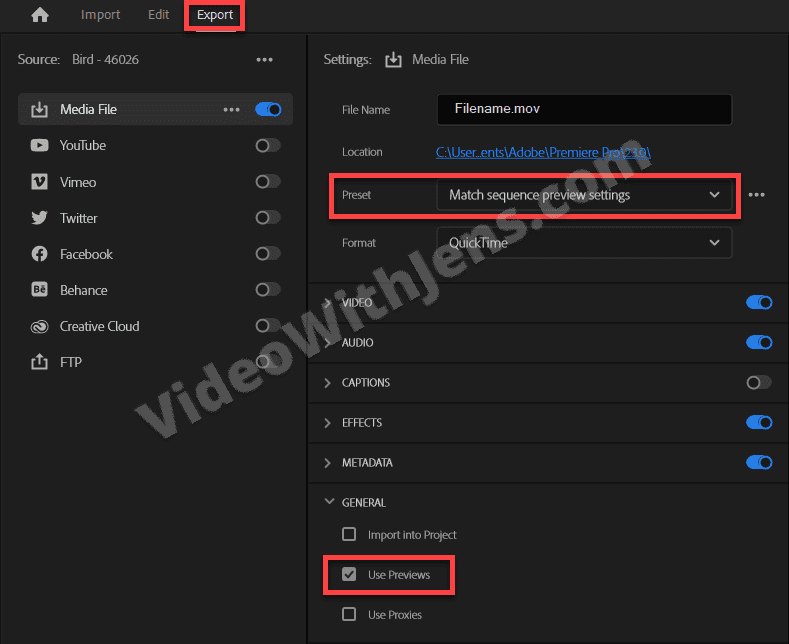
Next, head over to the Export tab, set Preset against Match sequence preview settings, and enable the option Use Previews:
6. Delete Rendered Files
If you already use the smart render feature (exporting video previews), deleting them might solve the issue.
The reason is that these files can become corrupt. Therefore, try exporting without them or creating new ones.
Click on Sequence > Delete Render Files:
7. Update or Downgrade Premiere Pro
Each Premiere Pro update is known to fix bugs and errors, and thus you should make sure the software is up-to-date.
7.1 Update Premiere Pro
Open the Adobe Creative Cloud application, go to Apps > Updates, and click on the Update button next to Premiere Pro.
If you can’t see it, you’re probably already up-to-date.

7.2 Downgrade Premiere Pro
If you did not encounter the error in the previous version of Premiere Pro, it might be worth doing a “rollback” to that version.
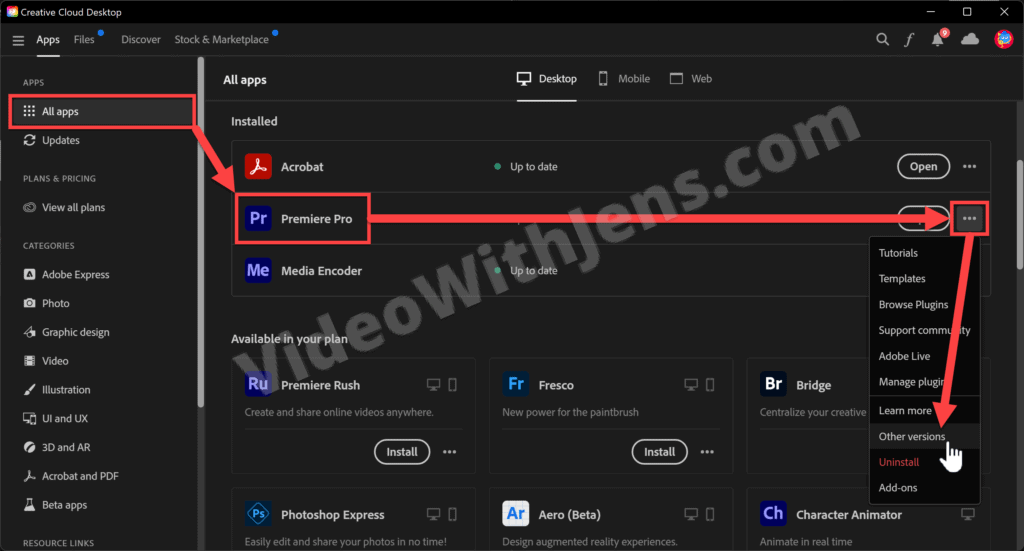
To downgrade the software, click on All apps (inside Adobe Creative Cloud), and then click on the three dots next to Premiere Pro.
In the drop-down menu, click “Other versions” and choose the previous version (or the version where you had no problems).
8. Export Part of the Project
Exporting part of the project may sound a bit weird; however, many people have found this to solve the error.
If you have applied a bunch of effects and color adjustments to your clips, that can become quite heavy for your GPU to handle.
So to lift some weight off it, we export the video in two parts.
For example:
- Remove effects or color grading from the video and export it.
- Import the export file to a new sequence.
- Re-apply effects or color grading and then export again.
As shown above, I recommend making a duplicate timeline before removing the effects in case it doesn’t work.

9. Additional reading
Another great read to deal with this error is by Kevin Monahan from Adobe; here’s a link to his post.
Check out this complete list of solutions to the most common errors in Premiere Pro.
- TIP: Bookmark the list to solve errors quickly in the future!