How To Group In Canva (Desktop & Mobile)

When you have a bunch of elements in your design that need similar formatting, grouping them will make your life much easier. In Canva, grouping your elements is as easy as pressing a button and can save you hours of time in the long run.
So let’s walk through exactly how to do it together in Canva desktop and mobile so you can start working more efficiently on all your future projects.
Table of Contents
How To Create A Group In Canva
If you’ve never created a group in Canva, don’t worry. The process is super simple, and you’ll be a master at it in no time.
Step 1: Visualize What Your Design Should Look Like
Before you start grouping elements and moving them around, take a few seconds to think about which elements you want to be grouped.
When working on a big project with many elements, planning things out at the beginning is better. This way, you won’t need to ungroup elements later and deal with a complicated mess.
You don’t have to visualize your design just in your mind. You can move elements, such as vertical text or graphics, around on your Canvas to help you.

As you move your elements around, you can use the guides that pop up to help guide you.

Step 2: Lock The Background
With your general layout in mind and knowing which elements you’d like to group, lock the background, so you don’t accidentally make changes when selecting elements.
To lock the background, click on your background element(s), then click on the Lock icon in the screen’s top right corner.
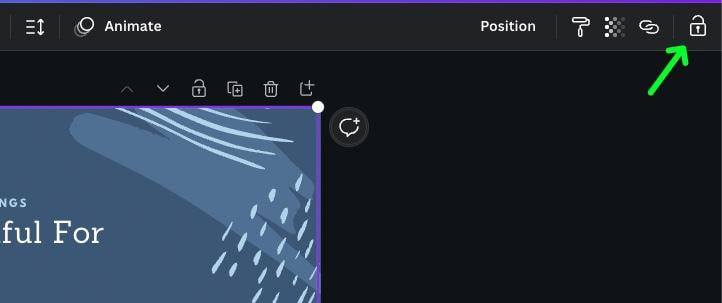
Pay close attention when you click the Lock icon. The first time you click the icon, you will enter a mode that only allows you to replace content. This is different from locking the background.

Click the Lock icon again to lock the element officially. You will know it’s locked when you see a Locked lock icon.

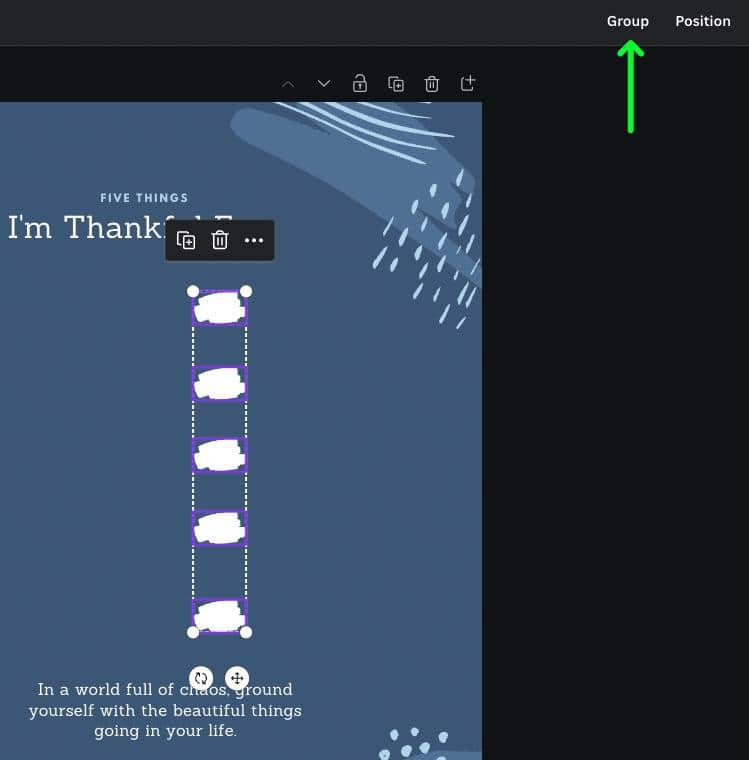
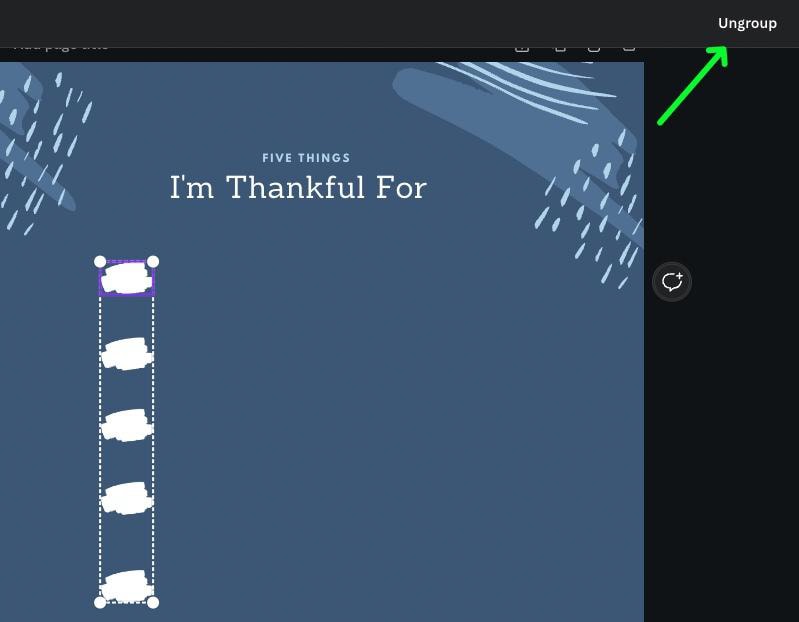
Step 3: Select Your Elements
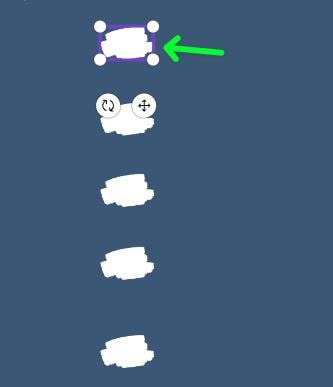
With the background locked, you can drag your mouse over the elements you wish to group. Doing this will temporarily group the elements you’ve selected.

You will know that your elements are temporarily grouped by the white bounding box that surrounds the elements.

You can also temporarily group your elements by clicking on your first element, holding down the Shift Key, then clicking the rest of the elements to select them temporarily.
Step 4: Click The Group Button
Once you have your elements selected, it’s now time to make your group official.
Click on the Group button. This will form all of your selected elements into a single component. You will know that you did this correctly when you see a purple bounding box surrounding your new group.
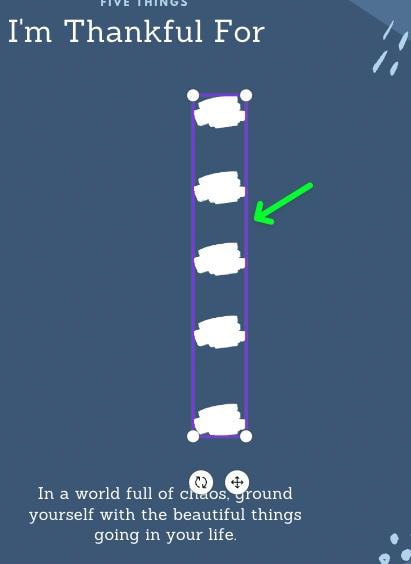
You can now move this element around your design by selecting any piece of it and dragging it around.
You can move this grouped element at any time as you work on your design.
Step 5: Unlock The Background
If you plan to make changes to your background element(s), hit the Lock icon in the top right corner to unlock it.


How To Temporarily Group Elements In Canva
In Canva, you can quickly move a collection of elements with a temporary group selection.
To “temporarily group” your elements, first lock any background elements you don’t want to end up in your temporary selection. You can do this by selecting your elements, then clicking the Lock icon.


With your background secure, you can drag your mouse over your elements.


You will know that your elements are temporarily selected if you see a white bounding box around each element. The purple boxes represent the edges of the individual elements when working with graphics.
You can now freely move your temporary selection however you wish. Click anywhere else on your canvas to deselect your temporary selection. This is useful for moving multiple things at once without committing to a group that will stay connected.

How To Ungroup Elements In Canva
Grouping your elements doesn’t mean that your elements are glued together forever. You can ungroup your elements at any time with the Ungroup button.
To do this, first, click on any part of your grouped element. You will see one single bounding box around the entire element.

Once your element is selected, click on Ungroup in the top right corner of your screen.
Your grouped element is now successfully ungrouped.
To confirm that this worked, click on the first element and then the last element and see if each one has a separate purple bounding box.

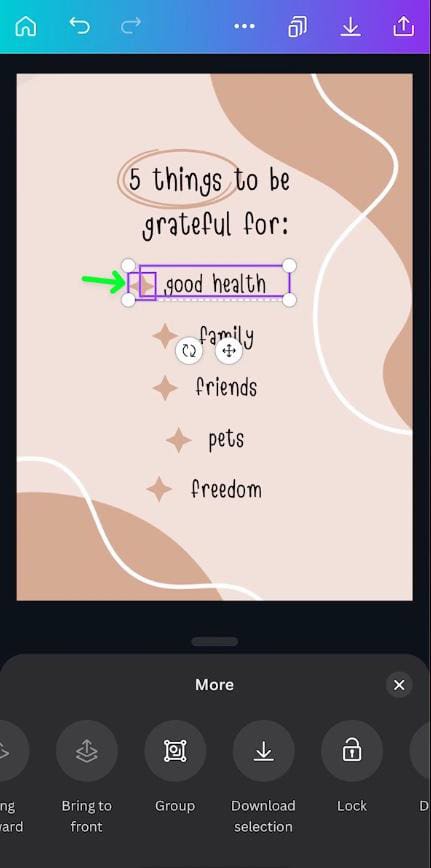
How To Group & Ungroup In Canva Mobile
Grouping elements to make your life easier is not exclusive to the desktop version of Canva. You can easily group elements on your phone, too, using the Canva mobile app.

One of the reasons it’s so easy to group elements in Canva Mobile is the Move button. When you tap on any element in Canva Mobile, a Move button will appear below the element.
Tap and hold on to the Move button to drag your element around. This is much easier than grabbing onto the element itself, especially if the element is the same size or smaller than your finger.
Use the Move button to position the elements you wish to group closer to each other.

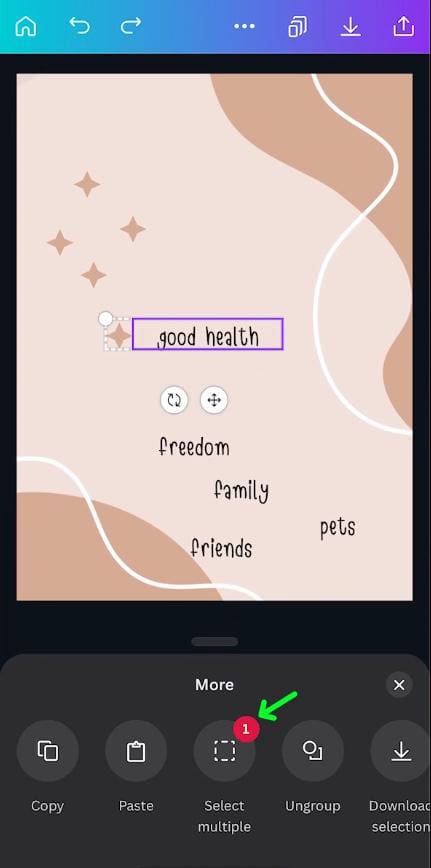
Once your elements are in place, tap on one of them and tap the Three Dots that pop up.
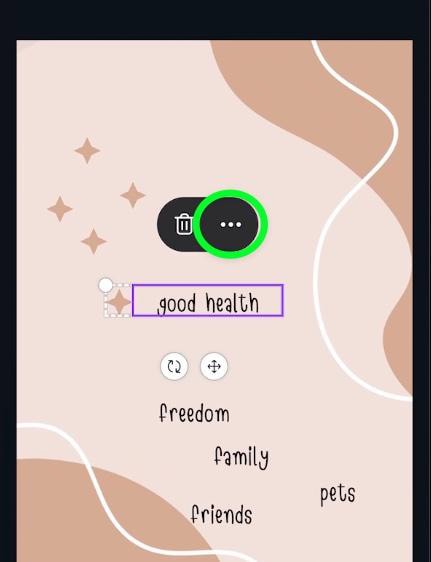
In the Options Menu, you can now tap on Select Multiple.
You will see the number 1 displayed in a red bubble.

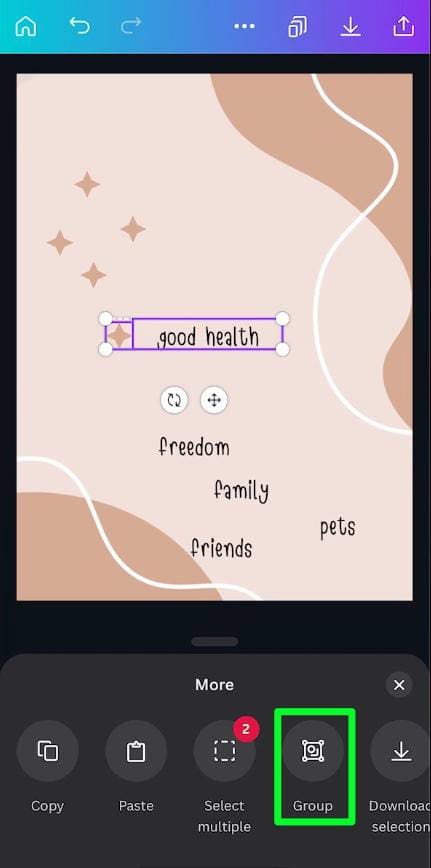
Tap and hold onto the element you want to add to the group. When the element is added, you will see two things:
- A purple bounding box around the newly selected element.
- The number in the red bubble now reflects how many elements you have selected.
Repeat this process as many times as you need to.
Note: This is considered temporarily grouping your elements. This is useful when moving elements elsewhere without making an official group. If you don’t plan on making an official group out of this collection of elements, then skip the next step.

Once you’re done adding elements to your selection and you want to make your selection an official group, tap on the Group button. This will merge all of the elements into a single component.
You will know the grouping works when the same purple bounding box surrounds both elements.

You can move your grouped element around your design as much as you need.
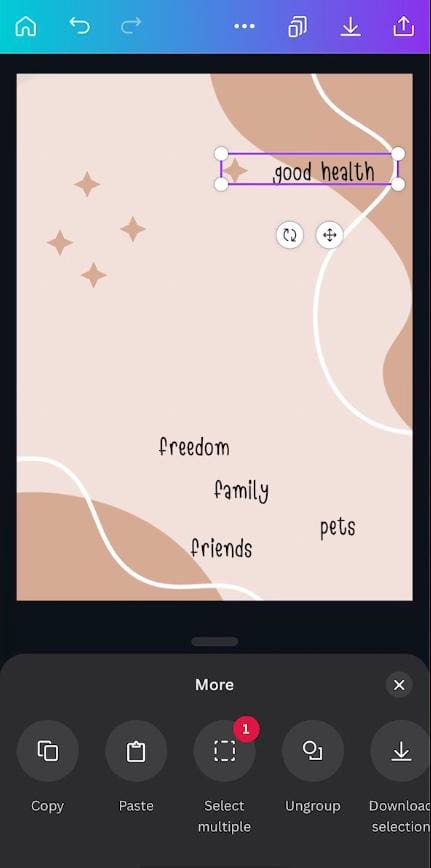
Repeat this process as needed to form your overall design.

If, for whatever reason, you need to ungroup one or more of your elements, first tap on the grouped element to open the Options Panel below your canvas. Then, tap on UnGroup.
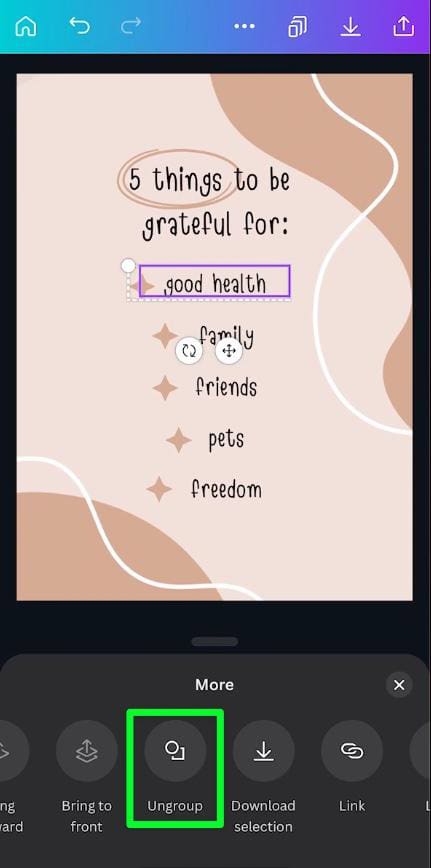
Once you ungroup your element, you will have two separate elements with two separate purple bounding boxes.
You can now make any changes that you need to.
Grouping is by far one of the easiest time-saving tactics you can use when working in Canva, and it’s saved me hours of time over the last few years. I hope it can do the same for you now that you know exactly how to do it!
Что происходит, когда вы удаляете члена команды из Canva?
Canva как платформа для дизайна используется предприятиями и частными лицами по всему миру для создания красивых дизайнов. Но что происходит, когда вы удаляете члена команды из Canva?
Когда вы удаляете члена команды из Canva, он больше не будет иметь доступа к вашей учетной записи или к любым созданным вами дизайнам. Если вы поделились с ними какими-либо дизайнами, эти дизайны будут удалены из общего доступа, и они больше не смогут их редактировать или просматривать.
СОВЕТ: Если вы удалите члена команды из Canva, он больше не будет иметь доступа ни к одному из дизайнов или активов в вашем аккаунте. Они также будут удалены из всех общих папок и проектов.
Вам нужно будет переназначить все проекты, над которыми они работали, другому члену команды.
Если вы делились с ними какими-либо шаблонами, вам нужно будет снова поделиться ими с новым членом команды.
В целом, удаление члена команды из Canva не является сложным процессом. Однако важно помнить, что у них больше не будет доступа к вашим проектам и шаблонам. Вам нужно будет переназначить все проекты, над которыми они работали, и поделиться шаблонами, которые вы им предоставили.
Вывод: Удаление члена команды из Canva — процесс несложный, но важно помнить, что у него больше не будет доступа к вашим проектам и шаблонам.
Как работают команды Canva?
Если вы похожи на большинство людей, вы, вероятно, используете Canva для создания простых изображений для социальных сетей или для быстрого создания мемов. Но вы можете не знать, что в Canva есть целый набор инструментов, предназначенных для бизнеса, включая команды. В этой статье мы рассмотрим, как работают команды Canva и какую пользу они могут принести вашему бизнесу.
Во-первых, давайте рассмотрим, что такое команды Canva. Команды Canva — это группы людей, которые имеют доступ к общей библиотеке активов.
Это означает, что все члены команды могут использовать одни и те же фотографии, шрифты, логотипы и другие элементы дизайна. Это очень удобно для компаний, поскольку помогает создать единообразие во всех маркетинговых материалах.
Еще одно преимущество использования команд Canva заключается в том, что это облегчает совместную работу над проектами. Например, если вы работаете над дизайном флаера, вы можете поделиться им со своей командой и получить их отзывы, прежде чем публиковать его. Таким образом, вы можете быть уверены, что все довольны конечным продуктом.
Итак, как создать команду Canva? Во-первых, вам нужно создать бесплатный аккаунт на сайте www.com. После этого перейдите на вкладку «Команды» в верхней части страницы, а затем нажмите «Создать команду».
ПРО СОВЕТ: Canva Teams — это функция, которая позволяет предприятиям и организациям создавать команды пользователей Canva и управлять ими. Эту функцию можно использовать для совместной работы над дизайном, обмена шаблонами и т.д. Однако важно отметить, что Canva Teams — это платная услуга по подписке. Если вы не являетесь платным подписчиком, вы не сможете получить доступ к этой функции.
Затем вам будет предложено ввести основную информацию о вашей команде, например, ее название и описание. Как только вы это сделаете, нажмите «Создать команду».
Теперь, когда ваша команда создана, пришло время добавить ее членов. Для этого перейдите на вкладку «Участники», а затем нажмите «Пригласить людей». Затем вы можете ввести адреса электронной почты людей, которых вы хотите пригласить, и добавить их в свою команду.
После добавления членов вашей команды они смогут получить доступ к вашей общей библиотеке активов и начать сотрудничать с вами над проектами.
Вывод:
В заключение хочу сказать, что команды Canva отлично подходят для предприятий, поскольку они помогают создать единообразие во всех маркетинговых материалах. Они также просты в настройке и использовании, что делает их идеальными для компаний любого размера.
Как изменить команду в Canva?
Будучи пользователем Canva, вы можете столкнуться с необходимостью время от времени менять команды. Есть несколько различных способов сделать это, в зависимости от вашей конкретной ситуации.
Если вы являетесь владельцем команды, вы можете просто удалить команду, перейдя на страницу настроек команды и нажав на кнопку Удалить команду. Это приведет к полному удалению команды из Canva, и все члены команды также будут удалены.
СОВЕТ: Если вы планируете сменить команду в Canva, имейте в виду, что прямого способа сделать это не существует. Вам нужно будет удалить свой аккаунт, а затем создать новый с правильной информацией о команде. Перед удалением аккаунта обязательно создайте резервную копию всех работ или данных, которые вы не хотите потерять.
Если вы не являетесь владельцем команды, но по каким-либо причинам вам необходимо покинуть команду, вы можете сделать это, перейдя на страницу настроек аккаунта и нажав на кнопку «Покинуть команду». Это удалит вас из команды, но сама команда останется нетронутой.
Наконец, если вам нужно сменить команду, не выходя из текущей, вы можете сделать это, перейдя на страницу Сменить команду и выбрав команду, к которой вы хотите присоединиться, из выпадающего меню. Это добавит вас в новую команду, при этом вы останетесь членом своей текущей команды.
Заключение:
Как сменить команду в Canva?
Вы можете изменить команду в Canva, удалив ее полностью (если вы являетесь ее владельцем), покинув ее (если вы не являетесь ее владельцем) или изменив команду, не покидая текущую.