Minecraft: как сделать свой текстур пак
Для создания собственного пакета текстур в Minecraft не нужно обладать особыми навыками, но нужно скачать несколько утилит и программ. Первым делом вам понадобится любой архиватор, вроде WinRAR или 7-zip. А также приложение для редактирования картинок: Adobe Photoshop, GIMP или Krita — не так важно, какое именно.
С помощью этого набора инструментов вы сможете изменить любой существующий пак или собрать свой с нуля. Читайте дальше и узнайте, как извлечь оригинальные текстуры из Майнкрафта, как создать свой собственный пакет и как получить доступ к новым текстурпакам в самой игре.
Как найти файлы текстур из Майнкрафт
Перед созданием своего ресурс-пака достаньте оригинальные текстуры игры. Так вы сможете изменять их на свой вкус, а не рисовать каждый предмет с нуля. Сделать это не сложно. Мы подготовили подробную инструкцию на 4 легких шага.
Шаг 1: Каталог Minecraft
Для начала откройте корневую папку игры. Сделать это можно одним из трех способов.
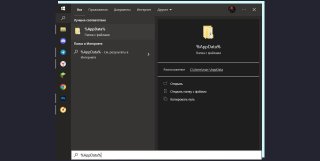
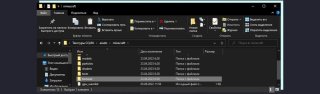
- ДляWindows. Откройте строку поиска на Панели задач и введите в нее «%AppData%». В открывшейся папке найдите другую — «.minecraft».
- ДляMac. Разверните Finder и кликните на «Перейти» в верхнем меню. С помощью опции откройте библиотеку и найдите в ней «Поддержку приложений». В этой папке отыщите «minecraft».
- ЧерезMinecraft. Запустите игру и выберите «Параметры» на стартовом экране. Нажмите на «Пакеты ресурсов», а после «Открыть папку для просмотра ресурсов».
Шаг 2: Поиск версии игры
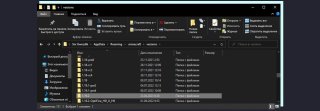
Теперь найдите в «.minecraft» папку «versions». В ней хранится вся информация по любым версиям игры, которые вы запускали ранее. Выберите последнюю из них (или любую, нужную вам). К примеру, 1.19.2. Откройте папку и найдите файл JAR — он-то и понадобится для дальнейшей работы.
Шаг 3: Файл JAR
В JAR-файле лежит вся игровая информация. Достижения, текстуры, звуковые эффекты и так далее. Именно из него мы и достанем все изображения блоков и предметов, которые только есть в Minecraft. Для этого лучше сразу создать отдельную папку и скопировать файл в нее.
Создайте папку на рабочем столе или в любом другом удобном месте. К примеру, внутри папки «AppData», в «.minecraft».
Шаг 4: Распаковка
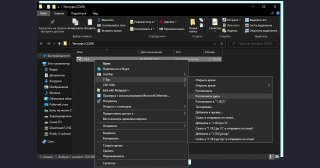
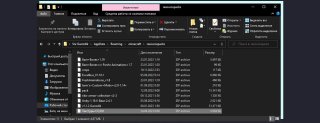
На этом шаге вам пригодится любой из упаковщиков. Нажмите правой кнопкой мыши по JAR-файлу в новой папке и выберите «Распаковать здесь». Теперь откройте папку «assets», за ней «minecraft» и «textures». Поздравляем, вам удалось достать все файлы текстур. Теперь осталось их изменить и упаковать в новый текстурпак.
Как создать пакет текстур в Майнкрафт
Для создания своего пакета текстур мы будем использовать уже готовые изображения из игры. Это проще, чем делать их самим с нуля. Особенно это касается мобов — у каждого из них свои разрешения и размеры, которые пришлось бы гуглить.
Шаг 1: Выбор категории текстур
Внутри папки «textures», что не удивительно, лежат все текстуры игры. Для удобства они распределены по папкам: «Блоки», «Энтити», «Предметы» и так далее. Откройте любую из них и отредактируйте изображения на свой вкус. Для этого лучше использовать графические редакторы, но подойдет и обычный Paint.

Шаг 2: Редактирование изображений
Нажмите правой кнопкой мыши по изображению и выберите «редактировать» с помощью Paint, Photoshop или Krita. Поменяйте текстуру на свое усмотрение, а после сохраните файл. Больше с картинками ничего делать не нужно — остается только добавить код для ресурс-пака и упаковать в архив.

Шаг 3: Код пакета ресурсов
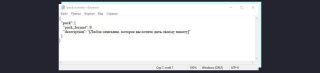
В своей папке с текстурпаком создайте текстовый файл. Достаточно будет обычного блокнота. В нем мы и пропишем несколько важных строк, с помощью которых игра поймет, что от нее хотят. Для этого откройте созданный файл и вставьте в него следующий код:
«description»: «[Любое описание, которое вы хотите дать своему пакету]»
Число в третьей строке кода зависит сугубо от выбранной версии ресурспака. Поменяйте его на свое усмотрение, согласно таблице:
| pack_format | Версия для Minecraft |
|---|---|
| 1 | 1.6.1 — 1.8.9 |
| 2 | 1.9 — 1.10.2 |
| 3 | 1.11 — 1.12.2 |
| 4 | 1.13 — 1.14.4 |
| 5 | 1.15 — 1.16.1 |
| 6 | 1.16.2 — 1.16.5 |
| 7 | 1.17x |
| 8 | 1.18.x |
| 9 | 1.19 — 1.19.2 |
| 11 | 22w42a — 22w44a |
| 12 | 1.19.3 |
Теперь сохраните текстовый документ, изменив его формат на «Все файлы». А также поменяйте его название на «pack.mcmeta».
Шаг 4: Сохранение и добавление текстур в игру
- Вернитесь в созданную папку с пакетом текстур и зажмите клавишу «Ctrl».
- Выберите левой кнопкой мыши папку «assets» и документ «pack.mcmeta».
- Нажмите на любой из них правой кнопкой мыши и выберите «7-zip» и «Добавить в архив».
- Поменяйте имя архива на любое другое на свой вкус и нажмите Ок.
- Перенесите новый архив в папку «resourcepacks», которая расположена в «.minecraft».
Как включить текстуры внутри игры
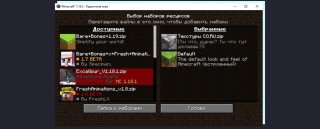
Запустите игру, откройте настройки и отыщите в них «Пакеты ресурсов». Именно в этой вкладке и будет ждать новый ресурспак. Активируйте его, перенеся в правый столбик с помощью стрелки, и вернитесь к игре.
Поздравляем, все готово. Можете зайти в любой мир и проверить изменения. Если у вас все получилось с первого раза — оставляйте комментарии. Если нет — не расстраивайтесь и попробуйте снова, процесс не такой сложный, как кажется.
Другие статьи по теме
- Как создать сервер в Minecraft
- Как размножать жителей деревни в Minecraft
- Популярные лайфхаки в Minecraft
- Моды на драконов в Minecraft
- Как превратить Minecraft в ужастик, самые страшные моды
Заглавное фото: wallpaperswide.com
Install novaskin resourcepack!
One click to apply. New textures will immediately be available in game!
Computer From your minecraft folder
New Project
Storage
New Project
Connect with dropbox!
Save, edit and share resource packs directly from your dropbox
Sound events:
Learn more about sound events on the minecraft wiki.
Test a resourcepack against a set of pre build scenarios
Techne Models


Pose — select a part
● Click/touch outside the 3d model and drag to rotate.
● Click and drag with the right mouse button, or touch with 3 fingers, to move the model.
● Zoom with pinch or shift+mouse wheel.
● Touch/Left click draw and right click select a cube, click again with the right mouse button to select inner cubes. Or use the selector box on the top of the page.
● Middle mouse pick a pixel color.
show randomobs
Upload the texture to the public gallery.
You can find the texture later on your profile.
Tutorials/Custom texture packs
This article is about creating custom texture packs. For programs to simplify the process of creating texture packs, see Programs and editors/Resource pack creators.
This page describes content that exists only in outdated versions of Minecraft.
In Java Edition 1.6.1 the feature was replaced by Resource pack.
The purpose of this article is to teach you how to create a custom texture pack. It focuses on the extraction of appropriate files from the game Java Archive minecraft.jar , their editing, packing the newly created textures, and putting them back into the game.
Contents
- 1 Extraction
- 1.1 Windows
- 1.2 MacOS
- 1.3 GNU/Linux
- 3.1 Windows
- 3.2 Mac OS
- 3.3 Ubuntu/GNOME
Extraction [ ]
The original textures are located in the game Java Archive file minecraft.jar . Any zip archiver should be able to extract files from it as the Java Archive format is just a subset of the common zip format. The exact procedure for locating the game archive and extracting the files from it varies by the operating system. Below is a list of files and subfolders of interest while creating a new texture pack:
File Description Notes pack.png Thumbnail of the pack in the texture selection list. Size should be 128×128 pixels. pack.txt Optional description of texture in the pack selection list. The text shouldn’t be too long or it will not appear. particles.png All particles The Redstone particle’s color cannot be changed. terrain.png All blocks Since Beta 1.8, the chest has its texture located in item/chest.png, (and item/largechest.png) similar to that of mobs, however, the textures in the terrain file are still used for the particle effects when breaking a chest. The water and lava textures can only be changed with the HD Texture pack patch.
> All blocks and items are now individual files found in the «texture» folder instead.[1.5 update]
Windows [ ]
To extract the editable files for a texture pack, first download a compression program, such as 7-Zip or WinRAR, and make a folder on your desktop for texture pack storage. For Windows Vista/7, go to the «start» menu on your desktop and search %appdata% . On Windows XP, go to «start» menu, click «run», and type in %appdata% . There may be a file called roaming , if so open it, and one of the folders inside should be called .minecraft , unless the roaming folder was not existent. Open this, and inside open the folder titled bin . (If you have a newer launcher there may not be a bin file. If that is so just open the folder versions and select the newest version’s folder) Then go to the minecraft.jar file or a file with the current version with .jar at the end (for example, 1.11.2.jar ) and right-click on it. In the menu of options should be either «7-Zip» or «WinRAR». Follow the arrow from that option to the menu of actions, and choose «Extract to ‘Minecraft/'». (It is best that your folder for texture packs have the word Minecraft in it. For example, mine is «Minecraft-desktop»). Find the extracted files. They should have been extracted to your desktop folder and be in a sub-folder titled «Minecraft». Open this file, and there will be 1,335 .class files. Delete every one of these. An easy way to select them all is to type .class in the search bar and press ctrl+A then delete (be sure not to delete the «splash» file, which will be selected because of the splash ‘best in class). Now you are ready to edit.
- Note: Microsoft Paint («Paint» on the Windows Start menu) does not support saving transparent PNG files, any «blank» areas will simply come out as white, and MS Paint is therefore not recommended for this.
MacOS [ ]
The Mac comes with a program called Archive Utility. First, open Finder and go to Finder>Library>Application Support>minecraft>bin. If the folder is not there, check Finder>(User)>Library>Application Support>minecraft>bin Find minecraft.jar and right-click (or control+left click) and click «Open With» and «Archive Utility». Archive Utility will create a new folder called «Minecraft». Notice that this is a new folder, and that minecraft.jar is still intact. You can therefore modify and delete the new folder without altering your minecraft.jar . Create a new folder on your desktop, and drag all the necessary files into it. Now you are ready to edit.
If using Archive Utility results in a file called Minecraft.jar.cpgz, try instead changing the file extension from .jar to .zip to achieve the desired effect.
GNU/Linux [ ]
On GNU/Linux-based systems, the game archive is usually located at ~/.minecraft/bin/Minecraft.jar where «~» is the user’s home folder, usually located in /home/ . Many desktop GNU/Linux distributions come with graphical archiver utilities that integrate with the desktop environment. If the zip and unzip command-line programs are available, the files can be simply extracted to a folder on the desktop using the following command in the terminal:
unzip -d ~/Desktop/my_texture_pack ~/.minecraft/bin/minecraft.jar pack.png pack.txt particles.png terrain.png achievement/* armor/* art/* environment/* font/* gui/* item/* misc/* mob/* terrain/* title/*
Editing textures [ ]
The textures are in the Portable Network Graphics (PNG) format and can be edited with any image editing program that can handle the format including transparency. Many different programs support this, some free ones include Paint.net (Windows) (which even Notch uses), GIMP (Windows, Mac, Linux), Paintbrush (Mac), and many more. Edit each PNG file as desired and save them with 32-bit color depth to preserve transparency.
Although Microsoft Paint does not handle transparency, it can still be used to make/edit textures. If you open a PNG image in Windows XP, a window should pop up showing transparency as a white and gray checkered pattern [does not work Win7 — no options of this type available]. There is a tool located on the toolbar that should have a screen tip with ‘Change to transparent’ or something similar. Go into Microsoft Paint and create/edit your texture(s). Find a color not used in the texture, and fill in the white space with it. Then, select the area desired to copy and paste it onto the PNG image. Paste it onto your PNG image and make sure to cover it completely. Simply change your unwanted color to transparent using the tool mentioned earlier, and every last pixel of that color on the current document will be changed to transparent. Beware, make sure that you do not click the wrong color, as this may mess up all textures in the document.
Packing and installation [ ]
Once you are done editing, create a zip file of the files modified (or, in Minecraft 1.3, you can use a folder with the files too), preserving all folder hierarchy. The root folder of the zip must have the files and folders listed below, or else they will not be changed. If you find that nothing changes when you select your texture pack, make sure that the files are in the root of the zip and not one folder in.
Windows [ ]
Select all the files (edited or not) Then choose the 7-Zip or WinRAR option after right-clicking and select «Add to archive. «. The archive will open, and you can name the file. Then hit «OK», and the program will make all the files into a zip archive. To put it into Minecraft, simply start the launcher, log in, and at the title screen go to the button «texture packs». In the lower-left, click the Open Folder button and drag your ZIP into the folder. Select your texture pack, and view it on your computer.
Mac OS [ ]
Highlight all the files in your folder, right-click, and click «compress (#) items». A new file called «Archive.zip» should appear. Rename the file to your liking. Go to Finder>Library>Application Support>minecraft>Texture Packs, and drag your .zip in. Now you can use your texture pack by selecting the button «mods and texture packs» in the main menu of Minecraft, and clicking on your pack.
Ubuntu/GNOME [ ]
Folder Layout ~/appdata/roaming/.minecraft/resourcepacks/MyPack/(assets etc.)
In Terminal, run this command.
cd ~/.minecraft/resourcepacks/ && zip -r MyPack.zip MyPack
. then launch Minecraft and enable the resource pack.
External links [ ]
- [1]
- Unmodified Minecraft game file
- «Unstitcher» tool which converts old texture packs into 1.5 format.
- direct link Enhanced version
- The first day/beginner’s guide
- The second day
- The third day
- Hunger management
- Things not to do
- Simple tips and tricks
- Your first ten minutes
- Best biomes for homes
- Best building materials
- Building and construction
- Navigation
- Shelters
- Shelter types
- Achievement guide
- Advancement guide
- Best enchantments guide
- Breaking bedrock
- Combat
- Complete main adventure
- Creating a village
- Downgrading
- Dual wielding
- End survival
- Exploring caverns
- Gathering resources on peaceful difficulty
- Getting food quickly
- Headless pistons
- Hitboxes
- Horses
- Indestructible end crystals
- Mapping
- Measuring distance
- Minecraft in education
- Mining
- Diamonds
- Fossils
- Ancient Debris
- PvP bases
- Trading
- Acquiring a conduit
- Curing a zombie villager
- Defeating temples
- Defeating a village raid
- Defeating a Nether fortress
- Defeating a bastion remnant
- Defeating a monster room
- Defeating a pillager outpost
- Defeating a woodland mansion
- Defeating a monument
- Defeating an End city
- Defeating the Ender dragon
- Defeating the Wither
- Exploring an ancient city
- Obtaining every music disc
- Adventure survival
- Half hearted hardcore
- Hardcore mode
- Surviving in a single area indefinitely
- Infinite desert survival
- Island survival
- Manhunt
- Mob switch
- Nomadic experience
- Skywars survival
- Superflat survival
- Flat survival
- Ultra hardcore survival
- Beating a challenge map
- Creating a challenge map
- Adding beauty to constructions
- Airlock
- Architectural terms
- Building a cruise ship
- Building a metropolis
- Building a rollercoaster
- Building safe homes
- Building water features
- Color palette
- Creating shapes
- Defense
- Desert shelter
- Elevators
- Endless circling pool
- Furniture
- Glazed terracotta patterns
- Making nice floors
- Pixel art
- Ranches
- Roof types
- Curved roofs
- Roof construction guidelines
- Roof decorations
- Playing on servers
- Multiplayer Survival
- Spawn jail
- Griefing prevention
- Joining a LAN world with alternate accounts
- Setting up a server
- Server startup script
- FreeBSD startup script
- OpenBSD startup script
- Ubuntu startup script
- Setting up a Hamachi server
- Setting up a Minecraft Forge server
- Setting up a Spigot server
- Ramdisk enabled server
- Custom maps
- Map downloads
- Command NBT tags
- Falling blocks
- Updating old terrain using MCEdit
- Creating a resource pack
- Loading a resource pack
- Sound directory
- Creating a data pack
- Installing a data pack
- Custom world generation
- Creating videos
- Livestreaming
- Installing snapshots
- Joining and leaving the Bedrock Edition beta program
- How to get a crash report
- Installing Forge mods
- Custom Minecraft directory
- Playing and saving Minecraft on a thumb drive
- Playing and saving Minecraft on a thumb drive with the old launcher
- Recover corrupted saved world data
- Run Minecraft through Google Drive
- Save game data to Dropbox (world data only)
- Saved data Dropbox guide
- Building micro shelters
- Custom texture packs
- Door-based iron golem farming
- Far Lands
- How to get a crash report
- Installing mods
- Man-made lake
- Managing slimes in superflat mode
- Minecart booster
- Potion farming
- Repeater reboot system
- Survival with no enabled data packs
- Update LWJGL
- Update Minecraft
- Village chaining
- Water ladder
- Water tram
Introduction to Resource Packs
Before building your first Add-On for Minecraft: Bedrock Edition, you need to create a pack to hold your custom content. There are two types of packs that a creator can make: resource packs and behavior packs. For this tutorial, we’re going to be focusing on resource packs.
A resource pack is a folder structure that contains all of your custom models, sounds, textures, and other custom content.
In this tutorial, you will learn:
- How a resource pack is created.
- How a manifest file is created.
- How custom textures are loaded into Minecraft.
- The concept of Pack Stacking when working with Add-On content.
Sample Resource Pack
There is a sample resource pack available on the Minecraft samples Github. This pack may be used to understand the structure of resource packs and to check your work after you complete this tutorial.
Requirements
We recommend completing the following before beginning this tutorial:
Building the Resource Pack
For Minecraft to find and use your resource files, you must set up the folders and files in a specific way. This tutorial will guide you through creating this folder and file structure.

Create a Resource Pack Folder
We will start by creating a folder called My_RESOURCE_Pack. Technically you can name this folder anything you want, but the other folders have to be named exactly as specified in this tutorial so that Minecraft knows where to find the information.
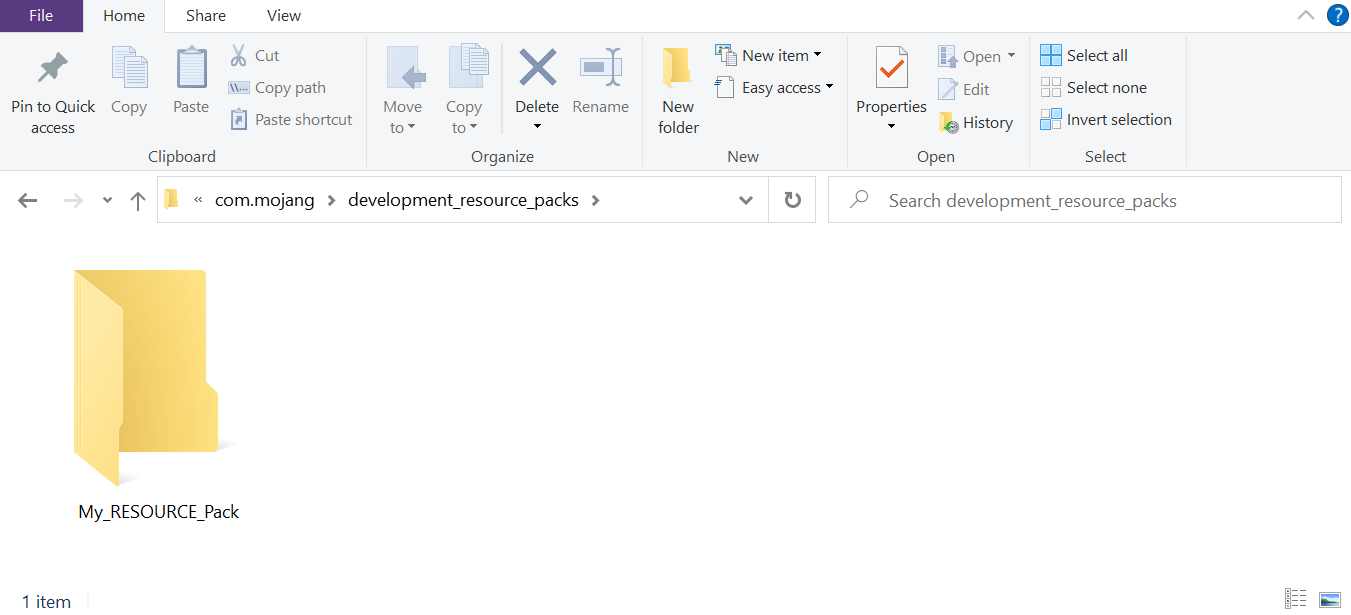
- Open the com.mojang folder.
- Double-click the development_resource_packs folder to open it.
- Add a new folder and name it My_RESOURCE_Pack.
- Double-click the My_RESOURCE_Pack folder to open it.
Create a Manifest File
To load a resource pack into Minecraft, we need a manifest file. The manifest file is a JSON file that contains the following information:
- Description: In-game description of what the resource pack does.
- Name: In-game name of the resource pack.
- UUID: Universally Unique Identifier.
- Version: Version of the resource pack.
- Minimum Engine Version: Minimum required version of Minecraft for this pack to work properly.
To learn more about how a manifest.json file works, see the Addons Reference manifest.json documentation.
Minecraft parses the information from the manifest file and displays it in the Add-On section of the game. Inside the file, the information is split into two separate sections: Header and modules. The header section contains the overall information for the pack, while the modules section contains the dedicated packages information. To create the manifest.json file:
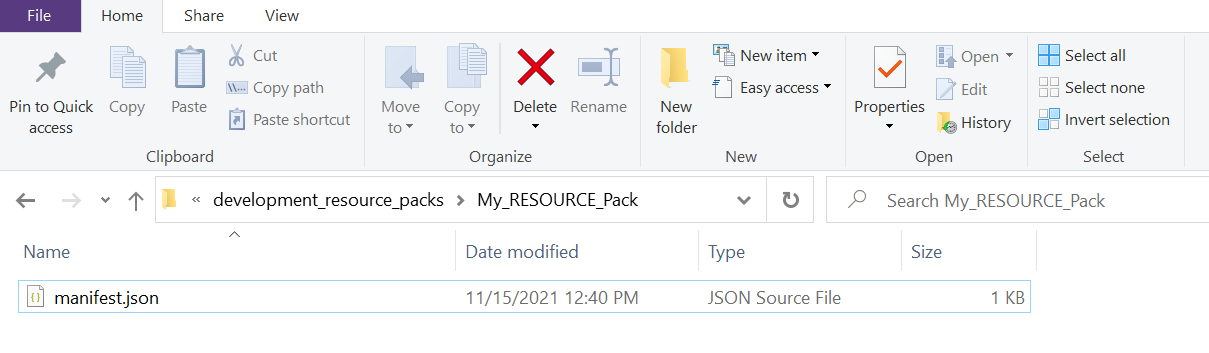
- Right-click in the Explorer window, and select New > Text Document.
- Name it manifest.json.
- You will need to change the file extension from .txt to .json. If your Explorer window does not show file extensions, you can enable File Name Extensions under the View tab.
- Double-click the manifest.json file to open it in a text editor.
- Copy and paste the following code into your file.
< "format_version": 2, "header": < "description": "My dirt resource pack Add-On!", "name": "My Resource Pack", "uuid": "", "version": [1, 0, 0], "min_engine_version": [1, 16, 0] >, "modules": [ < "description": "My First Add-On!", "type": "resources", "uuid": "", "version": [1, 0, 0] > ] >UUID
A Universally Unique Identifier (UUID) is a unique number used to identification purposes. For Minecraft, the UUID is used to define a specific pack and to prevent any duplicate software from causing issues. For the header and modules, there will need to be two different UUID numbers entered in each of the «uuid» fields between the quotes. You can get UUIDs from an online UUID Generator such as https://www.uuidgenerator.net/.

- Copy and paste a UUID into the header section. The UUID will need to be pasted in the «uuid»:»» field between the quotation («») marks to be read correctly.
- Refresh the webpage to generate a new UUID for use in the Modules section.
- Copy and paste the new UUID into the modules section in the «uuid» field between the quotation marks.
- Save the manifest.json file.
Changing the Dirt Block
With the manifest file completed, you can now start adding custom content to Minecraft. Let’s get started by applying a new texture to the Vanilla dirt block. The first part of the process involves creating a folder structure to hold the custom texture.
- Open the My_RESOURCE_Pack folder and create a folder named textures.
- Double-click the textures folder to open it.
- Open the textures folder and create a folder named blocks.
- Double-click the blocks folder to open it.
Creating the texture
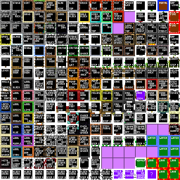
Now that the folder structure is created, we can start adding some custom textures. This green square is an example of the type of file created using the following steps.

You can download this green block and save it in your blocks folder or follow these steps to create your texture:
- Open up an image editor such as MS Paint.
- Go to the File menu and select Properties.
- Set the Width and Height to 16 pixels each.
- Click OK.
You can now design a pattern or any artwork in the editor. To make the green square, a simple fill color was added.
MS Paint is used in this example for quick and easy access, but you will need to use a different graphics editor for more advanced graphic features like transparency effects or .tga file support.
- After editing the texture, go to the File menu and select Save As.
- Choose the PNG picture option.
- In the Save As dialog box, navigate to the blocks folder.
- Save the file as dirt.png.
Testing the pack
Now that the pack has both a manifest file and a texture file, you can launch Minecraft and test your new resource Add-On.
Pack Stacking is how content is loaded on top of Vanilla content, causing each object that has the same name in both packs to be overwritten by the latest applied pack. In our example, the original dirt texture is overwritten by the custom texture.
If another pack that uses the dirt.png file is loaded after My_RESOURCE_Pack, then Minecraft will use that file instead.
Your custom texture will be used on every dirt.png block in the world, but it will not be used on blocks of dirt with grass on them because those blocks have a different name.
- Launch Minecraft and select Play.
- Select Create New World.
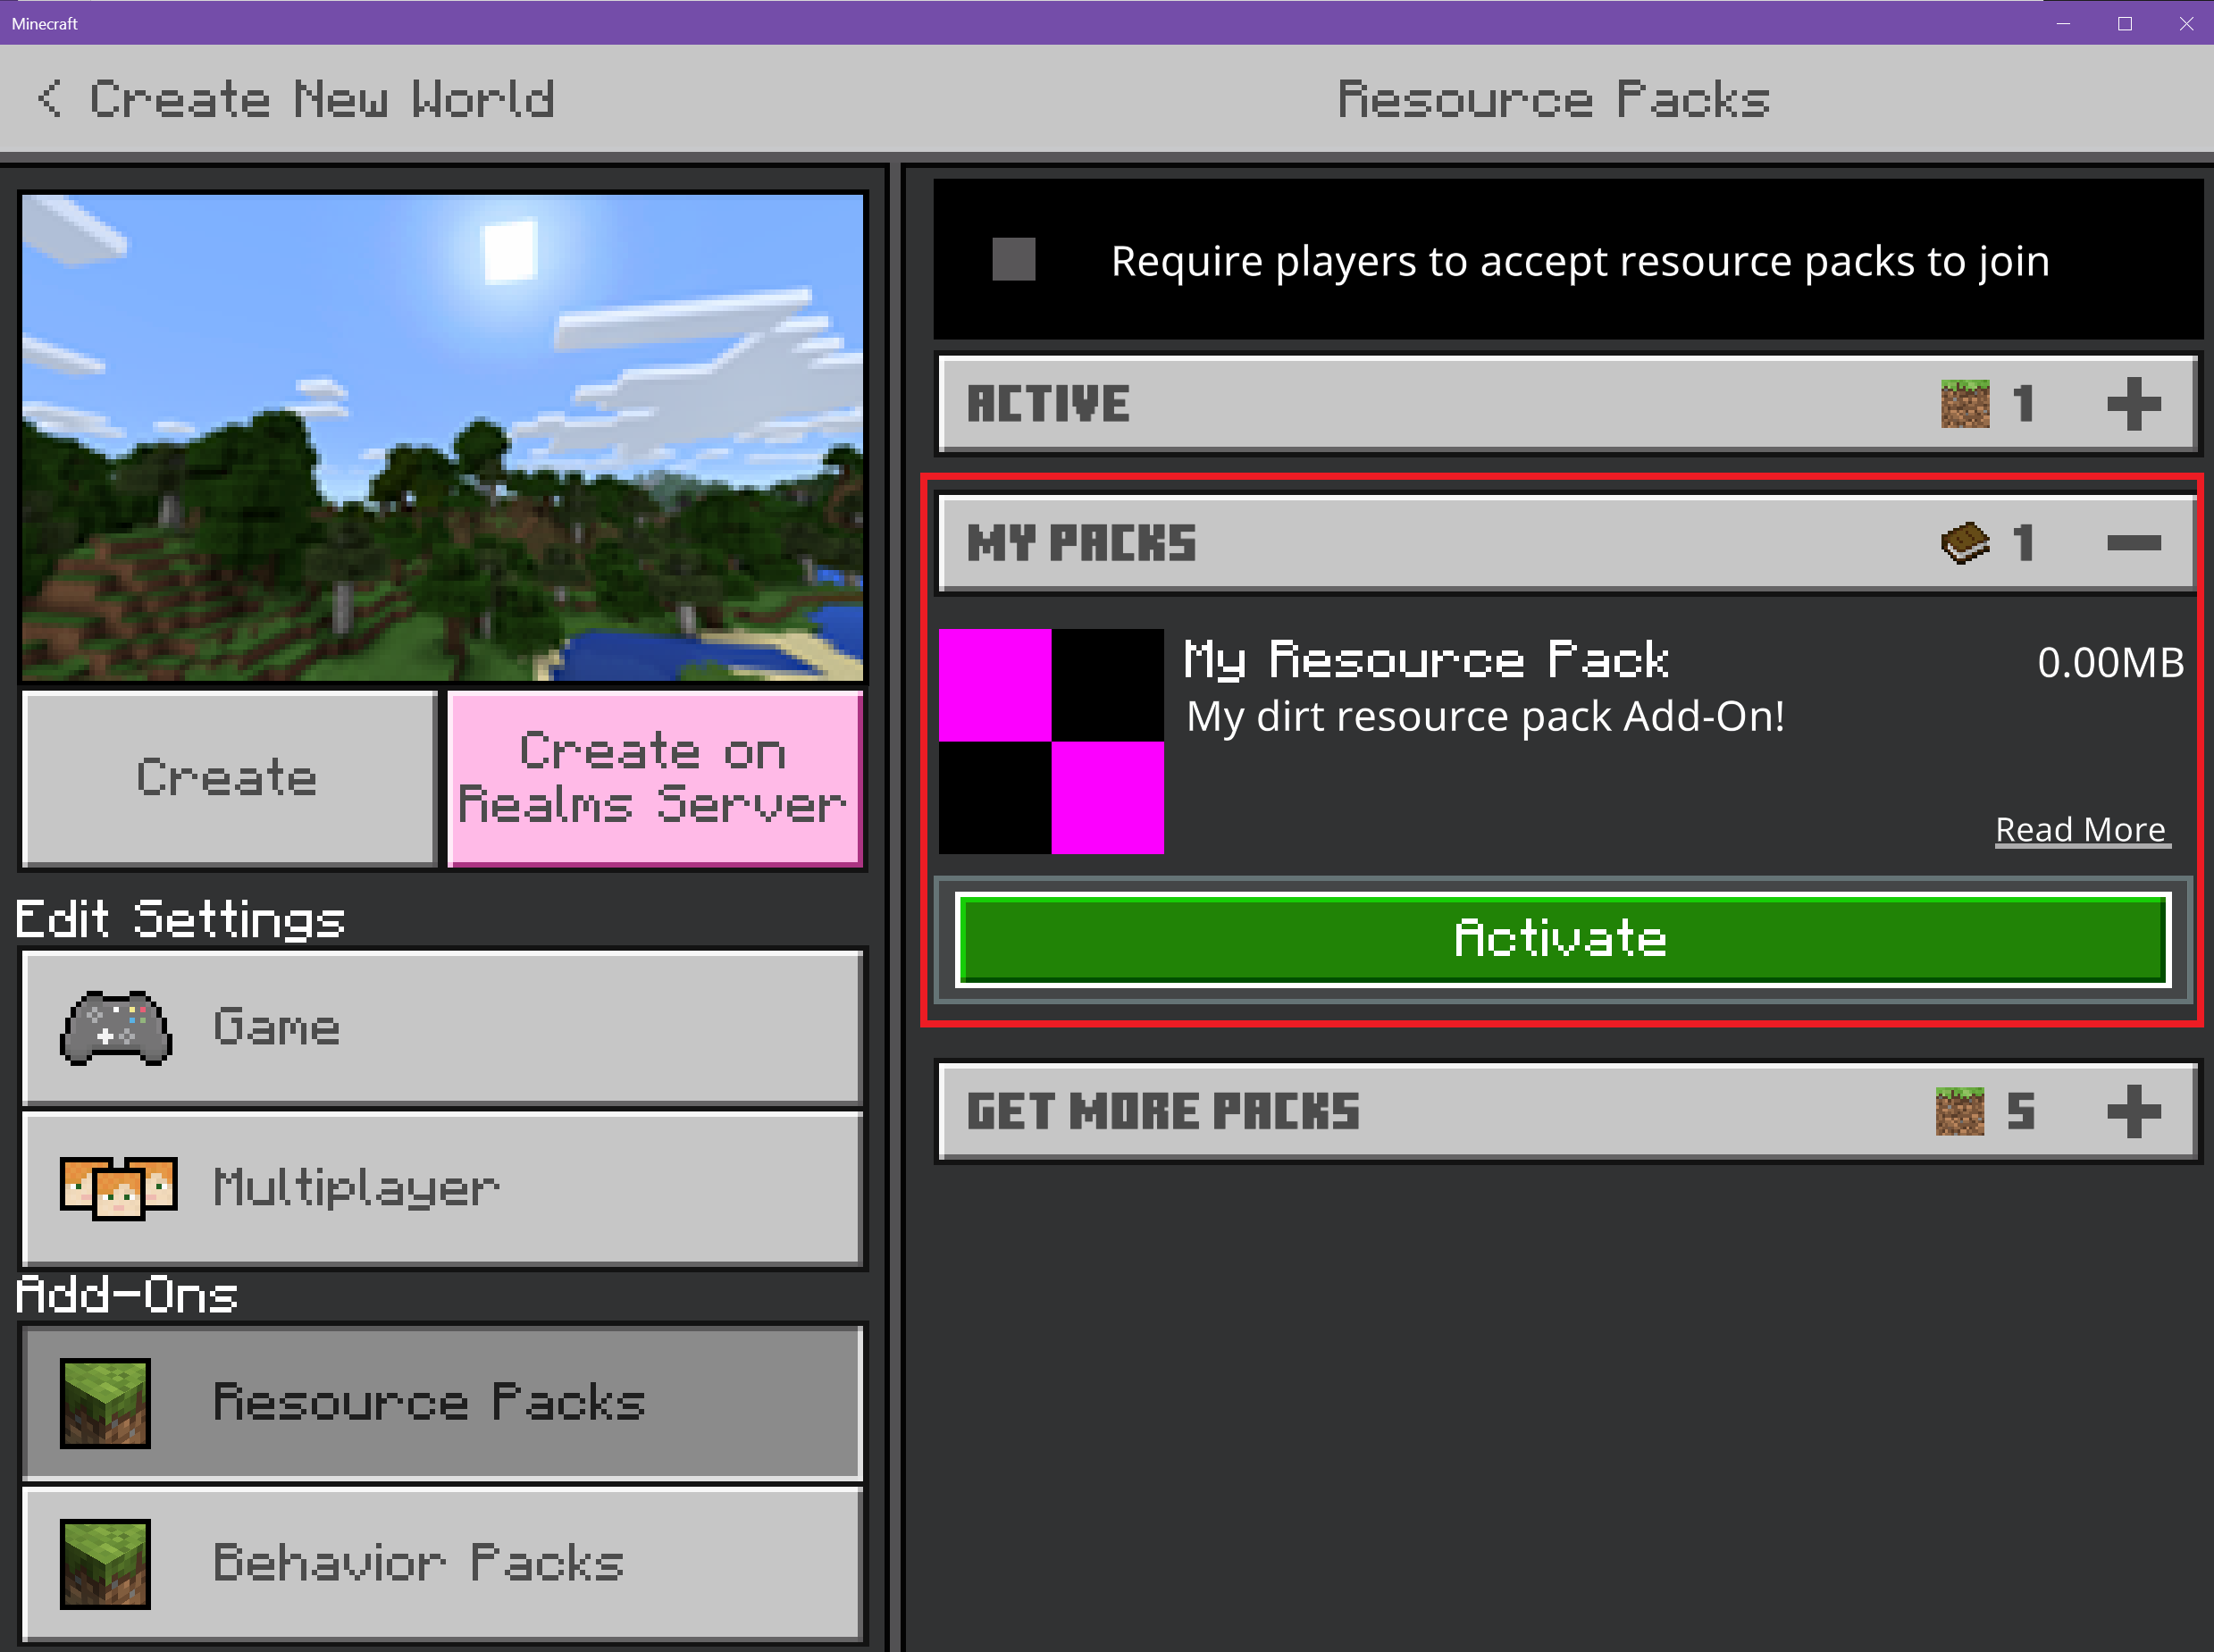
- Under Settings, scroll down to the Add-Ons section.
- Click on Resource Packs to see all available packs.
- Click the MY PACKS drop-down.
- Select My RESOURCE Pack and click Activate to add the resource pack to the world.
- Click Create.
Troubleshooting
Resource pack woes? Don’t worry, troubleshooting is a normal part of any development process.
You can use the sample resource pack on the Minecraft samples Github site to check the structure of your resource pack.
Your Resource Pack Does Not Appear in Minecraft
If your resource pack does not appear in the Add-Ons section of a world, the issue may be a malformed manifest.json file. Let’s investigate.
- Are there two different UUIDs in the manifest.json header and modules section? See the UUID section for more information.
- Have you turned on file extensions and paths? If your Explorer window does not show file extensions, you can enable File Name Extensions under the View tab.
- Double-check JSON curly braces and brackets. JSON linting tools can help.
Resource Pack Shows Up, Content Doesn’t Work
- Check that the textures folder is in the right place, and spelled correctly. Then check the blocks folder as well.
- Download the Vanilla resource pack and try adding your block to the existing textures/blocks folder.
- Make sure the new texture file is named the same as the Vanilla texture it’s replacing.
- Move your pack above others to ensure your dirt.png texture is loaded before other resource packs.
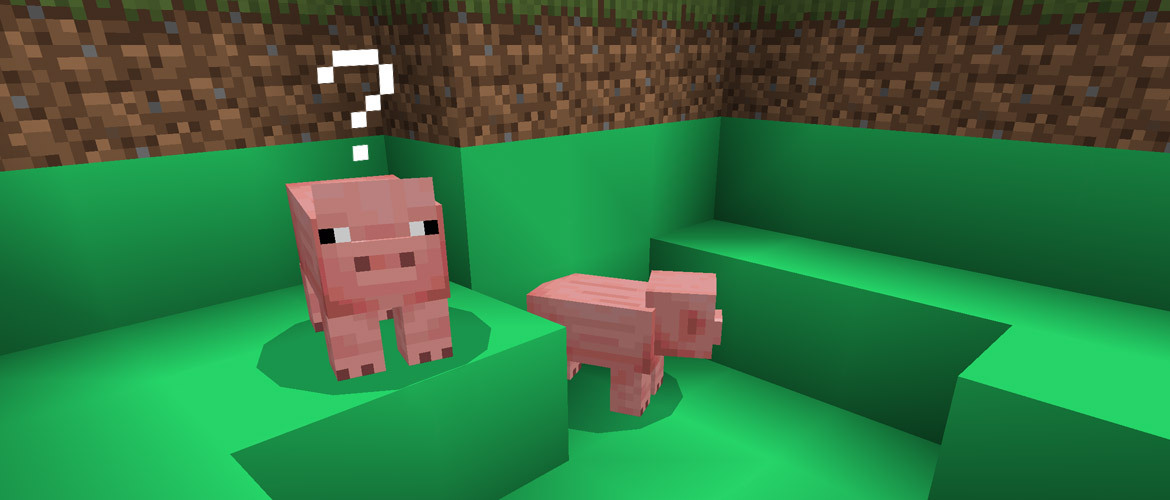
What’s Next?
With a custom texture now a part of your Minecraft world, it’s time to see how behavior packs alter existing entity behaviors. In our next tutorial, you will add aggressive behavior to a normally peaceful cow.
To see examples of unchanged resource and behavior files, check out the Minecraft Vanilla resource pack and Vanilla behavior Pack.