Установка Windows 7 на компьютере Mac с помощью boot Camp
Для пользователей Mac, которым также требуется компьютер на работе, дома или только с определенными приложениями, имеется решение. Используя помощник по загрузке, вы можете установить Windows 7 на компьютере Mac с Intel в рамках своего раздела. Вы будете иметь систему двойного загрузки с операционной системой Mac OS в одном из разделов и Windows в другом. Необходимые условия см. ниже, чтобы узнать, что вам нужно сделать.
- Все обновления программного обеспечения, установленные на компьютере Mac
- DVD-диск установки Windows 7 с ИД продукта (полная версия, а не версия для обновления)
Если у вас еще нет Windows 7, вы можете приобрести ее в Интернете в Microsoft Store. - Установочный DVD-диск Mac OS X Snow Leopard или Mac OS X Lion
- Копия экземпляра Boot Camp версии 3.3 (4.0 для Mac OS X Lion)
Дополнительная информация
Чтобы установить Windows на компьютере Mac с помощью приложения Boot Camp, выполните указанные ниже действия в порядке, приведенном в списке.
- Перед тем как следовать шагам в этой статье, не забудьте сделать это.
- Напечатайте эту статью, чтобы использовать ее в качестве справки при установке Windows.
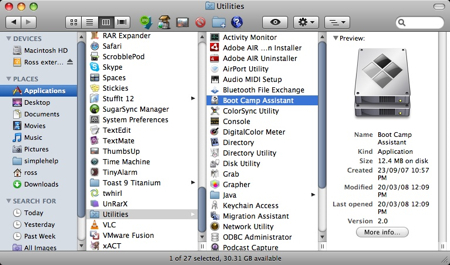
1. Откройте Finder и перейдите в приложение ->Utilities и дважды щелкните «Помощник по загрузке в университете».

2. Нажмите кнопку «Продолжить» в окне первоначального введения.
3. Установите размер раздела для установки Windows. Чтобы изменить размер выделенного пространства для Windows 7, щелкните небольшой разделтель между Mac OS X и Windows и перетащите его влево.
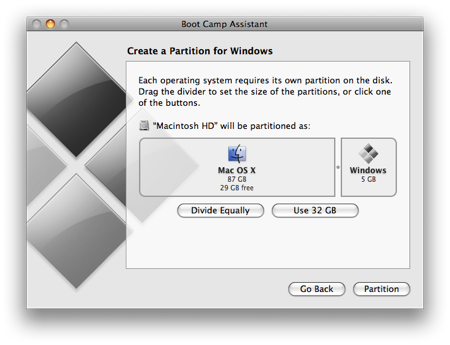
Примечание. Для установки Windows 7 требуется не менее 16 ГБ места на жестком диске, но имейте в виду, что в этом месте также потребуется обдумать все установленные приложения и сохраненные документы. в качестве отправной точки можно установить размер не менее 40 ГБ (в зависимости от количества приложений, которые вы планируете установить). Пример: Microsoft Office 2010 профессиональный требуется 3 ГБ.
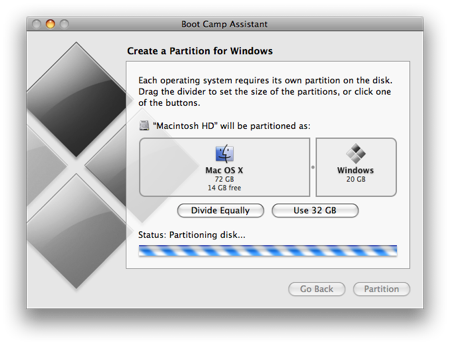
4. После того как вы определите, сколько места будет выделено для Windows 7, нажмите кнопку «Раздел» или просто нажмите кнопку «Разделить на одинаковое», чтобы одинаково отделить разделы.
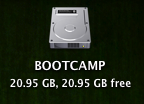
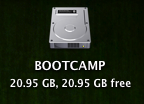
5. После создания раздела на рабочем столе будет новый значок диска BOOT ПЕРЕНАБОР.
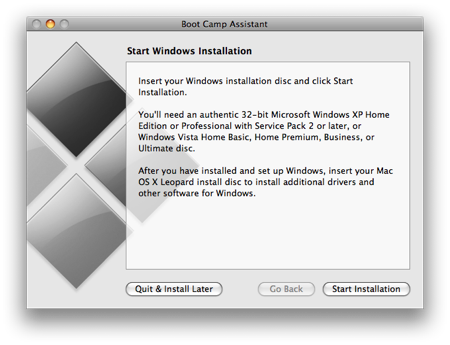
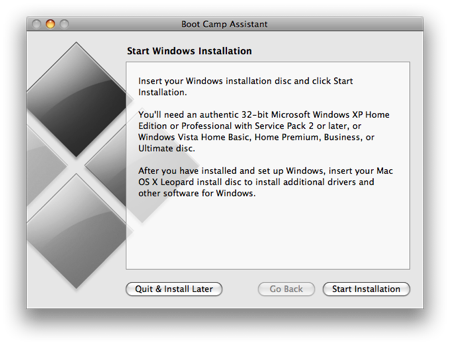
6. Затем вставьте DVD-диск Windows 7 и нажмите кнопку «Начать установку».
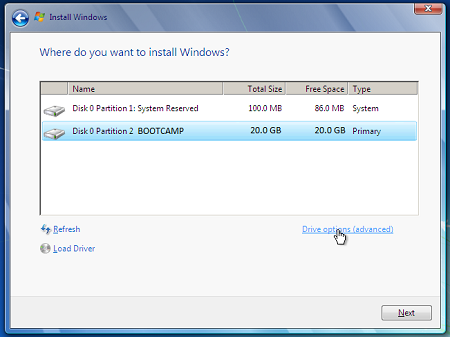
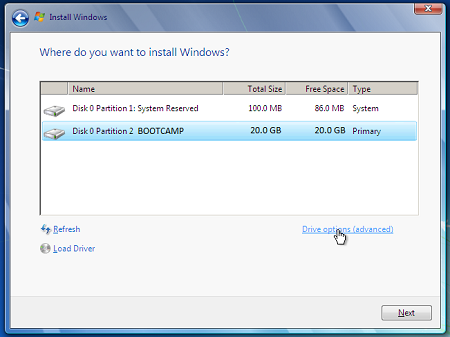
7. Компьютер Mac перезапустится и загрузится на DVD-диск Windows 7. Вам будет предложено в окне с вопросом, какой раздел вы хотите установить Windows. Выберите раздел с названием «ЗАГРУЗКА». Затем выберите «Параметры Диска» (дополнительные параметры).
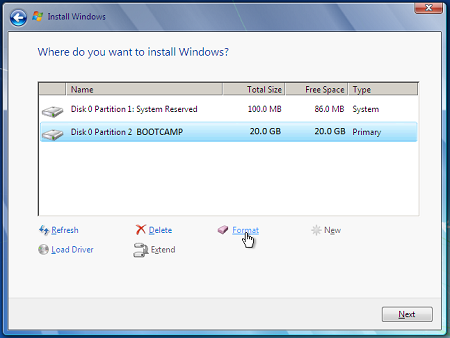
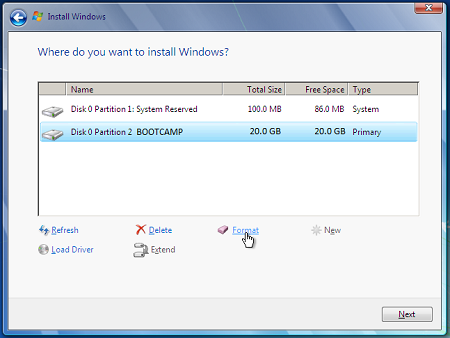
8. Не сжимая кнопку «ЗАГРУЗКА», нажмите кнопку «Формат».
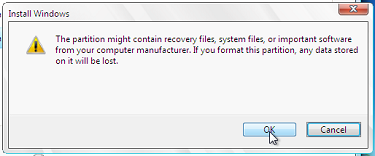
9. Нажмите кнопку «ОК», когда будете уведомлены о том, что файлы будут потеряны. Примечание. (Новый раздел не будет содержать файлов.
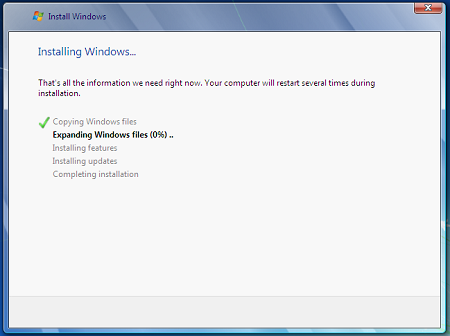
10. Начнется установка Windows 7. Во время установки система перезагружает компьютер, после этого потребуется удалить DVD-диск Windows 7.
11. После удаления DVD-диска с Windows 7 компьютер Mac автоматически начнет загрузку в Windows 7 и установка продолжится. Вам будет предложено выбрать язык, раскладку клавиатуры, ИД продукта и т. д. Следуйте дополнительным инструкциям, чтобы завершить установку Windows 7.
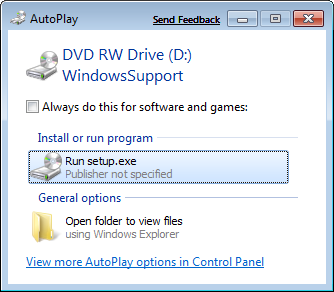
12. После завершения установки Windows вставьте DVD-диск MAC OS и выберите RunSetup.exe при запросе.
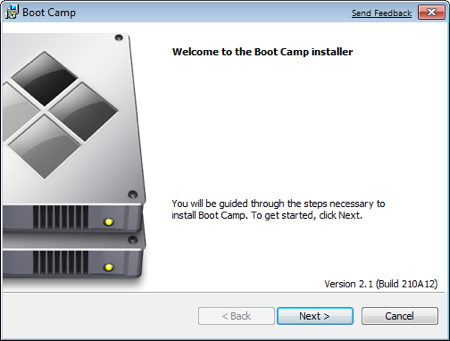
13. Нажмите кнопку «Далее», когда запустится установщик Boot Camp.
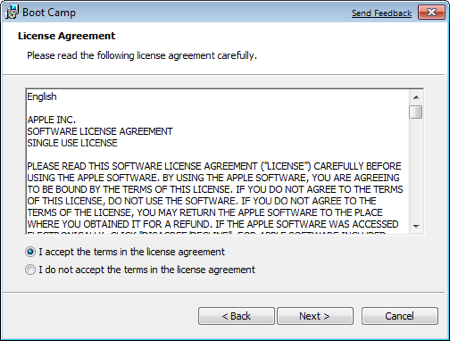
14. Выберите «Я принимаю условия лицензионного соглашения» и нажмите кнопку «Далее».
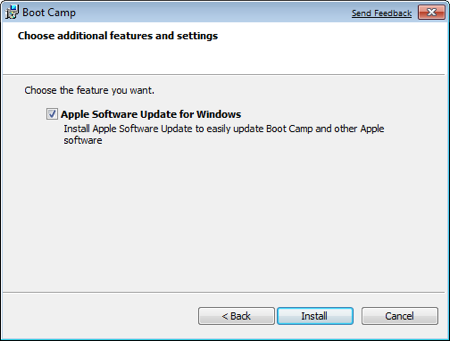
15. Убедитесь, что продукт Apple Software Update для Windows проверен, и нажмите кнопку «Установить».
16. Установщик Boot Camp установит все необходимые драйверы.
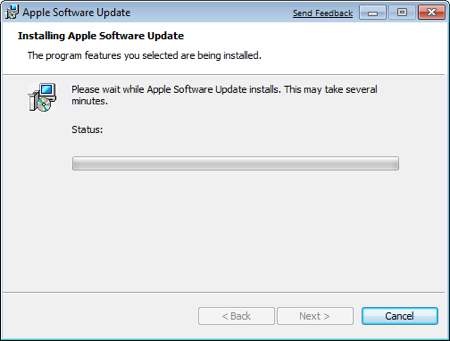
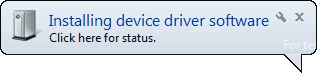
17. Уведомления будут всплывать с каждым установленным драйвером.
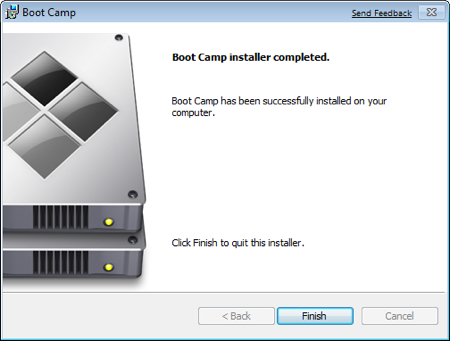
18. После завершения установки драйвера нажмите кнопку «Готово».
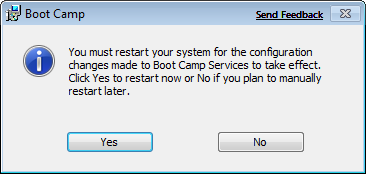
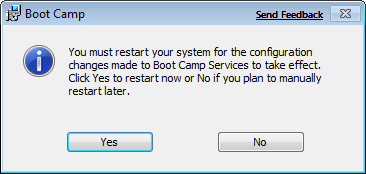
19. Вам будет предложено перезагрузить диск, удалить DVD-диск OS X и нажать кнопку «Да», чтобы перезапустить его.
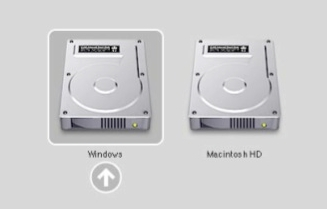
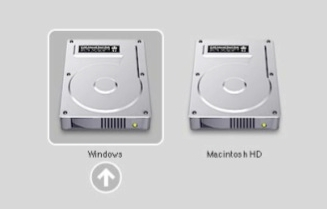
20. Когда вы загрузите компьютер Mac, удерживайте клавишу ALT, чтобы выбрать операционную систему, в которую вы хотите загрузиться. (Если не нажать кнопку Windows, компьютер Mac будет по умолчанию запускаться в Mac OS.)
Посетите Microsoft Store, чтобы найти пакеты программного обеспечения или обновления для текущего программного обеспечения или найти дополнительное программное обеспечение.
Если у вас еще нет учетной записи OneDrive, см. статью «Получить учетную запись OneDrive».
Если вы хотите перенести файлы с Компьютера Mac на ПК,
см. Если вы впервые используете компьютер и хотите узнать, какие приложения работают на компьютере с Windows, см. также: Какие приложения я использую в Windows после перехода с MAC?
Installing Windows 7 on your Mac using Boot Camp
For Mac users who also need to use a PC at work, home or just with specific applications, there is a solution. Using Boot Camp Assistant, you can install Windows 7 on your Intel-based Mac computer in its own partition. You’ll have a dual-boot system with your Mac OS on one partition and Windows on another. See the prerequisites below to see what you’ll need to do this.
- All firmware updates installed on your Mac
- A Windows 7 installation DVD with a Product ID (Full version, not an Upgrade version)
If you do not have Windows 7 yet, you can purchase it online at the Microsoft Store. - A Mac OS X Snow Leopard or Mac OS X Lion installation DVD
- A copy of Boot Camp version 3.3 (4.0 for Mac OS X Lion)
More Information
To install Windows on your Mac using Boot Camp, follow the steps listed below in the order listed:
- Be sure to back up all your data before following the steps in this article.
- Print this article to use as a reference while installing Windows.
1. Open Finder and navigate to Applications -> Utilities and double-click Boot Camp Assistant.
2. Click Continue on the initial introduction window.
3. Set the partition size for the Windows installation. To change the amount of space to dedicate to Windows 7, click the small divider between Mac OS X and Windows, and drag it to the left.
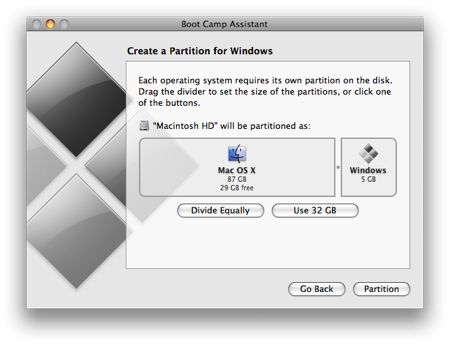
Note: Windows 7 requires at least 16 GB of hard drive space to install but keep in mind that the this space will also need to accomidate any applications installed and your saved documents. a good starting point might be to set the size 40GB or more (depending on the number of applications you plan to install). Example: Microsoft Office 2010 Professional requires aroud 3GB to install.
4. Once you’ve determined how much space you want to dedicate to Windows 7, click the Partition button, or simply click the Divide Equally button to devide the partitions equally.
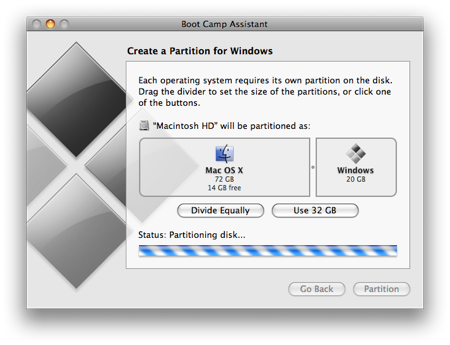
5. Once the partition is created, you will have a new BOOTCAMP drive icon on your desktop.
6. Next, insert your Windows 7 DVD and click the Start Installation button.
7. Your Mac will restart and boot to the Windows 7 DVD. You’ll be prompted with a window asking which partition you want to install Windows on. Select the partition labeled BOOTCAMP. Then, click Drive options (advanced).
8. With the BOOTCAMP volume still selected, click Format.
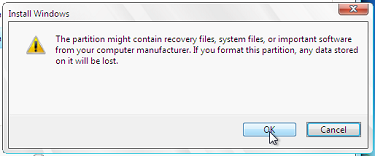
9. Click OK when notified that files will be lost. Note: (The new partition will not contain any files).
10. Windows 7 will begin to install, during the installation your system will reboot, when this happens, you’ll need to remove the Windows 7 DVD.
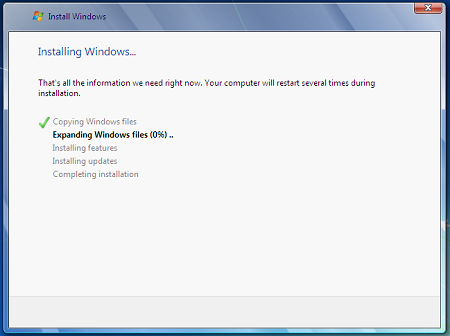
11. With the Windows 7 DVD removed, your Mac will automatically boot back into Windows 7, and the installation will continue. You’ll be prompted to select your language, keyboard layout, Product ID, etc. Follow any additional instructions to complete the installation of the Windows 7.
12. When the Windows installation has completed, insert your MAC OS DVD and select RunSetup.exe when prompted.

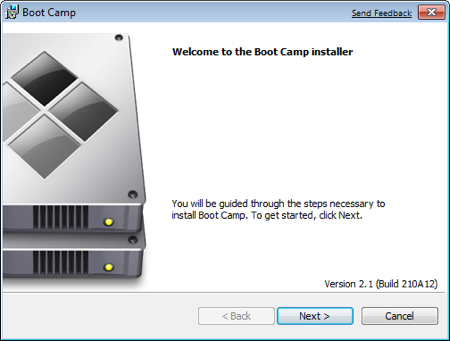
13. Click Next when the Boot Camp installer launches.
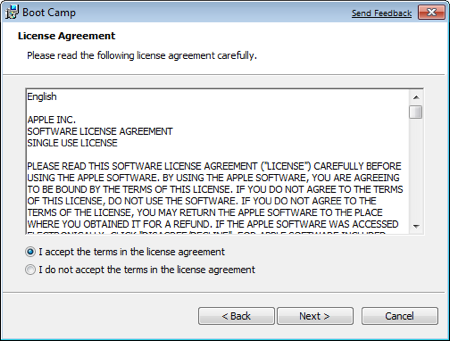
14. Select I accept the terms in the license agreement and then click Next.
15. Make sure that Apple Software Updatefor Windows is checked, and then click Install.
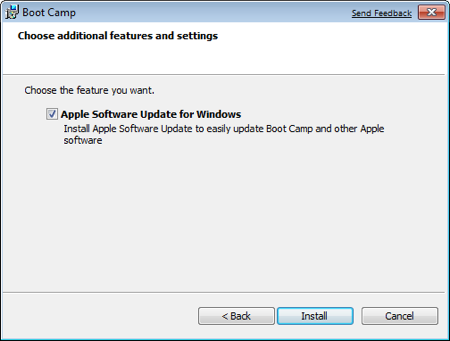
16. The Boot Camp installer will install all the required drivers.
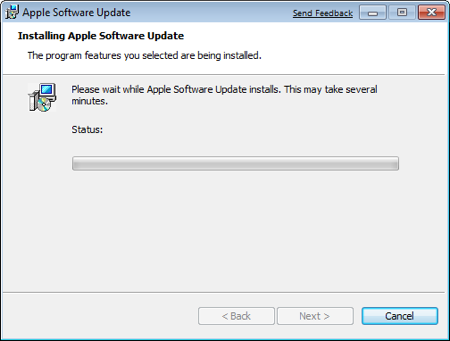
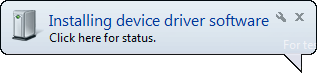
17. Notifications will pop up with each driver that gets installed.
18. Once the driver installation has completed, click Finish.
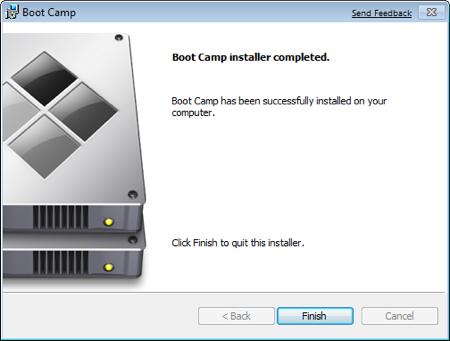
19. You’ll be prompted to reboot, remove your OS X DVD from the drive, and click Yes to restart.
20. When your Mac boots, hold down the ALT key to select which Operating System you want to boot to. (If you don’t press the Windows button, your Mac will boot to the Mac OS by default.)
Visit the Microsoft Store to find Software packages or Updates to your current software, or to search for additional software.
Get Started with OneDrive, if you don’t already have an account see: Get a OneDrive account.
If you would like to Migrate your files from a Mac to a PC, see Migrate your files from a Mac to a PC
If your new to the PC and would like to find out what applications work on a PC for what you do on a MAC, see: What applications do I use on Windows after moving from MAC?
Installing Windows 7 on your Mac using Boot Camp
For Mac users who also need to use a PC at work, home or just with specific applications, there is a solution. Using Boot Camp Assistant, you can install Windows 7 on your Intel-based Mac computer in its own partition. You’ll have a dual-boot system with your Mac OS on one partition and Windows on another. See the prerequisites below to see what you’ll need to do this.
- All firmware updates installed on your Mac
- A Windows 7 installation DVD with a Product ID (Full version, not an Upgrade version)
If you do not have Windows 7 yet, you can purchase it online at the Microsoft Store. - A Mac OS X Snow Leopard or Mac OS X Lion installation DVD
- A copy of Boot Camp version 3.3 (4.0 for Mac OS X Lion)
More Information
To install Windows on your Mac using Boot Camp, follow the steps listed below in the order listed:
- Be sure to back up all your data before following the steps in this article.
- Print this article to use as a reference while installing Windows.
1. Open Finder and navigate to Applications -> Utilities and double-click Boot Camp Assistant.
2. Click Continue on the initial introduction window.
3. Set the partition size for the Windows installation. To change the amount of space to dedicate to Windows 7, click the small divider between Mac OS X and Windows, and drag it to the left.
Note: Windows 7 requires at least 16 GB of hard drive space to install but keep in mind that the this space will also need to accomidate any applications installed and your saved documents. a good starting point might be to set the size 40GB or more (depending on the number of applications you plan to install). Example: Microsoft Office 2010 Professional requires aroud 3GB to install.
4. Once you’ve determined how much space you want to dedicate to Windows 7, click the Partition button, or simply click the Divide Equally button to devide the partitions equally.
5. Once the partition is created, you will have a new BOOTCAMP drive icon on your desktop.
6. Next, insert your Windows 7 DVD and click the Start Installation button.
7. Your Mac will restart and boot to the Windows 7 DVD. You’ll be prompted with a window asking which partition you want to install Windows on. Select the partition labeled BOOTCAMP. Then, click Drive options (advanced).
8. With the BOOTCAMP volume still selected, click Format.
9. Click OK when notified that files will be lost. Note: (The new partition will not contain any files).
10. Windows 7 will begin to install, during the installation your system will reboot, when this happens, you’ll need to remove the Windows 7 DVD.
11. With the Windows 7 DVD removed, your Mac will automatically boot back into Windows 7, and the installation will continue. You’ll be prompted to select your language, keyboard layout, Product ID, etc. Follow any additional instructions to complete the installation of the Windows 7.
12. When the Windows installation has completed, insert your MAC OS DVD and select RunSetup.exe when prompted.
13. Click Next when the Boot Camp installer launches.
14. Select I accept the terms in the license agreement and then click Next.
15. Make sure that Apple Software Updatefor Windows is checked, and then click Install.
16. The Boot Camp installer will install all the required drivers.
17. Notifications will pop up with each driver that gets installed.
18. Once the driver installation has completed, click Finish.
19. You’ll be prompted to reboot, remove your OS X DVD from the drive, and click Yes to restart.
20. When your Mac boots, hold down the ALT key to select which Operating System you want to boot to. (If you don’t press the Windows button, your Mac will boot to the Mac OS by default.)
Visit the Microsoft Store to find Software packages or Updates to your current software, or to search for additional software.
Get Started with OneDrive, if you don’t already have an account see: Get a OneDrive account.
If you would like to Migrate your files from a Mac to a PC, see Migrate your files from a Mac to a PC
If your new to the PC and would like to find out what applications work on a PC for what you do on a MAC, see: What applications do I use on Windows after moving from MAC?
Установка Windows 7 на Macbook Air 2010 Late основной и единственной ОС

Для начала займемся подготовкой флэшки и сделаем ее загрузочной. Для этого нам понадобится PC с Windows 7 и диск от Windows (желательно x64, так как ноутбук поддерживает x64).
Вставляем флэшку на 4Гб в USB, набираем в поиске CMD, правой клавишей «Запустить с правами Администратора».
Далее набирает diskpart (это системная утилита для разбивания дисков, аналог старого fdisk). Теперь по этапам, что делаем в diskpart:
- Набираем list disk (отобразится список дисков, в нем ищем нашу флэшку на 4Гб, у меня она disk 3)
- select disk 3 (выбираем нашу флэшку)
- clean (стираем с нее все)
- create partition primary (создаем на ней основной раздел)
- select partition 1 (заходим в созданный раздел)
- active (делаем раздел активным)
- format fs=fat32 quick (форматируем, можно отформатировать в NTFS)
- assign (подключаем диск, и назначаем ему букву)
- exit (выходим, cmd не закрываем, он нам еще понадобится)
Подробнее о diskpart: http://support.microsoft.com/kb/300415
- F: (у меня CD-ROM обозначается буквой F:, у вас может быть другая)
- cd \boot\
- bootsect /nt60 E: (где E: это имя флэшки)
Этап 2. Подготовка Macbook Air
Если было бы так все просто, и можно было просто вставить флэшку в Macbook и установить Windows 7, этого бы поста не было.
И так по пунктам:
- Для начала нам потребуются драйвера для Windows 7, на флэшке, которая идет в комплекте с Air, драйверов нет (кстати, флэшка которая идет в комплекте, определяется как внешний CD-ROM).
- Возьмем вторую флэшку, отформатируем ее в Fat32 с помощью дисковой утилиты.
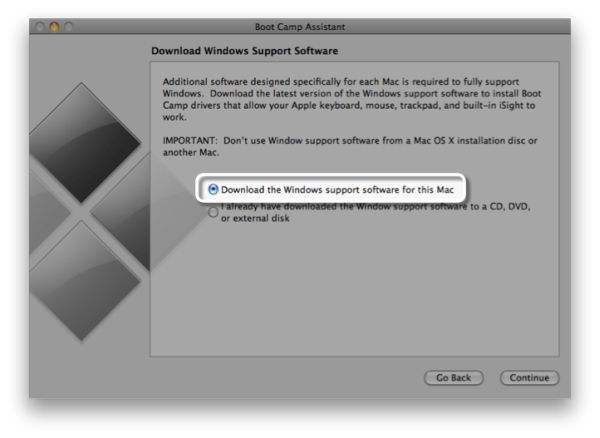
- Запустим bootcamp. И на вопрос, есть ли у нас подобная флэшка или диск с драйверами, ответим нет, и попросим скачать с интернета:
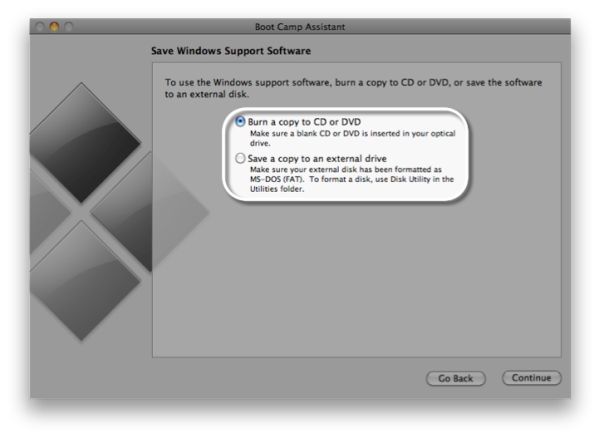
- После того как все скачается, запишем это на нашу флэшку выбрав пункт, записать на внешний диск:
На предложение разбить диск на разделы и вставить диск с Windows отвечаем отрицательно, и просто закрываем Bootcamp.
Подробнее о том как работать с Bootcamp: http://support.apple.com/kb/ht4407
Этап 3. Заставить Macbook видеть USB Flash с Windows
Все мои попытки заставить Macbook видеть загрузочную флэшку, завершились неудачей, поэтому пришлось воспользоваться Google.
Оказывается я не один, кому нужен чистый Windows/Linux на Macbook, и для этого есть программа rEFIt.
Скачиваем ее с официального сайта: http://refit.sourceforge.net/. Я установил себе последнею версию 0.14. Устанавливается она стандартно, как любое приложение в MacOS.
После установки надо перезагрузить компьютер 2 раза. На второй перезагрузке необходимо зажать правый-option и появится подобное меню (USB Flash с Windows должна быть в MacBook): 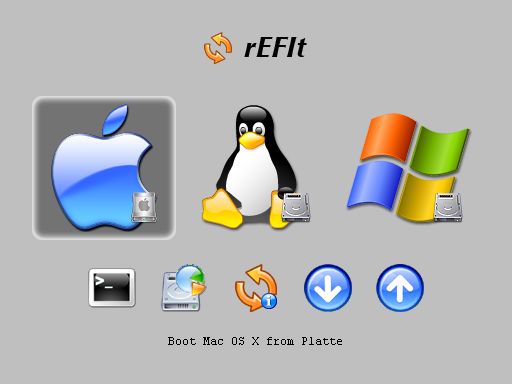
У вас по умолчанию будет значок MacOS и значок Windows. Нам надо выбрать Windows.
После запуска установщика, ввода ключа, выбираем «полная установка».
Будет выведен список разделов, на которые размечен SSD: 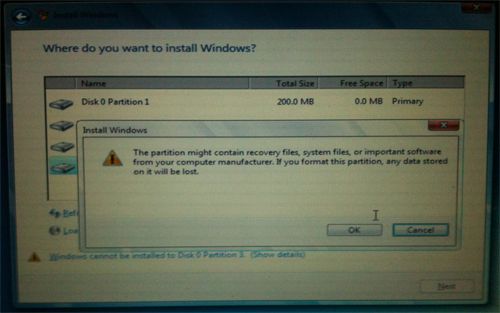
Удалям все разделы! И создаем новые, при создание Windows предложит, точнее прикажет, создать системный раздел на 100Мб.
Диск я разбил на 100Мб(), 40Гб (система), и остальное.
Как все установится, компьютер перезагрузится, и запустится виндовс, в начале, он возможно долго будет висеть на белом экране, и искать раздел MacOS, это вылечится после установки драйвером, и приложения Bootcamp в Windows, чтобы быстрее нашелся нужный раздел, зажимаем левый option и выбирает диск с Windows.
После того как установка завершится, устанавливаем драйвера со второй флэшки, перегружаем. После перезагрузки заходим в Bootcamp, выбираем диск для загрузки Windows и нажимаем перезагрузить сейчас. ВСЁ! Теперь вы не будете видеть белый экран включения Macbook около минуты.
Немного о том как все это работает
Поработав 2 дня, на новеньком MacBook, я оценил все преимущества SSD. Windows грузится 10-15 секунд (от нажатия кнопки включения, до того как все иконки в систреи загрузятся)
Word отскрывается за 1 секунду
Photoshop CS5 – первый раз за 4 секунды, если выключить и включить заново 2 секунды (связано скорее всего с ReadyBoost, и всякими новыми фичами в Windows 7)
Время отклика приложения мгновенное.
И все это с сочетание Core2Duo, DDR3, Multi-touchpad, 1440×900…
Одним словом, я очень доволен! И не имеет значение что стоит Windows или MacOS, потому что MacBook Air 2010 Late отличная железка!
Всем счастливого Нового Года и хороших подарков!