Как установить CentOS в VirtualBox. Полная пошаговая инструкция

Познакомиться с возможностями операционной системы CentOS вы можете, установив ее в VirtualBox на ПК под управлением Windows 7, 10; macOS или другого дистрибутива Linux.
Что надо знать перед установкой
Как скачать CentOS

Щелкните по кнопке «CentOS Linux DVD ISO» и стартует загрузка образа операционной системы. Вы можете также скачать ее с торрента.

Список зеркал предлагается по ссылке. В зависимости от особенностей вашего интернет-соединения, прямая загрузка может быть недоступна. В этом случае вам останется только воспользоваться торрентом.

Что нужно для установки системы
- ПК с 64-битным процессором (для CentOS 7 и 8). 32-битные процессоры поддерживаются версией CentOS 6.10.
- Не менее 1 гигабайт ОЗУ. Рекомендуется 1 гигабайт ОЗУ на каждое ядро ЦП.
- Не менее 10 гигабайт на жестком диске (лучше 20 гигабайт).
Формат установочных файлов
Дистрибутив CentOS основан на Red Hat Enterprise Linux. Для установки софта в CentOS применяются пакеты RPM (Red Hat Package Manager).
Предпочитаете дистрибутивы на основе Debian (DEB)?
Я подробно рассмотрел процесс установки в VirtualBox:
- Linux Mint
- Ubuntu и 5 способов установки программ для нее
Как создать виртуальную машину
Откройте VirtualBox и нажмите расположенную на панели под строкой меню кнопку «Создать».

Создавая виртуальную машину и выделяя ей аппаратные ресурсы, используйте кнопку «Далее» для перехода к следующему экрану, «Назад» — для возврата к предыдущему.

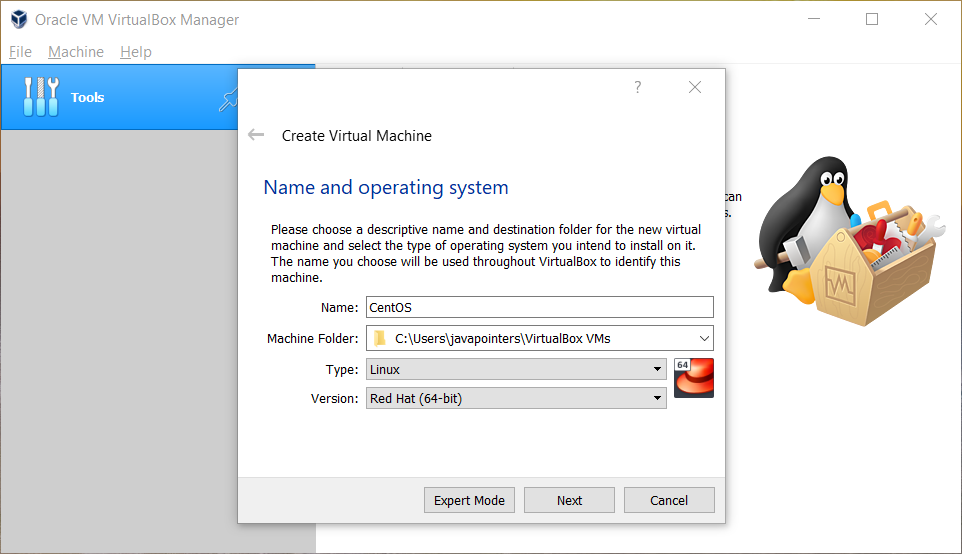
В поле «Имя» введите название нового «виртуального компьютера». «Тип»: Linux; «Версия»: Red Hat.

Выделение ОЗУ и виртуальный жесткий диск для CentOS
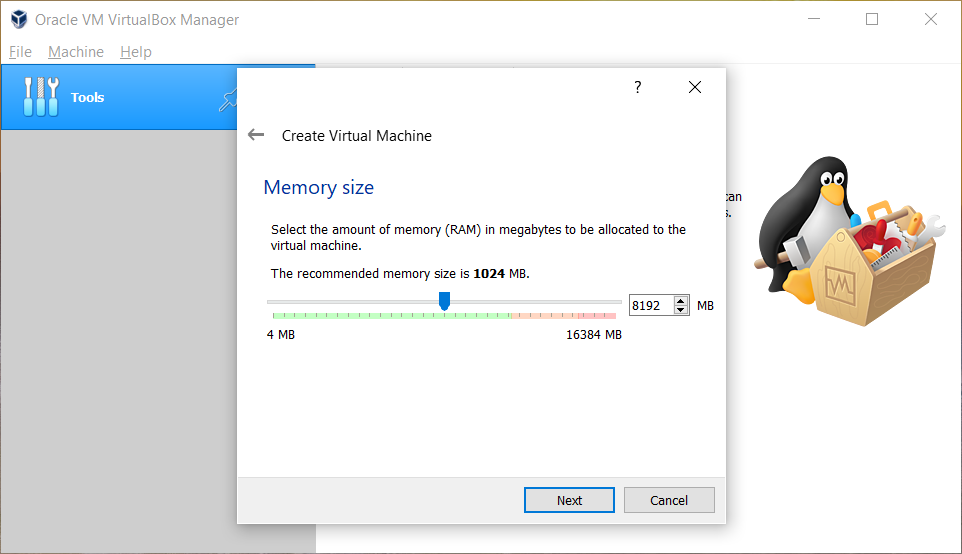
Установите объем оперативной памяти не менее 2048 мегабайт. Это сделает работу с ОС более комфортной.

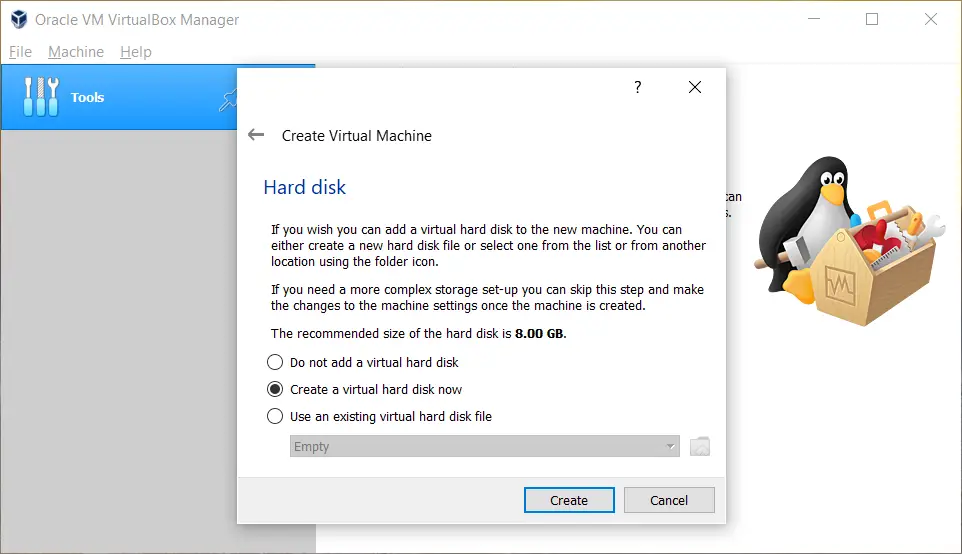
По умолчанию предусмотрена опция «Создать новый виртуальный жесткий диск». Не меняйте ее. Нажмите «Создать».

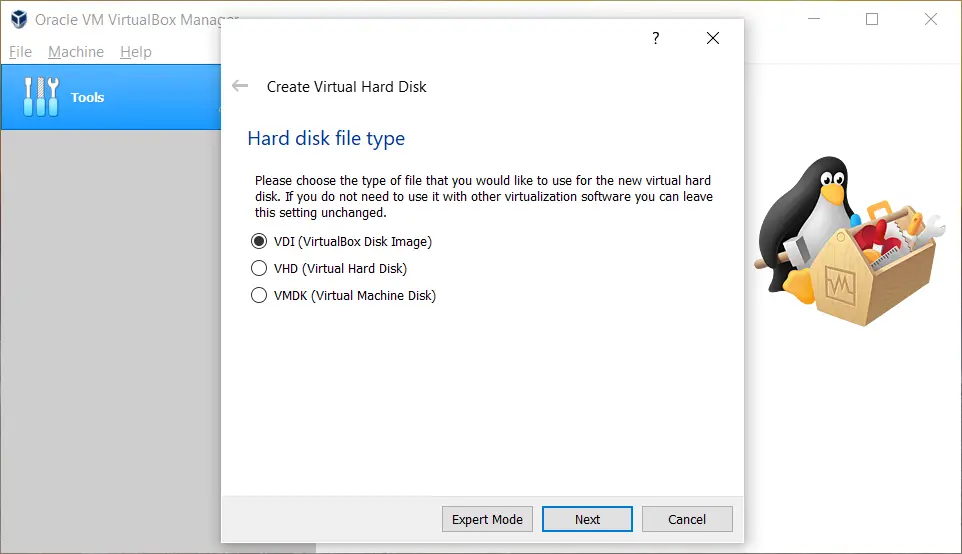
Если вы не планируете использовать создаваемый «диск» с другими инструментами виртуализации, оставьте тип накопителя «VDI».

Если вы укажете в качестве формата хранения «Динамический виртуальный жесткий диск», пространство на накопителе будет использоваться по мере необходимости. Если вы выберете «Фиксированный виртуальный жесткий диск», указанный вами объем предоставляется виртуальной машине сразу и станет недоступен вам для других задач. Фиксированный жесткий диск обычно быстрее, поэтому при наличии свободного пространства на HDD или SSD отдайте предпочтение этому варианту.

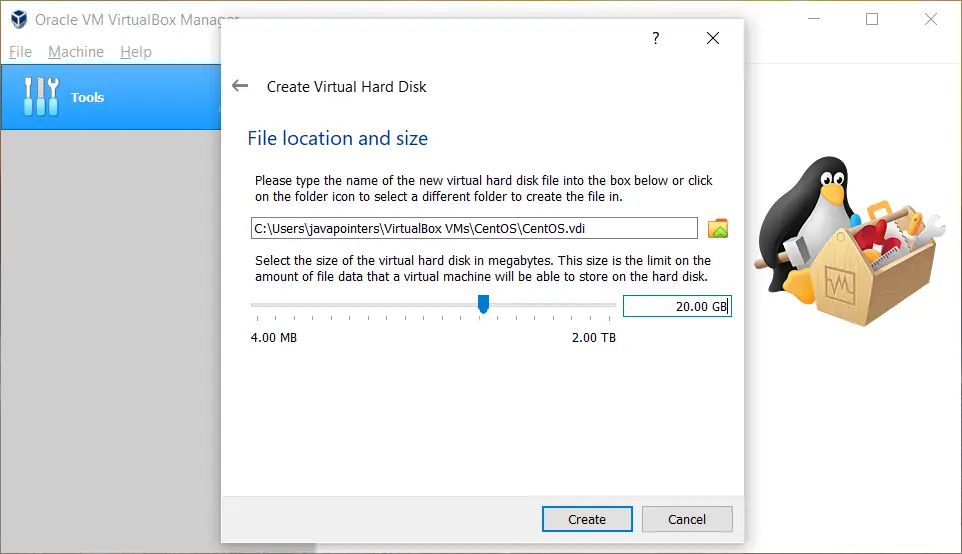
Укажите имя и размер виртуального жесткого диска. Если «железо» вашего ПК позволяет, рекомендую предоставить виртуальному накопителю не менее 20 гигабайт. Нажмите «Создать».

Настройка виртуальной машины
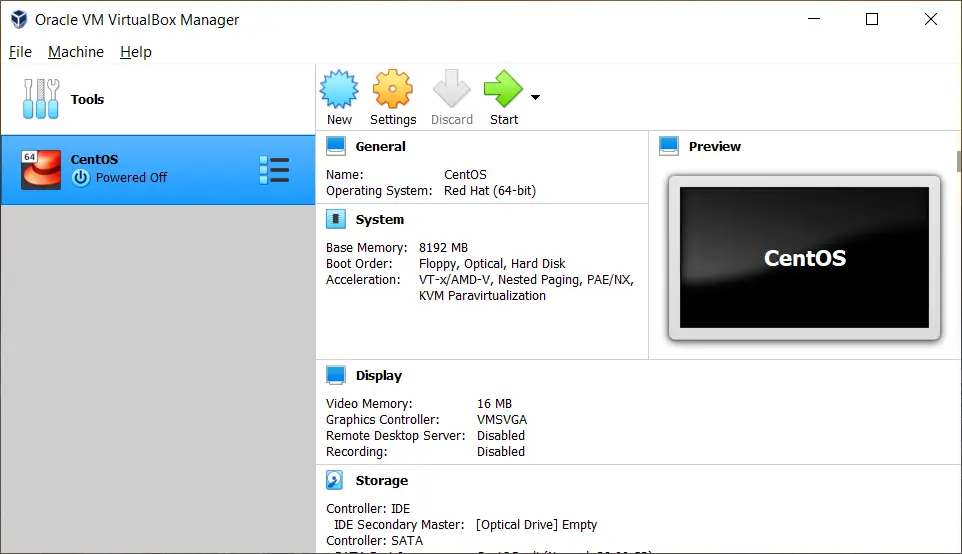
Новый «виртуальный ПК» отобразится в списке после ранее созданных вами.

Выделите ее и нажмите щелкните по кнопке «Настроить», расположенной на панели под строкой меню.

В разделе «Общие» на вкладке «Дополнительно» в полях «Общий буфер обмена» и «Функция Drag’n’Drop» выберите из списков «Двунаправленный». Это необходимо для обмена данными между основной ОС и CentOS, которую вы установите на виртуальную машину.

В разделе «Система» на вкладке «Материнская плата» определите порядок загрузки. Приоритетный: «Оптический накопитель (CD/DVD)»; второй: «Жесткий диск». Снимите «птички» возле других накопителей. Для изменения порядка загрузки используйте стрелки «Вверх» и «Вниз».

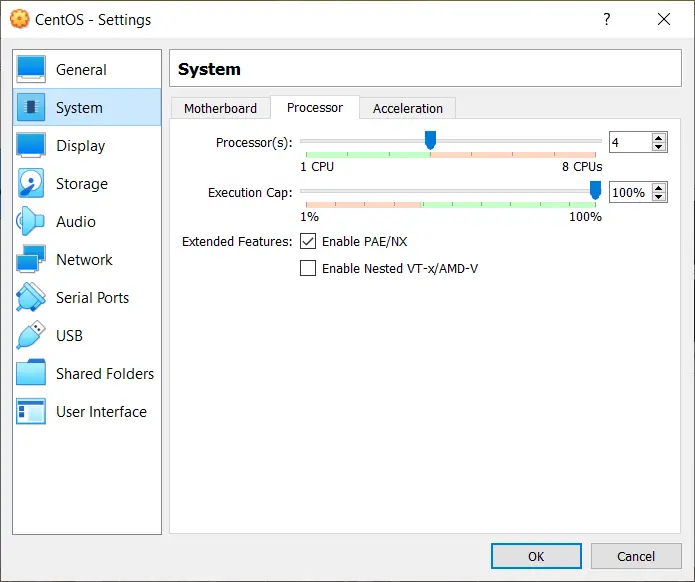
На вкладке «Процессор» определите число доступных виртуальной машине ядер ЦП. Рекомендую менее двух не указывать.

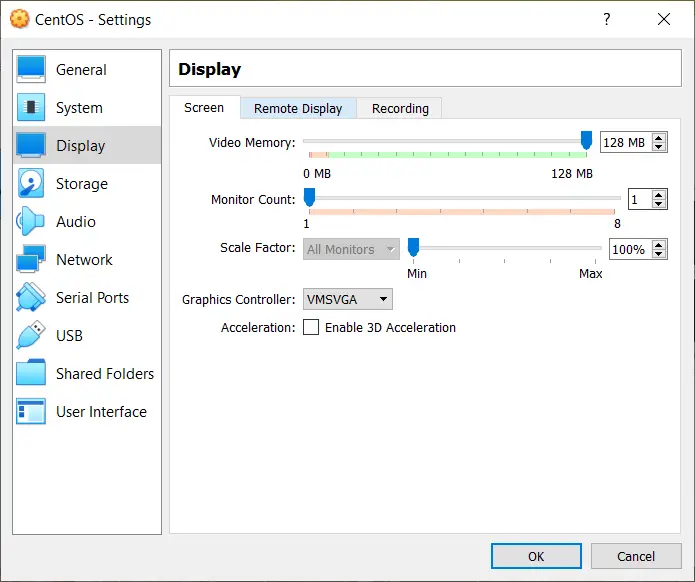
В разделе «Дисплей» на вкладке «Экран» предоставьте виртуальной машине видеопамять. Чем больше объем, тем выше качество изображения и удобнее работа с операционной системой. Нажмите «ОК».

Подготовка к установке CentOS на виртуальную машину
Выделите виртуальную машину. Предусмотрены два способа запустить ее:
- Двойным щелчком мышью по ней
- Нажатие кнопки «Запустить» на панели под строкой меню

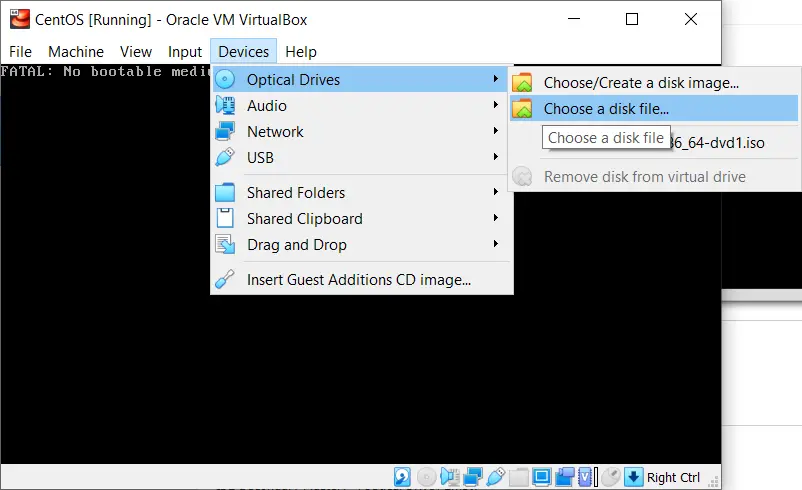
Укажите путь к ранее загруженному файлу ISO-образа CentOS.
Больше статей и видео в нашем Дзен-канале

Нажмите кнопку «Продолжить» в нижней части диалогового окна.

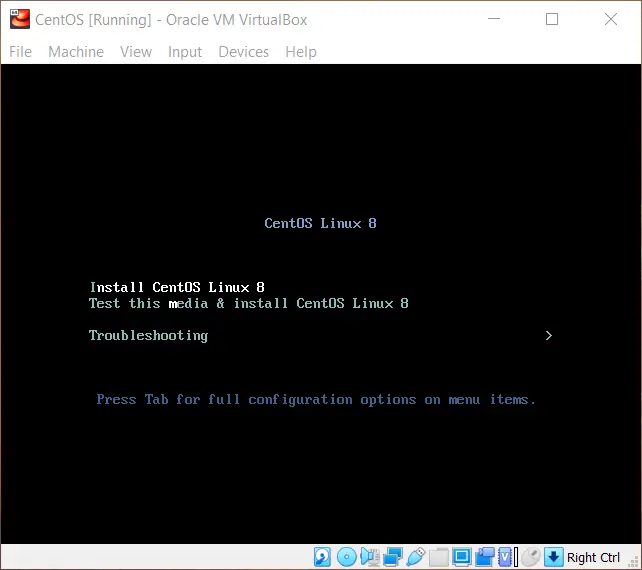
Выберите пункт «Install CentOS Linux 8.0.1905». Если вы устанавливаете другую версию ОС, строка будет несколько отличаться.

Подождите, пока дистрибутив готовится к установке.

Выберите язык мастера установки ОС. Нажмите «Продолжить».

Актуальная раскладка клавиатуры отображается в верхнем правом углу окна установщика CentOS. Для переключения раскладки щелкните один раз щелкните по ней левой кнопкой мыши.

Часовой пояс и сетевое соединение
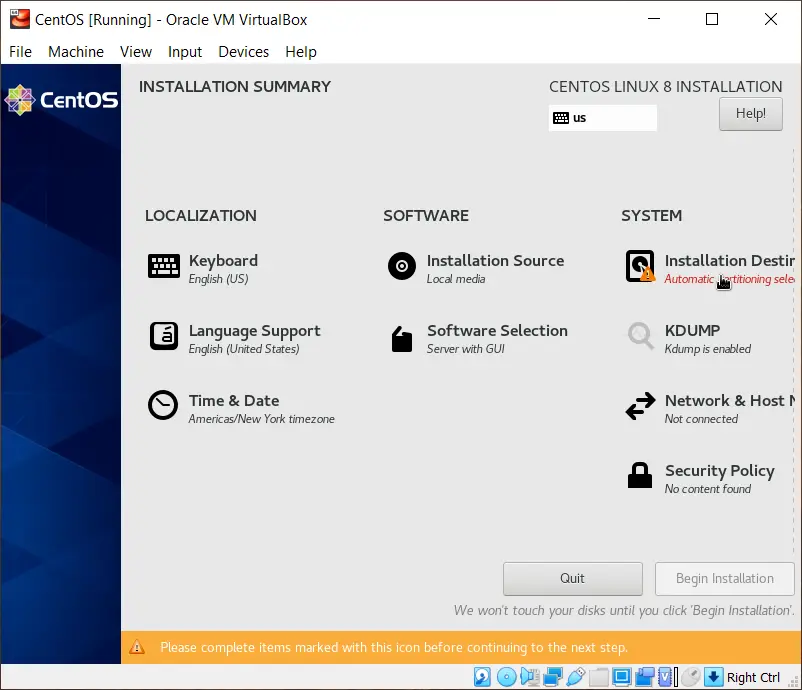
Некоторые секции окна «Обзор установки» отмечены оранжевым треугольником с восклицательным знаком. Заполните их.

В данном случае вам предлагается разбить диск на разделы. Оставьте предложенный установщиком вариант «Автоматически». Нажмите кнопку «Готово» в верхнем левом углу окна.

Перейдите в секцию «Time & Date» и выберите свой часовой пояс.

По умолчанию соединение с интернетом отключено.

В секции «Сеть и имя хоста» переведите ползунок активации сетевого соединения во включенное состояние. «Готово».

Создание учетной записи администратора
Нажмите расположенную в правом нижнем углу кнопку «Начать установку».

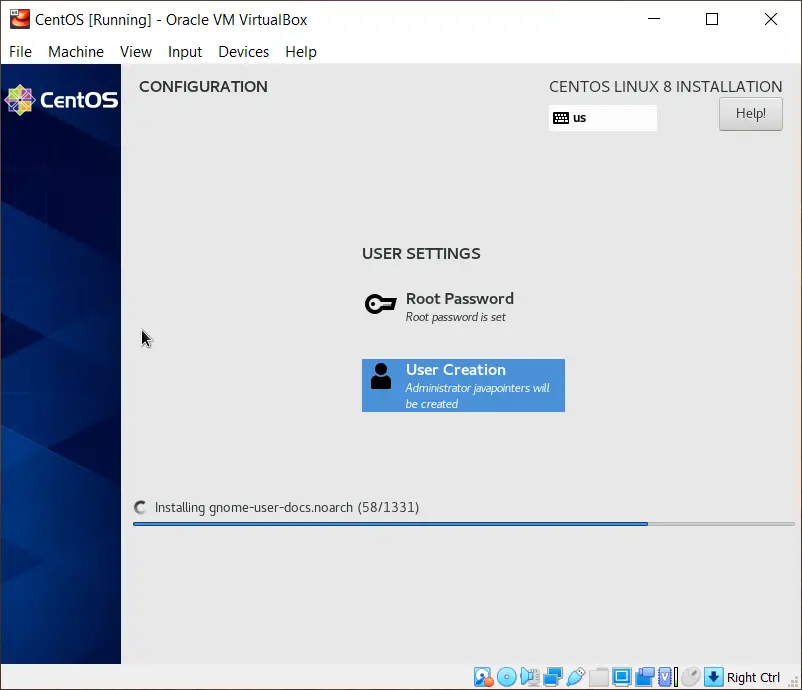
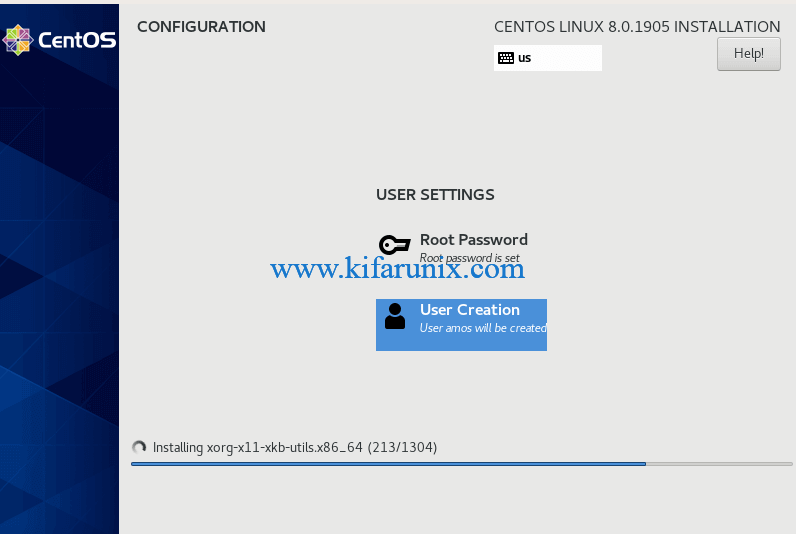
В окне конфигурации:

— Обратите внимание на подсказку мастера установки в нижней части окна.

— Дождитесь завершения загрузки пакетов, установки и настройки компонентов. Может потребоваться 30 и более минут.

— Создайте аккаунт пользователя и пароль администратора системы.

Щелкните левой кнопкой мыши по секции «Root Password». Введите пароль и подтвердите его во втором поле. Учетная запись администратора нужна для управления системой. Одинарный щелчок по кнопке «Готово».
Если установщик сочтет пароль ненадежным, он предложит пользователю подтвердить свое решение двойным щелчком левой кнопки мышью по кнопке «Готово». Причина недовольства мастера установки паролем будет указана на оранжевом фоне в нижней части окна.

Создание учетной записи пользователя
В разделе «Создание пользователя» введите в соответствующих полях полное имя, имя пользователя и пароль пользовательской учетной записи. Пароль подтвердите вводом в дополнительное поле.

Вы можете сделать этого пользователя администратором. Имя пользователя может содержать до 32 знаков без пробелов. Определите, нужно ли вводить пароль при вхоже в систему. Если посторонние не имеют доступа к компьютеру, снимите «птичку» слева от этой опции. Один раз щелкните левой кнопкой мыши по кнопке «Готово». Если мастер установки будет недоволен надежностью пароля, но вас он устраивает, подтвердите выбор двойным щелком по «Готово».

После появления в нижней части окна конфигурации сообщения об успешной установке CentOS, нажмите кнопку «Завершить настройку».

Подготовка к первому запуску CentOS
Будут произведены необходимые автоматические настройки. Перед началом работы с операционной системой:
- Необходимо принять условия лицензионного соглашения. Для этого поставьте «птичку» в белом квадратном блоке, расположенном ниже текста
- Введите пароль учетной записи пользователя, если вы оставили включенной опцию подтверждения входа в систему вводом пароля
- Выберите язык рабочего стола и раскладку клавиатуры
- Включите или отключите для приложений возможность определения местоположения
- Возможно сразу же ввести данные своих учетных записей:
- Nextcloud
- Microsoft
Пятый шаг вы можете пропустить и вернуться к нему после того, как будете уверены, что CentOS вам подходит.

Какую причину перехода на Linux вы считаете главной?
How to Install CentOS 8 on VirtualBox
This tutorial will guide you on how to install CentOS 8 in a VirtualBox. We’ll start by installing an Oracle VM VirtualBox in a Windows 10 host machine, then creating a new CentOS 8 in the VirtualBox and finally installing VirtualBox Guest Additions on CentOS 8.
Install CentOS 8 on VirtualBox
This guide uses VirtualBox 6.1. First, download the latest version of VirtualBox using this link https://www.virtualbox.org/wiki/Downloads. Then follow on-screen instructions to install it in a Windows machine. You also need to download the ISO image of CentOS 8. You can download the ISO image here https://www.centos.org/download/.
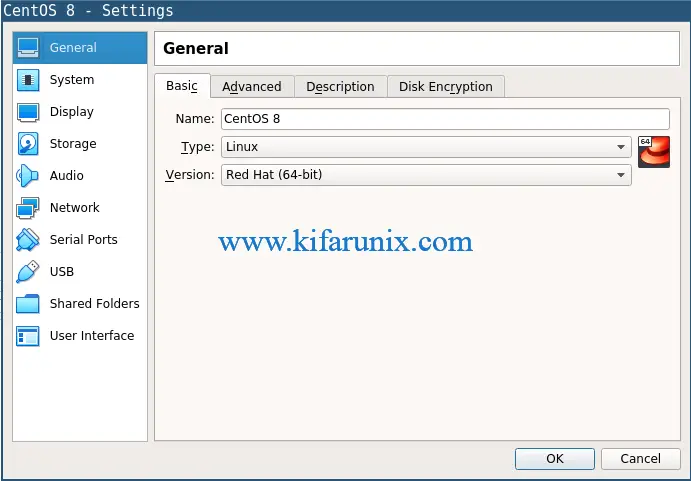
Once installed, click New to create CentOS 8 Virtual Machine. Type the name of the VM and select the correct type and version if it’s not been auto-selected.
Click Next to continue. Adjust the memory size. Normally, we set it only within the green area to avoid using too much RAM on the host machine.
Next, we’ll create a virtual hard disk. This will be the HDD that your VM will use. We set it as a VirtualBox Disk Image with 20GB of space that is dynamically allocated so that it will not immediately take 20GB on the host machine but only consume space as the VM disk increases.

Click Create and you should see your newly created VM on the left side of VirtualBox.
Setup CentOS 8 on VirtualBox
Before we proceed with the actual installation of CentOS operating system on the virtual machine, we first change some settings of our VM. With your VM selected on the left side, click Settings in the header panel. In the General section, go to the Advanced tab. Change the Shared Clipboard and Drag’n’Drop to Bidirectional to allow copy-paste functionality between the host machine and virtual machine. Take note that this might not work properly until we install the Virtual Box Guest Additions on CentOS later.

Next, go to the System section and in the Processor tab, increase the CPU size.
Then go to the Display section and increase the video memory.
Click OK. We are now ready to install the operating system on our virtual machine. Click Start. Once the VM window is opened, go to Devices > Optical Drives > Choose a disk file… and select/browse the ISO image of CentOS 8 that we have downloaded earlier.
Then restart the machine by going to Machine > Reset. Once the machine has been reset, you should see the Centos 8 Installation screen. Select Install CentOS Linux 8. Note: You can go back to your host machine by hitting the control key which is by default is the right CTRL in your keyboard.
The installation wizard should continue. Select the language you would like to use during the installation process.
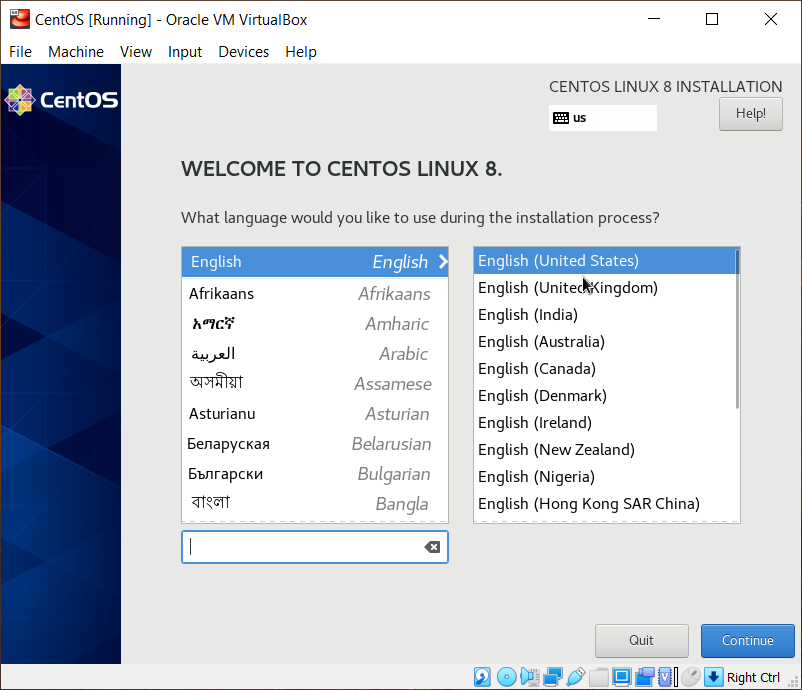
Click Continue. Next, you will select which drive you want to install the operating system. Previously, we created a 20gb virtual disk drive for this machine. We will then select that drive in this installation.
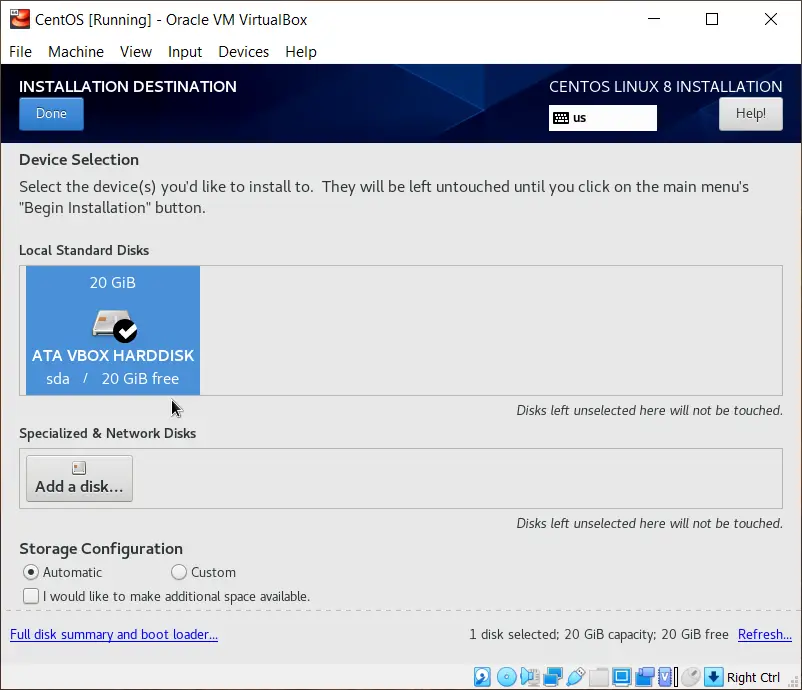
Click Done at the upper left side to continue. Then proceed with the installation process. You can also create your own user and set the root password while the wizard continues on installing the system.
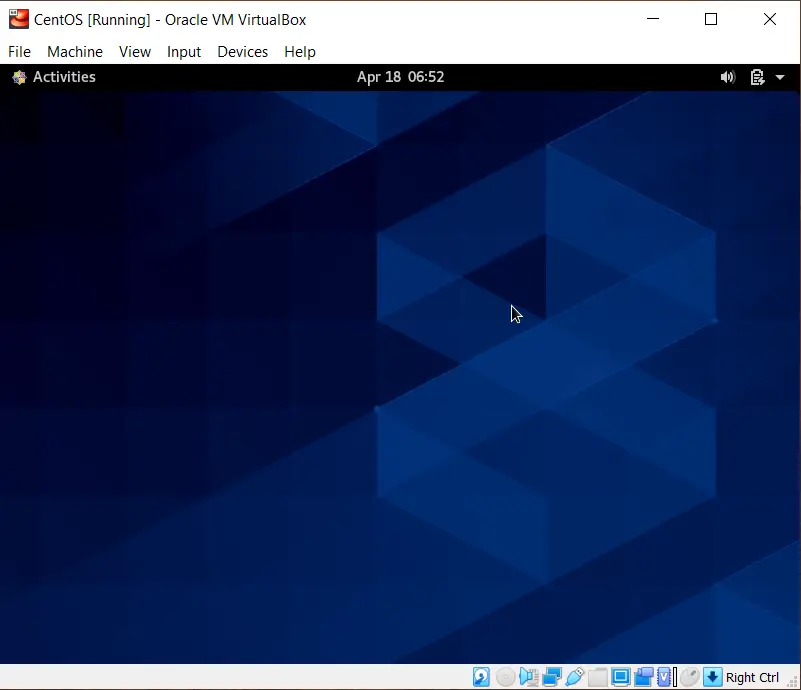
After a successful installation, you need to restart your virtual machine. This time, we don’t need the ISO image inserted in the optical drive. Thus, we can now remove the ISO image from it. Go to Devices > Optical Drives > Remove disk from virtual drive. If it prompts that it’s currently busy, then go ahead and force unmount it. Restart the VM by going to Machine > Reset. It should properly load and you should be greeted with a welcome screen from CentOS. It will prompt you for some configuration like language, etc. After that, it should display your Desktop.
Installing VirtualBox Guest Additions on CentOS
Now that we have a running CentOS 8 on a VirtualBox, we now installed the VirtualBox Guest Additions on Centos 8 to properly integrate the virtual machine to the host machine including copy/paste functionality, synchronizing the date/time from the host machine to virtual machine, mouse and keyboard integration and so on.
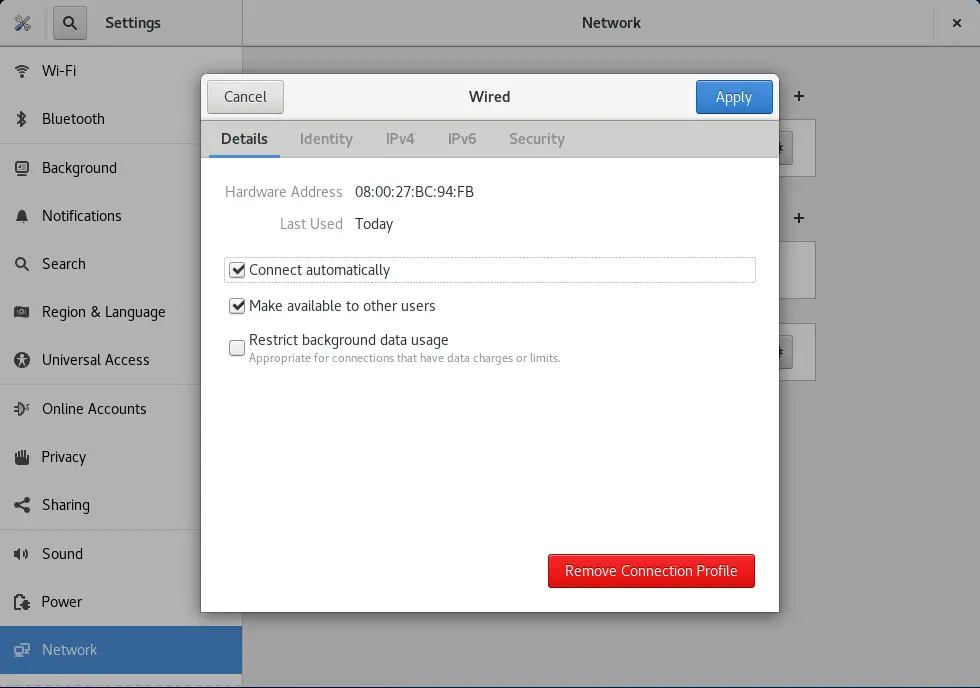
Start by setting your LAN connection to automatically connects to the internet. From the upper-right dropdown menu, go to Wired Settings. From the window opened, click the gear icon and tick Connect automatically. Click Apply.
Then update your repositories by running yum update and reboot your CentOS machine:
sudo yum update
Restart your CentOS after yum update.
Next, install the dependencies of VirtualBox Guest Additions. In the upper left corner, click Activities and search for Terminal. This will open a console/command prompt looking window. Install the dependencies by typing the below command:
sudo dnf install tar bzip2 kernel-devel-$(uname -r) kernel-headers perl gcc make elfutils-libelf-devel
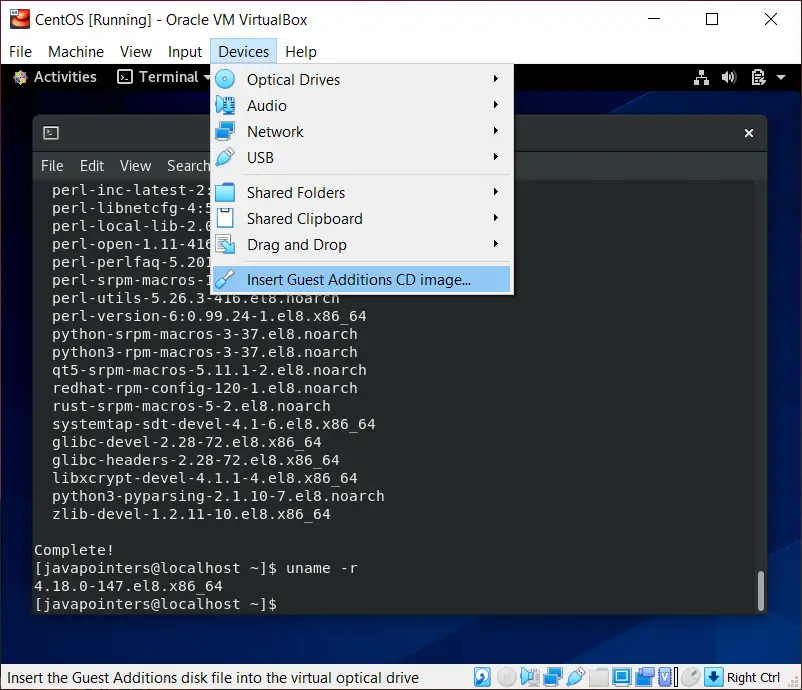
Next, go to Devices > Insert Guest Additions CD image.
Mount the disk using the below command:
sudo mount /dev/cdrom /mnt
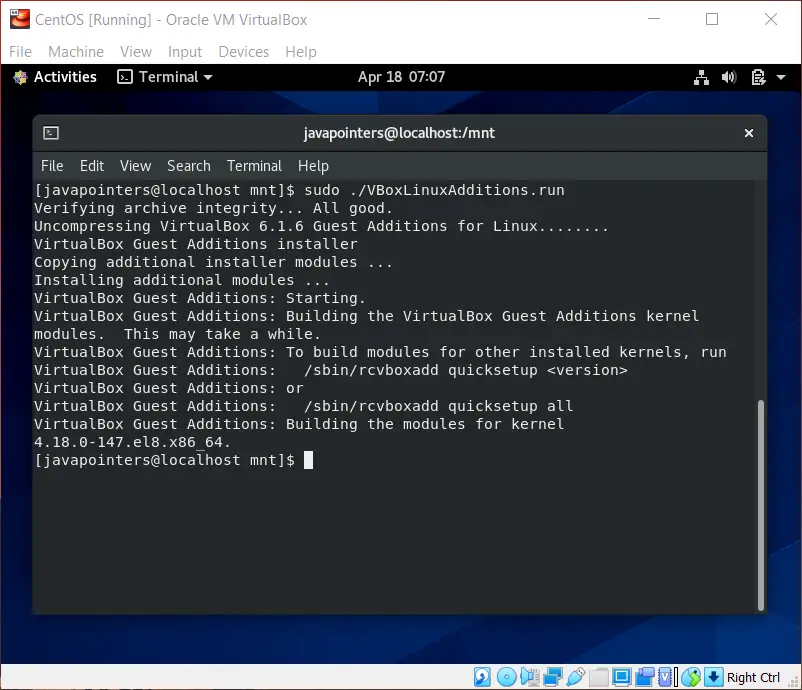
This will mount the guest additions cd to /mnt. Go to /mnt folder and install VirtualBox Guest Additions:
cd /mnt sudo ./VBoxLinuxAdditions.run
It should properly install the VirtualBox Guest Additions. It should show something like this:
Unmount the cd by running the command:
cd / sudo umount /mnt
Remove the disk in Drive > Optical Drive > Remove Disk. Click force unmount if it prompts. Restart your VM and test your copy/paste functionality. Your mouse should also seamlessly integrated on your VM.
That’s it for this guide on How to Install CentOS 8 on VirtualBox. We hope the screenshots help and let us know in the comments for any issues you’ve encountered. The next guide will show you how to install Java with JDK on Centos or any RHEL based Linux.
Install CentOS 8 on VirtualBox

So CentOS 8 is just released a few days ago and you would like to test it? Well, let us learn how to install CentOS 8 on VirtualBox.
Install CentOS 8 on VirtualBox
The installation of CentOS 8 on VirtualBox follows the same process you usually use to create VirtualBox VMs.
Download CentOS 8 ISO file
First things first. Get the CentOS 8 iso file from CentOS Mirror. You can simply grab a download link and use wget to pull the iso file.
wget -c http://isoredirect.centos.org/centos/8/isos/x86_64/CentOS-8-x86_64-1905-dvd1.isoCreate New VirtualBox VM
Launch VirtualBox and create a new VM with your preferred settings such as networking, disk, system resources etc.
Attach CentOS 8 Installation ISO
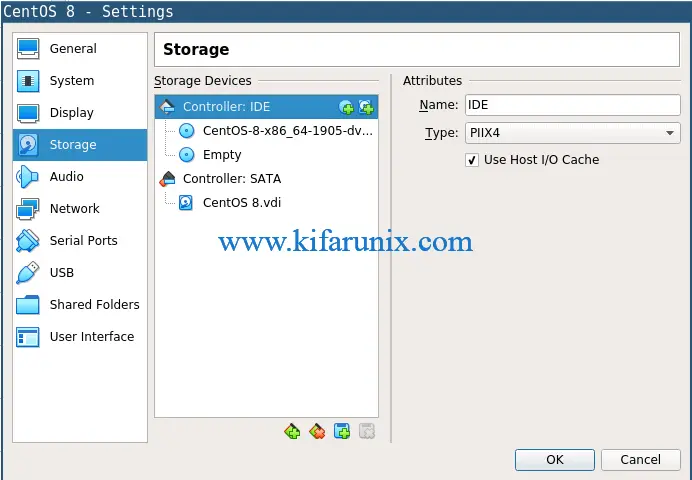
Once you have created and setup a new VirtualBox VM for CentOS 8, click Storage > Controller:IDE.
Next, click the disk like icon with a plus sign to choose the CentOS 8 disk to attach.
Install CentOS 8 VM
Once you have setup your VM and attached the CentOS boot disk, start the vm to begin the installation.
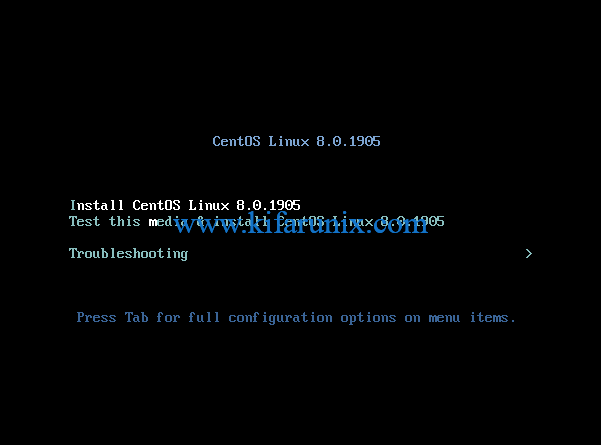
When it runs, select the first installation option, Install CentOS Linux 8.0.1905 .
Next, choose your installation language, the installation disk and click Begin Installation to proceed with installation.
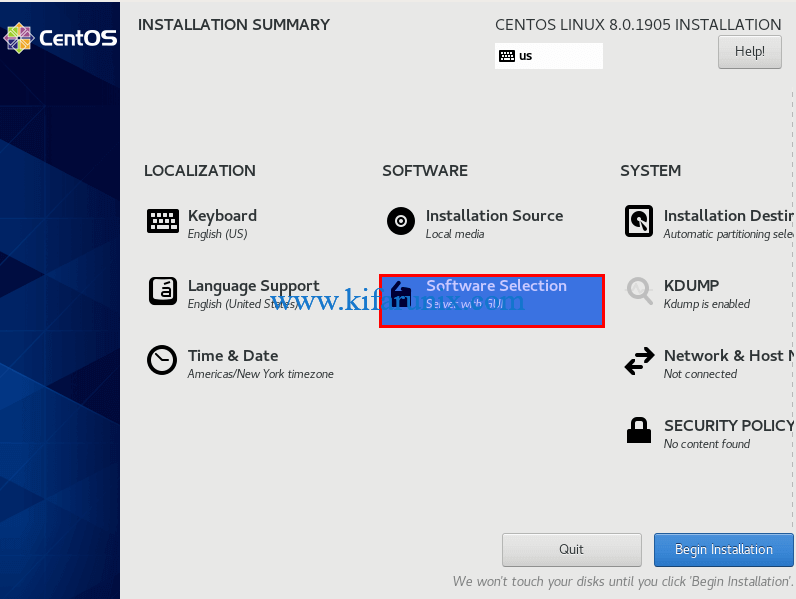
Want to Install the CentOS 8 minimal version instead? Click on Software Selection. (By default, Server with GUI is selected for install).
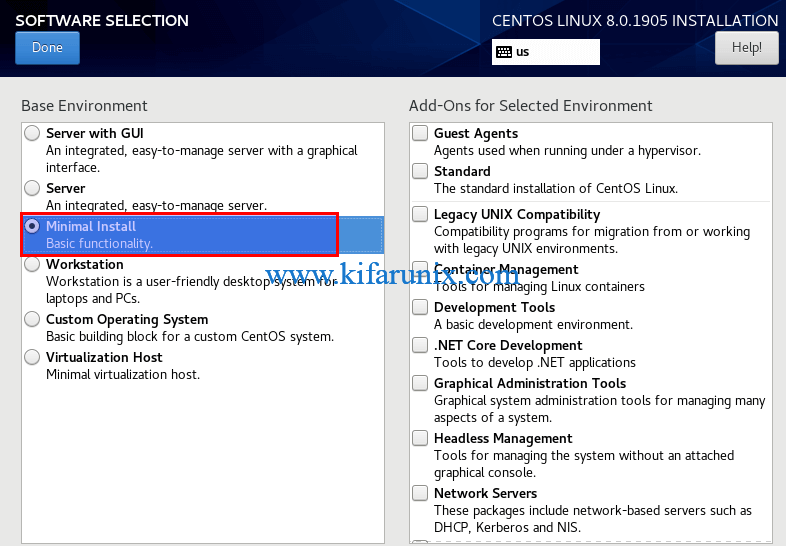
Next, select Minimal Install > Done and begin the installation.
This guide installs server with GUI CentOS 8 edition.
Set your root password and if you want, create a non-root user account and proceed.
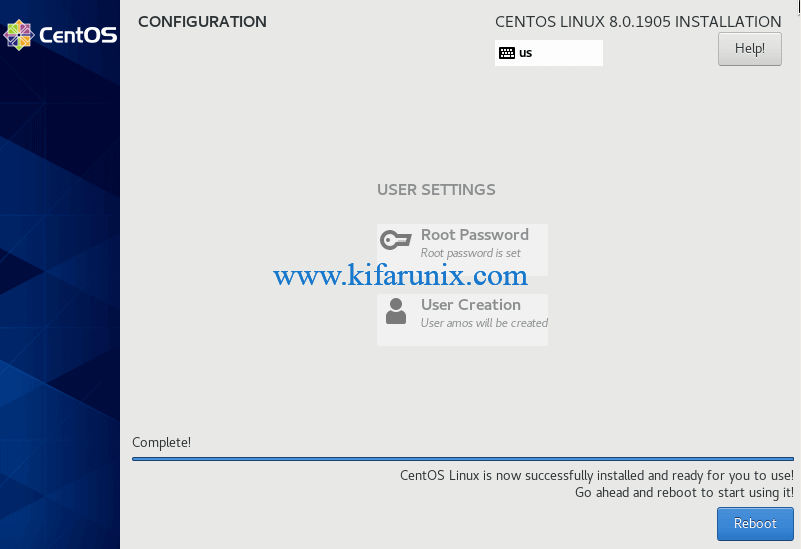
After the installation completes, instead of rebooting your CentOS 8 virtual machine just power it off and detach the installation ISO file from the storage, otherwise the installation process will reinitiate.
Running CentOS 8 Server on VirtualBox
Once you have detached the installation medium, boot up your CentOS 8 virtual machine.
Accept CentOS 8 EULA
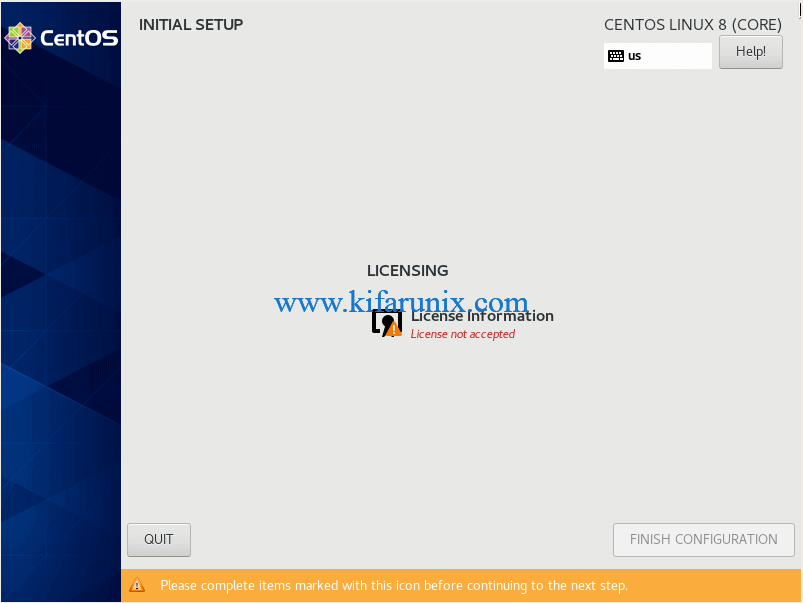
CentOS 8 requires that your accept the End User License Agreement.
Hence, click on the License Information and accept the license.
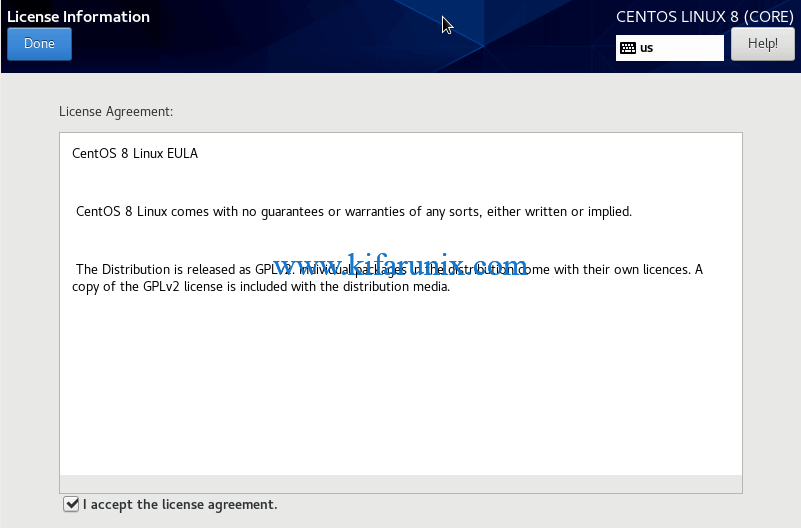
Click Done and finish the configuration to proceed to CentOS 8 desktop.

Login to your CentOS 8 system.
That is all about how to install CentOS 8 on VirtualBox.
SUPPORT US VIA A VIRTUAL CUP OF COFFEE
We’re passionate about sharing our knowledge and experiences with you through our blog. If you appreciate our efforts, consider buying us a virtual coffee. Your support keeps us motivated and enables us to continually improve, ensuring that we can provide you with the best content possible. Thank you for being a coffee-fueled champion of our work!

I am the Co-founder of Kifarunix.com, Linux and the whole FOSS enthusiast, Linux System Admin and a Blue Teamer who loves to share technological tips and hacks with others as a way of sharing knowledge as: «In vain have you acquired knowledge if you have not imparted it to others».
Related Posts
Install MySQL 8 on Fedora 30/Fedora 29
Install Guacamole as Docker Container on Rocky Linux
7 Essential Tools Your Business Should Be Using Today
Install ClamAV on Rocky Linux 8
Install Nagios Server on Oracle Linux 9
Install BackupPC on Ubuntu 22.04
8 thoughts on “Install CentOS 8 on VirtualBox”
Josef Gruber
After Installing CENTOS 8 as VBoxs Guest the display is corrupted and can’t be used.
A restart doesn’t solve the problem.
CentOS 8 is complete unuseable as VirtualBox guest due to display error’S
Hi Josef, sorry for that, Kindly share the screenshot of the error that you get.
Carlos Tejada
Same here, display corrupted with multi-colored random text characters. Host OS is ubuntu 18.10.
Marie Hanschmann
I have the same problem!
Hey Marie, we sorry for that.
Would be good if you share a screenshot of the issue.
James Tanko
I’m having the same issue, its not working after following the installation procedure
Sorry for that James. Can share the screenshot of the issue, please?
How to install and configure CentOS 8 on VirtualBox
VirtualBox is a powerful virtualization tool specially designed to allow Operating Systems such as Windows, Linux, MacOS, Solaris and Open Solaris to run on it as virtual Machines.
Here at Linux APT as part of our Linux Support Services, we regularly help our customers to Install Software, Operating systems and VirtualBox.
In this context, we shall look into how to install CentOS 8 Linux distribution on VirtualBox.
More Information about VirtualBox?
VirtualBox is owned by Oracle and it is designed to run virtual machines on your physical machine without needing to reinstall your Operating System. It is an Open Source Software and completely free to use. An Operating System (OS) and applications which runs in a Virtual Machine (VM)is able to run as if it is on a Physical machine by means of VirtualBox.
How to Install VirtualBox?
To install VirtualBox, you need to visit the VirtualBox’s official Download Center and select the version based on your Operating System such as Windows. Now you can download VirtualBox to your computer.
After the download process is completed, you can proceed with running the installer in order to install VirtualBox on your Machine.
How to install CentOS 8?
You need to start by downloading an ISO installation image of CentOS 8 from CentOS official website and follow the steps below;
Now click on » CentOS Linux DVD ISO » button which will take you to the mirror link for your geographical area. You should click the link to the .iso file. Next, save the file by clicking OK on the prompt screen.
The download process for CentOS 8 ISO installation image will begin automatically which could take some time to complete.
How to create a VirtualBox virtual Machine for CentOS 8?
To create a VirtualBox virtual Machine, follow the steps below;
1. Begin by opening VirtualBox and then click on » New » to create a new Virtual Machine.
2. Now, enter a name for the Virtual Machine (VM) followed by selecting the » Type » as Linux as well as the «Version» as Red Hat (64-bit). Then click on Next to continue the process.
3. In the next page, you can set the Memory size. Here you can set the amount of Memory in RAM for your new VM. For a headless server, 1 GB (1024MB) is sufficient. Click the Next button to continue to the next phase.
4. In the next page, you can create a virtual hard disk by selecting » Create a virtual hard disk now » followed by clicking on the » Create » button. This will take you to the » Hard disk file type » page where you do not need to modify the default settings.
5. Continue by clicking on the » Next » button which will take you to the » Storage on physical hard disk » page where you do not need to change the default settings. Next click on the Next button to continue.
6. On the » File Location and size » page, you can set the virtual hard disk size. For instance you can set it as 20GB.
Then, click on » Create » to complete the process of creation of the new VM.
7. Now click on » Settings » and go to the » Storage » Section. Here you can click on » Empty » in » Controller:IDE «. Then click on the CD icon and click on » Choose Virtual Optical Disk File «.
8. Next, select the » CentOS 8 ISO installation image » and click on » Open «. Then click on » OK «.
9. To start the newly created VM, click on » Start «.
This will start the VM and will display the GRUB boot menu.
CentOS 8 Installation on VirtualBox VM
To install CentOS 8 Linux, follow the steps below;
1. Start by selecting » Install CentOS Linux » from the GRUB menu followed by pressing Enter.
2. Now Select your language and click on Continue.
3. Next, click on » Installation Destination «. Here you can select the virtual hard drive and select «Automatic» from the » Storage Configuration » section. Then click on «Done».
4. Now you can click on » Network & Host Name » where you can enter a host name and click on » Apply » followed by the Done button to complete.
5. For graphical user interface on CentOS 8 server, you can start the installation with the settings you have already. otherwise if you need to install a headless CentOS 8 server, you can click on » Software Selection «.
6. Now, select » Server » followed by clicking on Done button.
7. You can set up your time zone by clicking on » Time & Date «.
8. Now you can select your » Region » and » City » followed by clicking on Done button.
9. Now you can start the Installation of CentOS 8 by clicking on » Begin Installation «. This will start the installation process.
10. You can create a new login user by clicking on » User Creation «. Then type in your personal information and check » Make this user administrator » followed by clicking on Done button.
11. Now you will see that the installation is processing and once completed do a reboot by clicking on » Reboot «.
You might experience a second booting of the VirtualBox VM from CentOS 8 Installation disk again. To prevent this from happening, click on Devices > Optical Drives > Remove disk from virtual drive .
12. Next, click on » Force Unmount «.
13. Now, you can click on Machine > Reset . This will reset the VM.
14. Continue by clicking on » Reset » to confirm the prompt.
This will boot the VM from the virtual hard drive.
As soon as CentOS 8 boots, enter the username and password which you have previously configured during the earlier stage of the installation.
Now your CentOS 8 Linux Kernel will be ready.
How to configure the CentOS 8 VM?
Sometimes, the network connection on your newly created VM will be inactive. To activate it, you need to configure the network interface to start automatically on boot by using the nmtui command as shown below;
sudo nmtui
Now you can select » Edit a connection » and click on Enter to continue.
Here you can select the network interface which you can select » » and press » Enter «.
Next, check «Automatically connect» and press the followed by . Press . To exit, press the » Esc » button on your keyboard twice.
To test the network interface to see if it has an IP address, run the command below;
ip a
You will get an output with an IP address assigned via DHCP.
You can also try to ping an domain such as google.com to the following command;
ping -c 5 google.com
You will see that the internet connectivity is working.
Now this is how to install CentOS 8 in a VirtualBox virtual machine (VM).
Need to Install a Virtual Machine on VirtualBox? We are available to help you today.
Conclusion
This article will guide you through the processes of Installing VirtualBox, CentOS 8 as a Virtual Machine (VM) on VirtualBox.