Делаем стильный скетч из фотопортрета, применяя слои и фильтры
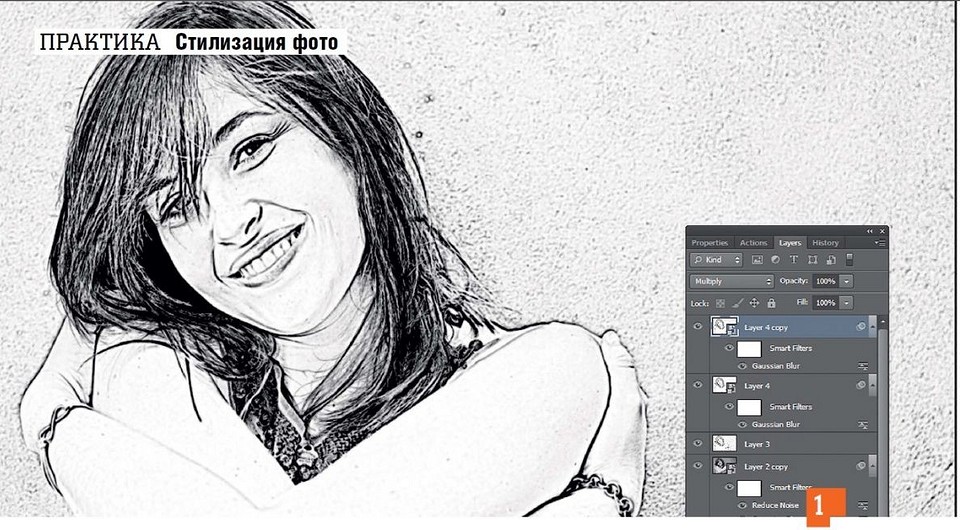

С помощью ловкой комбинации стандартных фильтров в Photoshop вы превратите любой снимок в реалистично выглядящий набросок карандашом.
В своей рекламе компания Adobe обещает превращение снимков в произведения искусства в один клик. Однако крайне редко используемые фильтры сразу же дают приемлемый эффект. Это правило работает и при конвертации фотографии в хороший карандашный рисунок. Вместо того чтобы довериться автоматике в одно нажатие, лучше скомбинируйте несколько фильтров.
Для этого сначала необходимо будет создать достаточное количество новых слоев. Если превратить эти слои в смарт-объекты, то впоследствии, после оценки эффекта, любое изменение можно будет исправить или же отменить эти слои.
Четкие или мягкие контуры?
Последний, восьмой шаг нашего руководства — опциональный. Нарисованные карандашом контуры зачастую выглядят слишком четкими, поэтому художник их слегка растушевывает. Таким образом, конечный результат выглядит созданным угольным карандашом.
Мы рекомендуем в любом случае выполнить действия данного этапа. Поскольку они касаются только самого верхнего слоя, вы можете отменять их и снова применять для оценки эффекта. После этого сохраните тот вариант, который кажется вам более удачным.
Стилизуем фото под рисунок карандашем
1. Создаем рабочий слой
Запустите Photoshop и откройте фотографию, которую вы хотите превратить в карандашный рисунок. Продублируйте слой клавишами «Ctrl+J». Скройте нижний слой и продолжайте работу только с верхним.

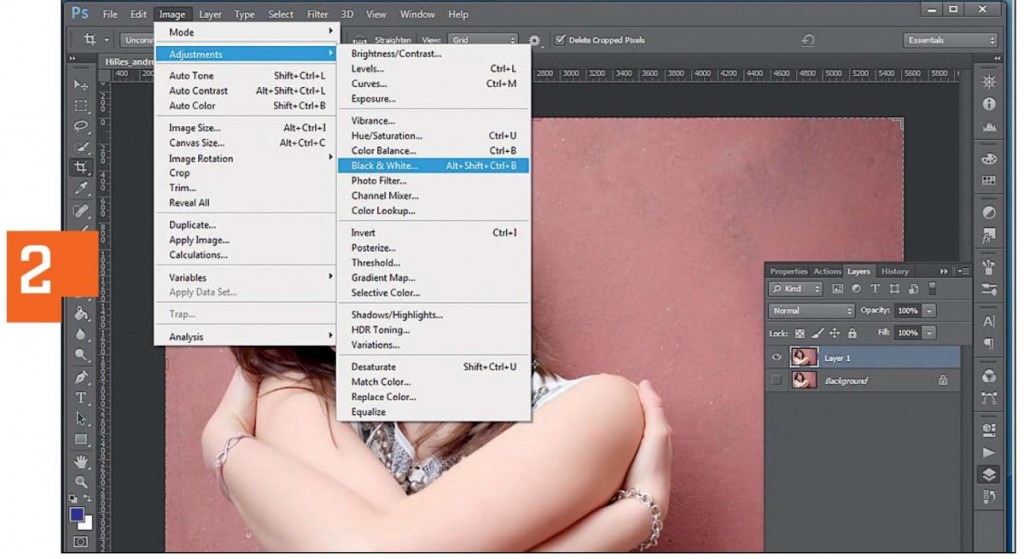
2. Превращаем фотографию в градации серого
Превратите ваш снимок в полутоновое изображение с помощью «Image | Adjustments | Black&White». Теперь либо выберите подходящую предустановку «Preset», либо настройте цветовое оформление снимка посредством ползунков.
В нашем примере хорошие результаты показала предустановка «Darker», поэтому дополнительная настройка не потребовалась. Подтвердите свой выбор нажатием на «ОК».
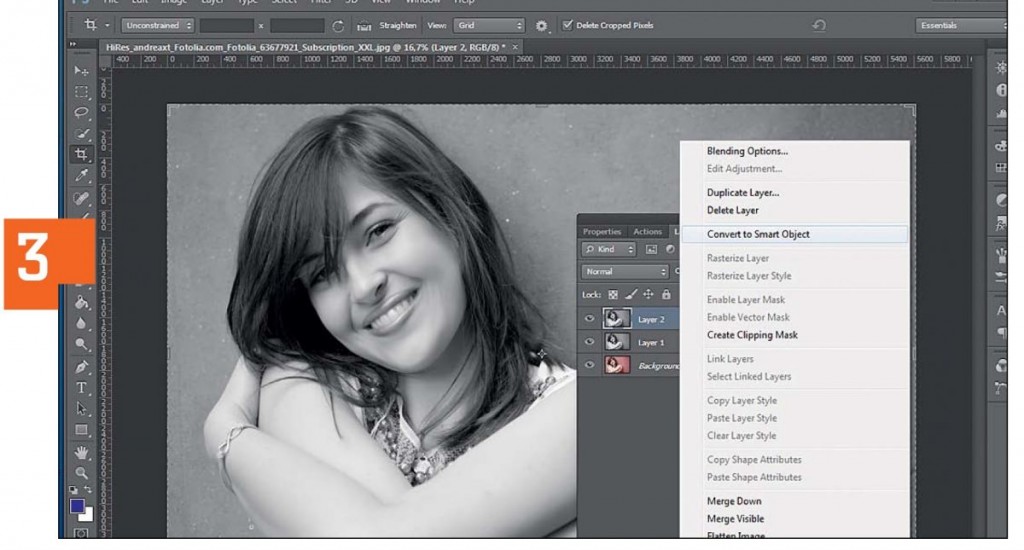
3. Превращаем слои в смарт-объекты
Выделите оба слоя и нажмите «Shift+Ctrl+Alt+E». Появится новый слой, содержащий всю информацию из обоих оригинальных слоев. Правой кнопкой мыши кликните по этому новому слою и выберите «Convert to Smart Object». Теперь продублируйте слой смарт-объекта с помощью клавиш «Ctrl+J».
4. Добавляем эффект карандаша
Поменяйте режим самого верхнего слоя с «Normal» на «Divide». Отобразится практически белое изображение. Теперь переключитесь на смарт-объект, расположенный ниже. Выберите в меню «Filter | Sharpen | Unsharp Mask» и в появившемся окне фильтра введите следующие значения для параметров: «Amount: 500», «Radius: 8,0», «Threshold: 4». Нажмите на «ОК».
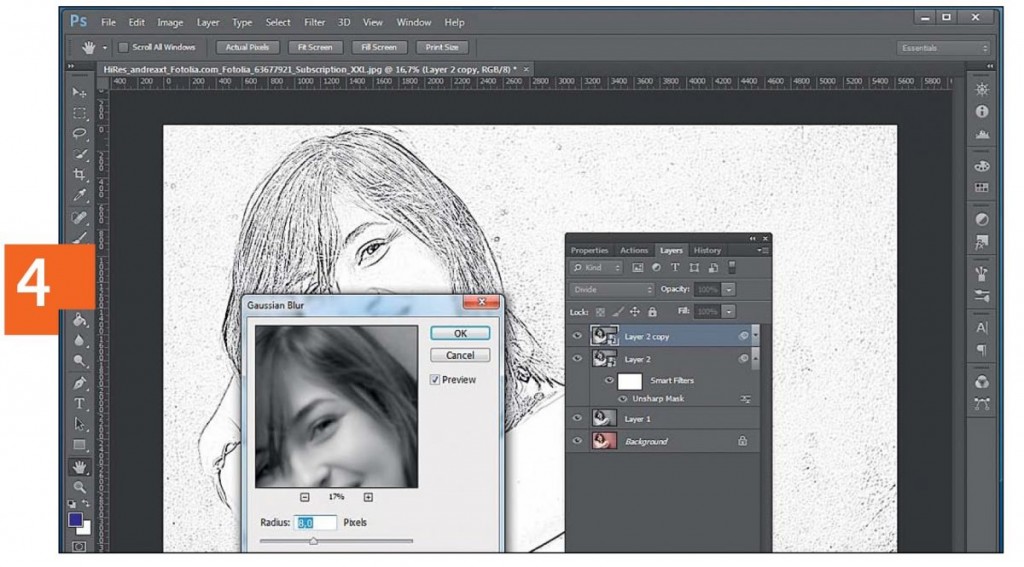
5. Усиливаем темные штрихи
Снова вернитесь к верхнему смарт-объекту и через «Filter | Blur» добавьте «Gaussian Blur». Установите для параметра «Radius» значение примерно «8» пикселей и нажмите на «ОК».
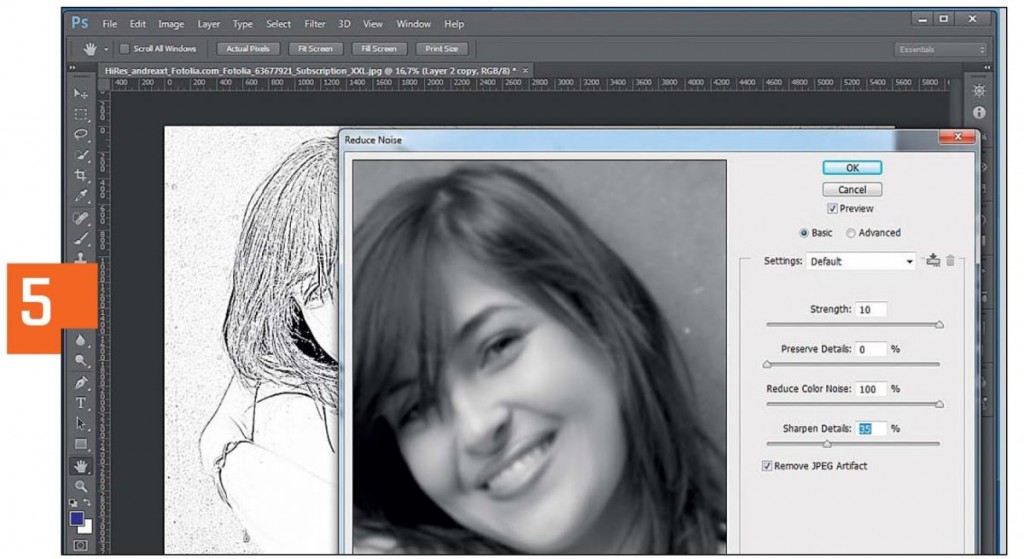
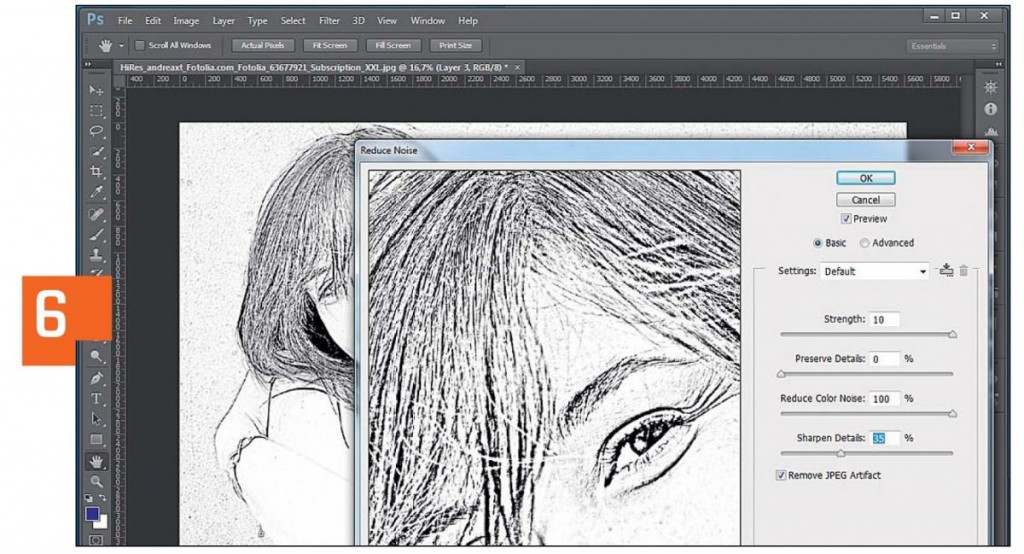
6. Удаляем шумы и артефакты
Оставаясь на том же слое, выберите в меню «Filter | Noise | Reduce Noise». В диалоговом окне фильтра выставьте следующие значения: «Strength: 10», «Preserve Details: 0», «Reduce Color Noise: 100», «Sharpen Details: 35». Также поставьте флажок для «Remove JPEG Artifact». Теперь кликните по «ОК».
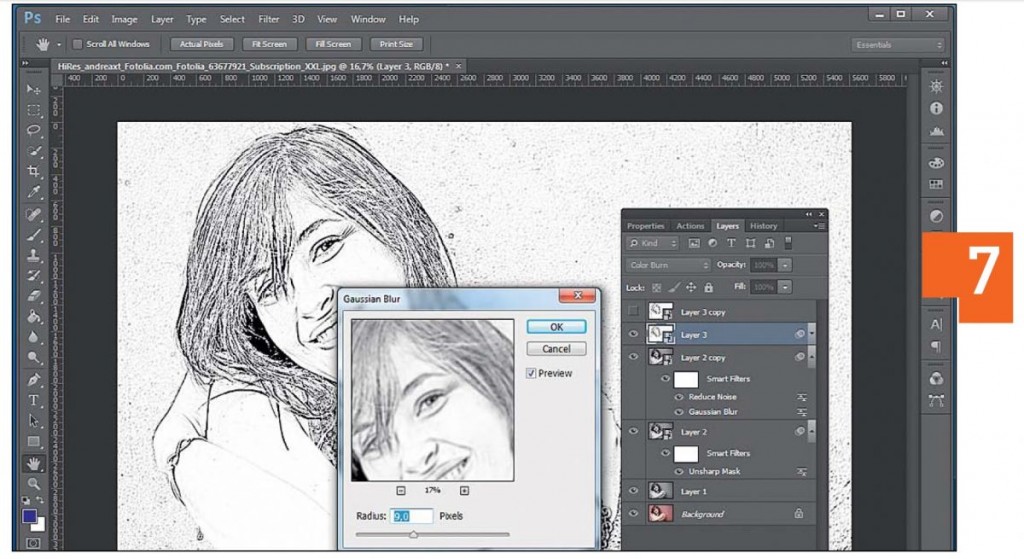
7. Повторное объединение слоев
Вновь объедините все слои в единый комбинацией клавиш «Shift+Ctrl+Alt+E». Переведите режим этого нового слоя с «Normal» на «Color Burn», превратите в смарт-объект и после этого продублируйте. Скройте самый верхний слой и примените фильтр «Gaussian Blur» с радиусом «9» к слою под ним.
8. Растушевываем контур
При желании вы можете немного размыть контур, чтобы фигура выглядела чуть мягче. Для этого снова активируйте верхний слой и переставьте режим с «Normal» и на «Multiply». Используйте для этого слоя фильтр «Gaussian Blur» с радиусом «4». Напоследок снова зайдите через «Filter | Noise» в «Reduce Noise» и примените уже указанные значения к этому слою. Объедините все слои в один клавишами «Shift+Ctrl+Alt+E» прежде чем сохранить фотографию.
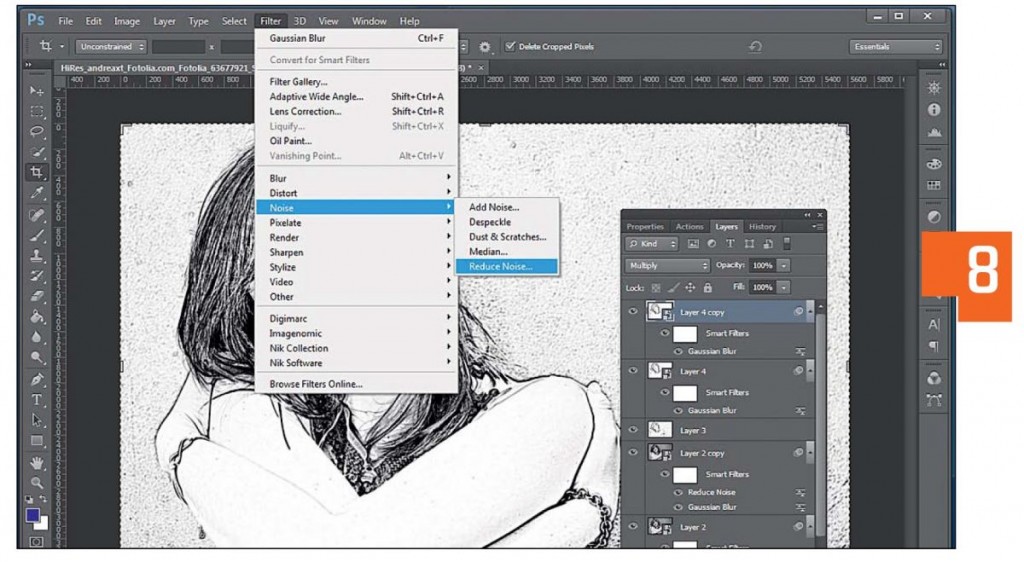
Фото: компании-производители; andreaxt/Fotolia.com
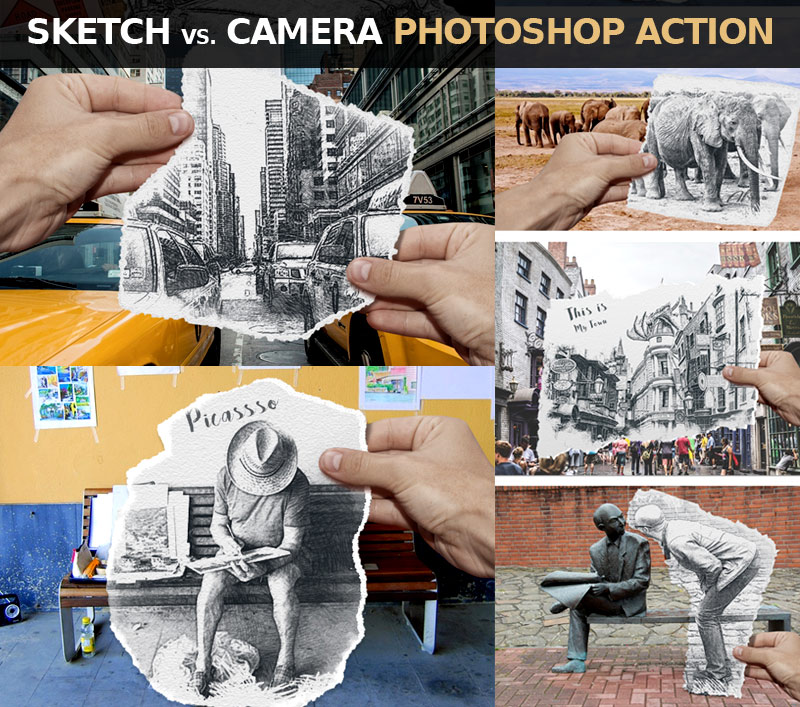
How to Create a Sketch vs. Camera Effect in Adobe Photoshop
In the following tutorial, I’m going to show you how to create a pencil sketch Adobe Photoshop action with a unique twist.
This effect is part of the Pencil Sketch vs. Camera Photoshop action that you can download from Envato Market.
Tutorial Assets
The following assets were used during the production of this tutorial:
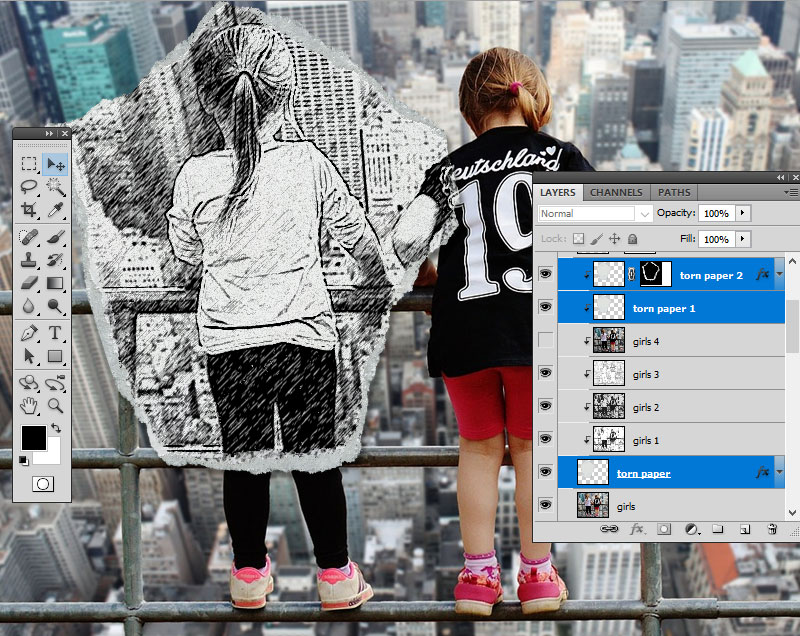
1. Add the Girls Photo
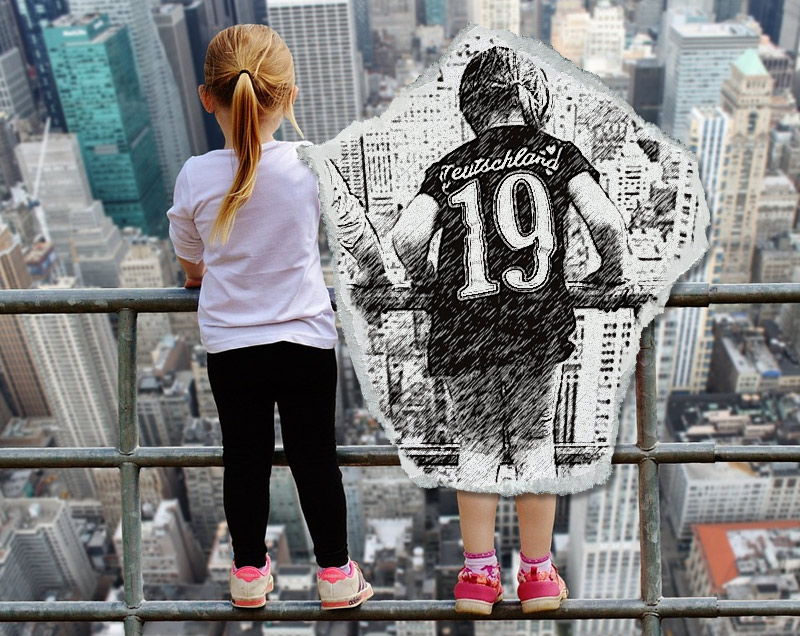
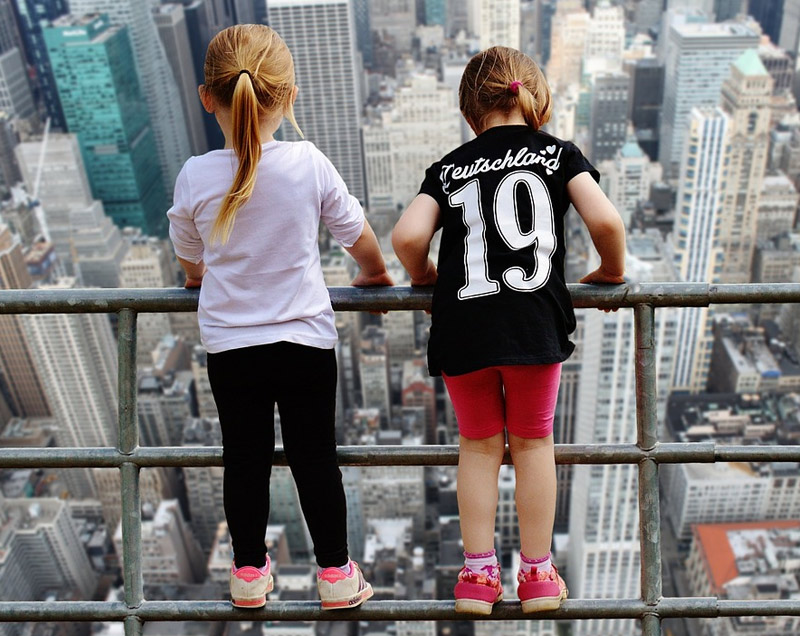
Create an 850 x 636 px New Document. You can, of course, use another size for your PSD file, but you have to proportionally adjust all the sizes used in this tutorial. Add the Girls stock image.
2. Add the Torn Paper
Step 1
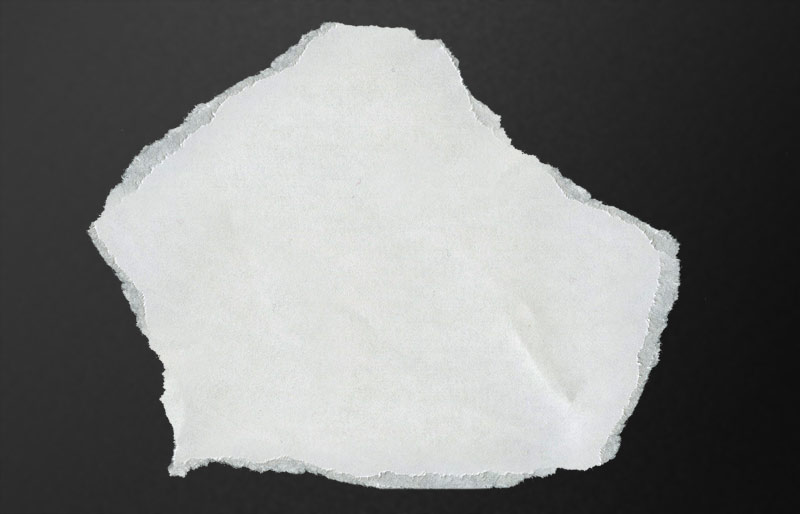
I have attached a Torn Paper PNG image that you can use. But, if you want to create your own texture of a torn paper, it’s very easy to do. You can find a piece of thick paper or cardboard and tear it roughly in the shape that you want. Then place it on a flat surface, preferably of a contrasting color (e.g. black if the paper is white).
Take a photo using a camera or a mobile phone. Make sure that you take the picture from directly above the piece of paper so that the perspective matches what we need.
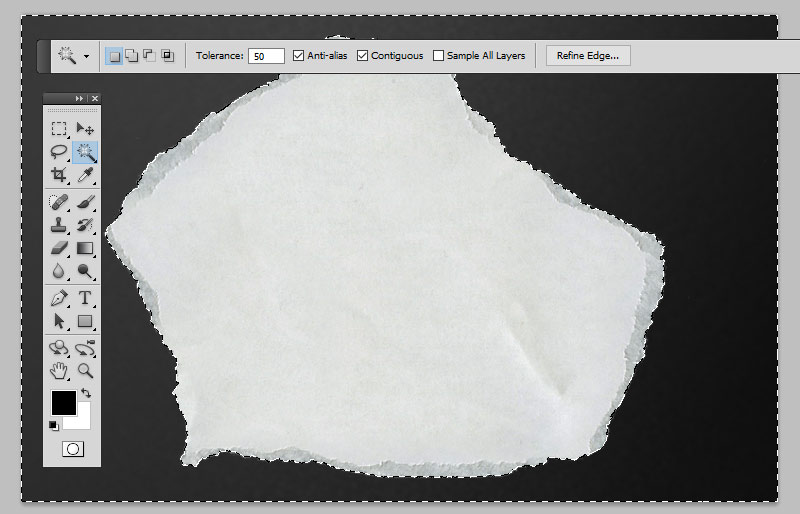
Step 2
Upload the photo to your computer and open it in Photoshop. Using the Magic Wand Tool, make a selection and remove the background.
Step 3
Download the Torn Paper PNG image and add it in a new layer.
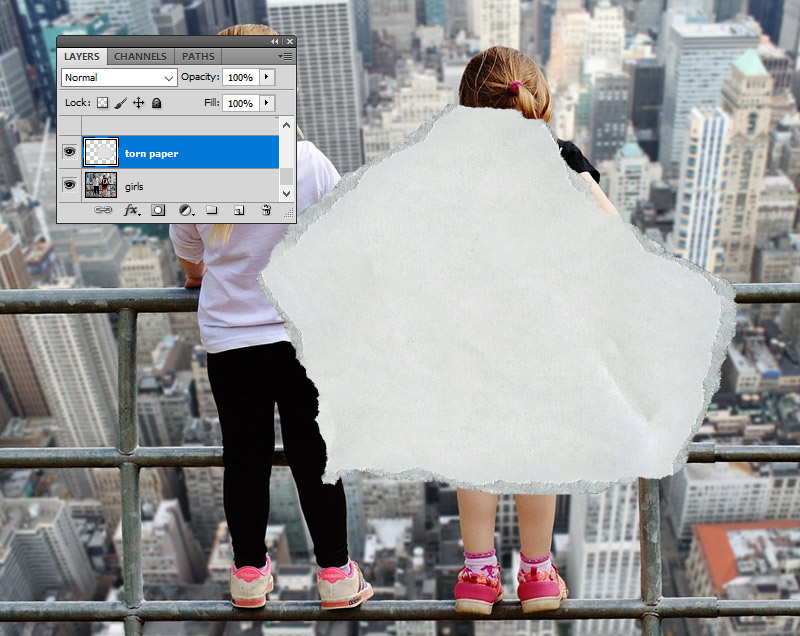

Step 4
Press Control-T to rotate the Torn Paper and position it over the area that you want to turn into a sketch.
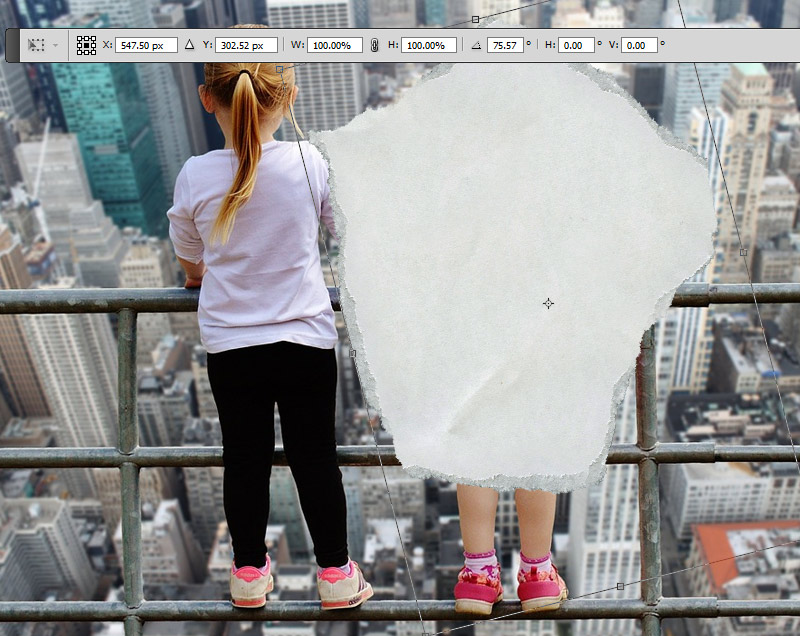
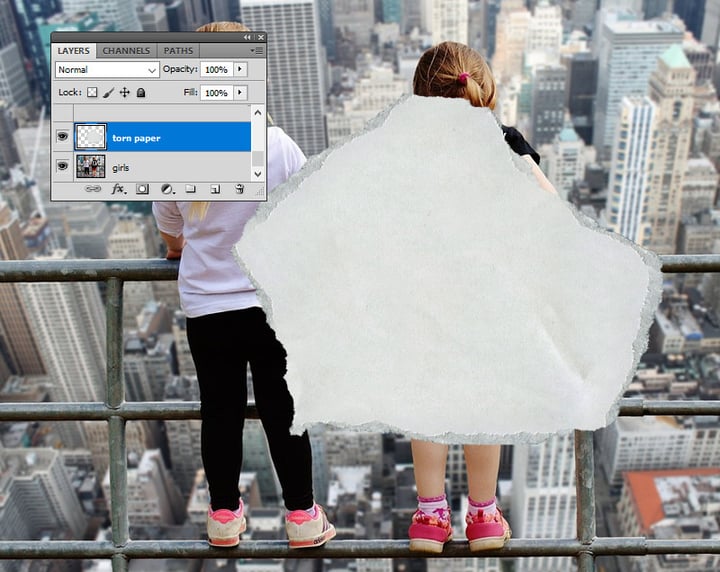
Step 5
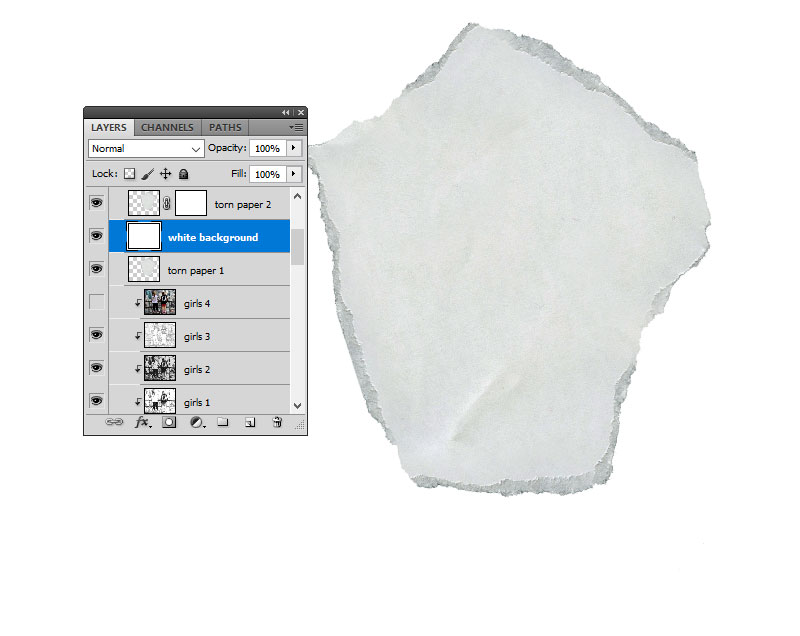
Press Control-J twice, to make two copies of the Torn Paper layer, and call them Torn Paper 1 layer and Torn Paper 2 layer.
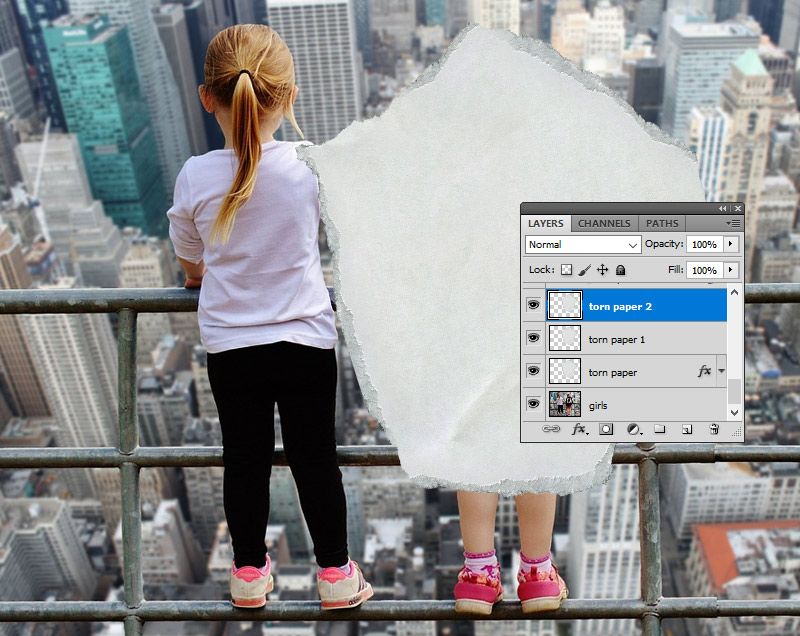
Step 6
Add a Drop Shadow layer style to the Torn Paper layer, using the color #000000 .

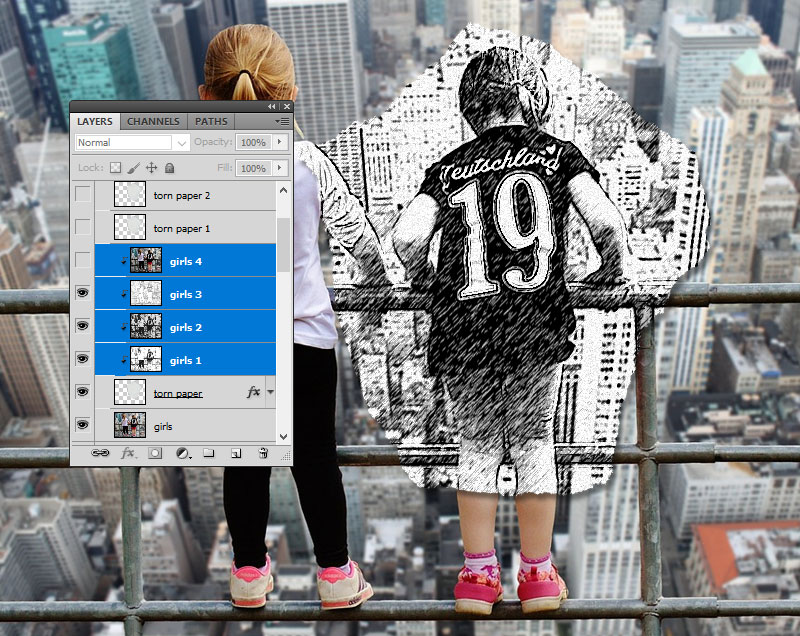
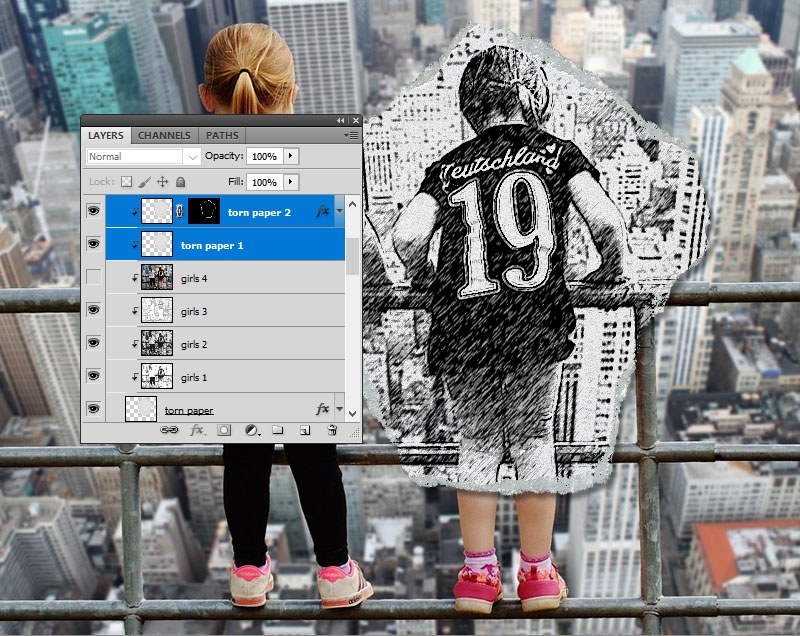
3. Make Four Copies for the Girls Layer
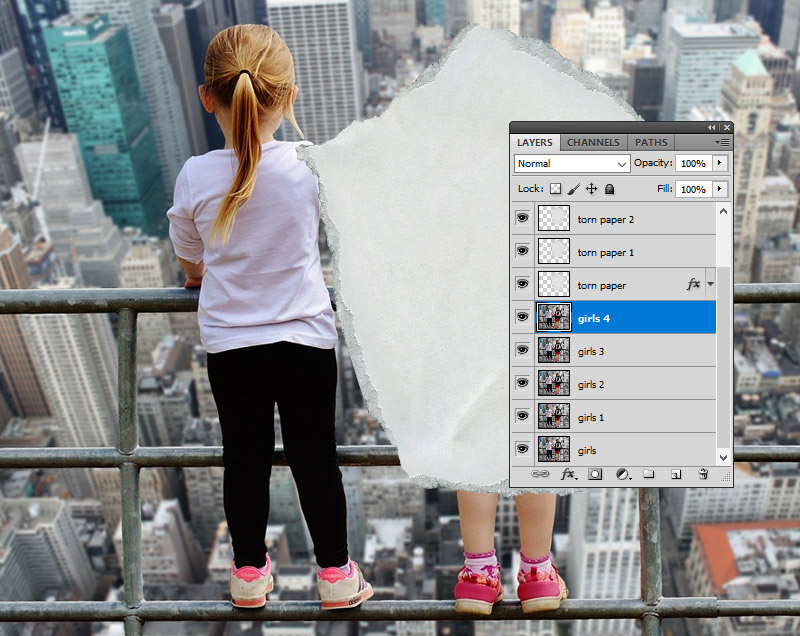
Step 1
Press Control-J four times, to make four copies of the Girls layer, and call them Girls 1 layer, Girls 2 layer, Girls 3 layer, and Girls 4 layer.


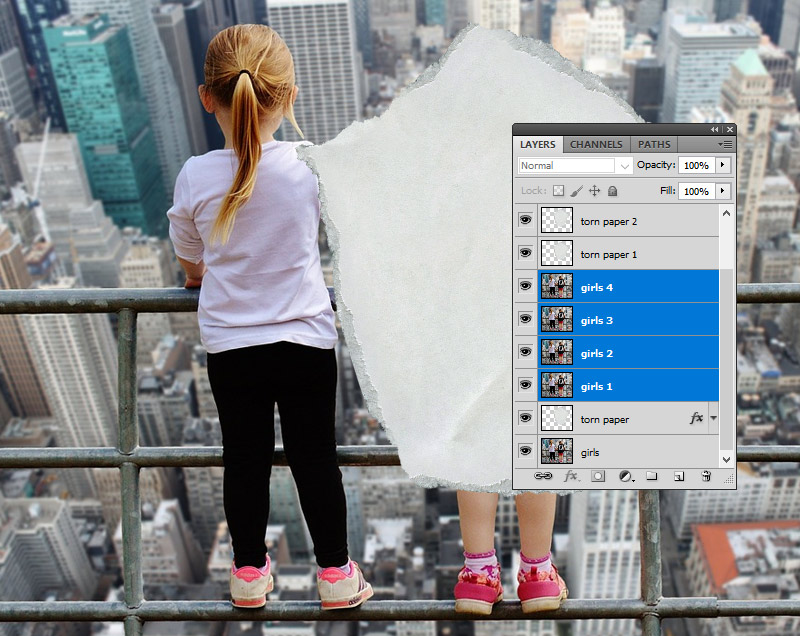
Step 2
Keep the Control key pressed and select Girls 1 layer, Girls 2 layer, Girls 3 layer, and Girls 4 layer. Move them above the Torn paper layer.
4. Use the Graphic Pen and Motion Blur Filters in Photoshop
Step 1
Hide all the copy layers except the Girls 1 layer.
Set the Foreground Color to #000000 and the Background Color to #ffffff .
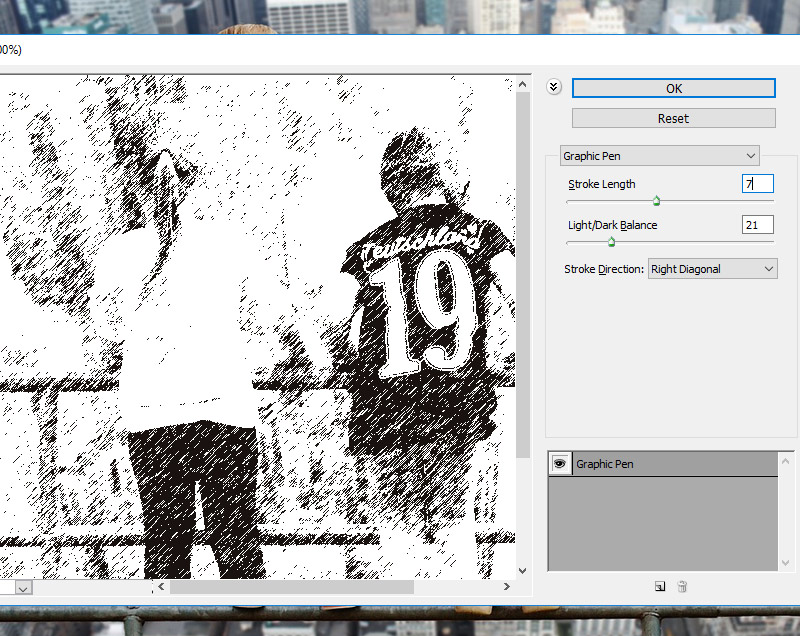
Step 2
For the Girls 1 layer, go to Filter > Sketch > Graphic Pen. For another image, you might have to adjust these settings.
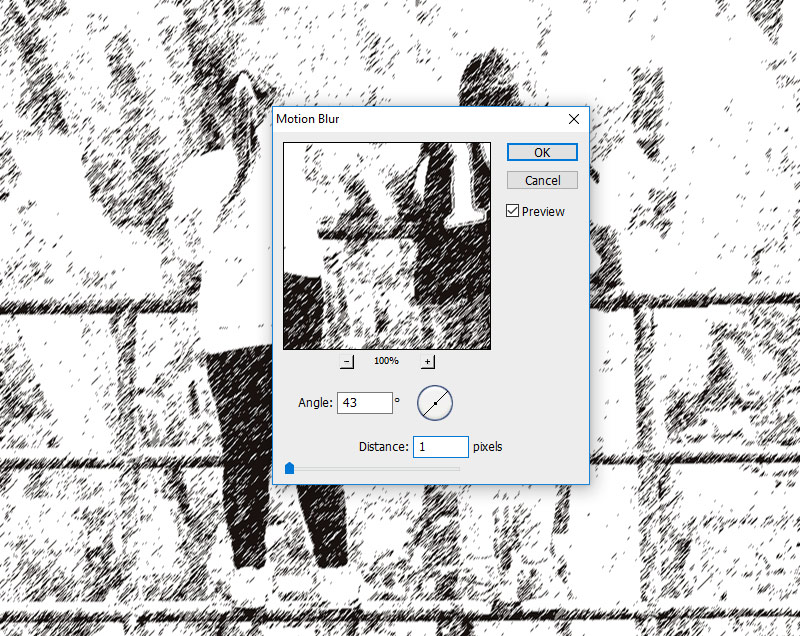
Step 3
Go to Filter > Blur > Motion Blur.
5. Use the Graphic Pen and Noise Filters in Photoshop
Step 1
Make the Girls 2 layer visible and set the blend mode to Multiply, opacity 30%.
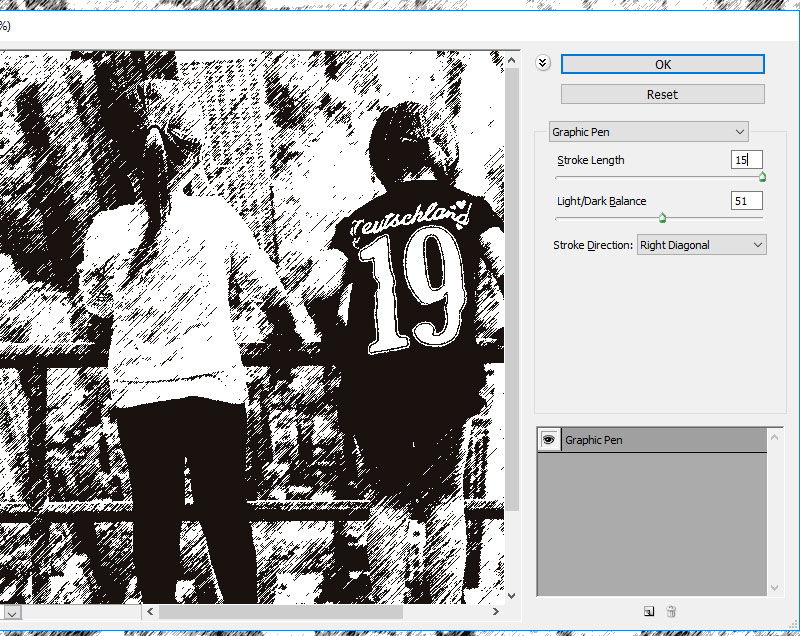
Step 2
Go to Filter > Sketch > Graphic Pen. For another image, you might have to adjust these settings.


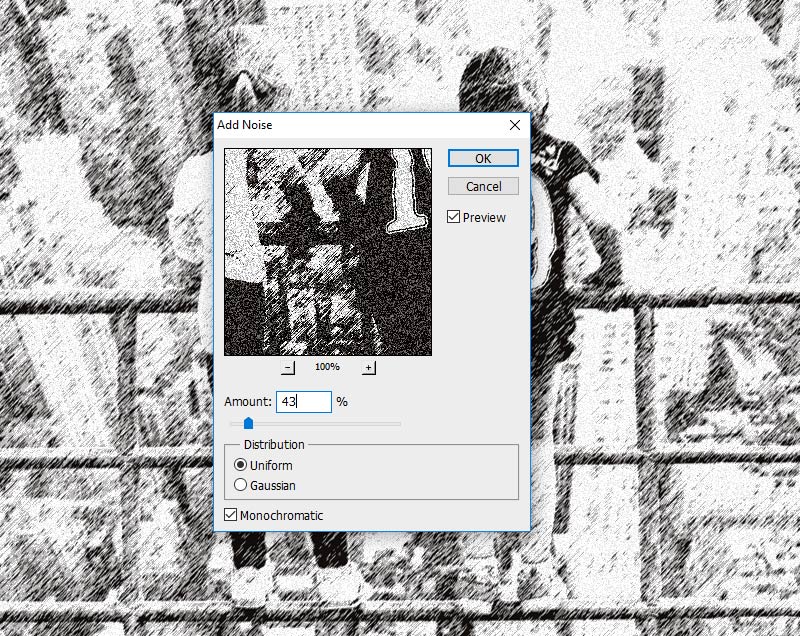
Step 3
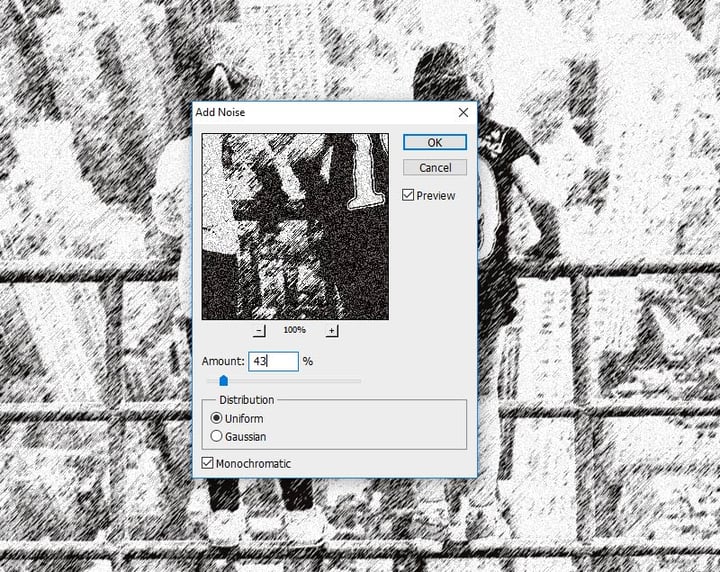
Go to Filter > Noise > Add Noise.

6. Use the Photocopy Filter in Photoshop
Step 1
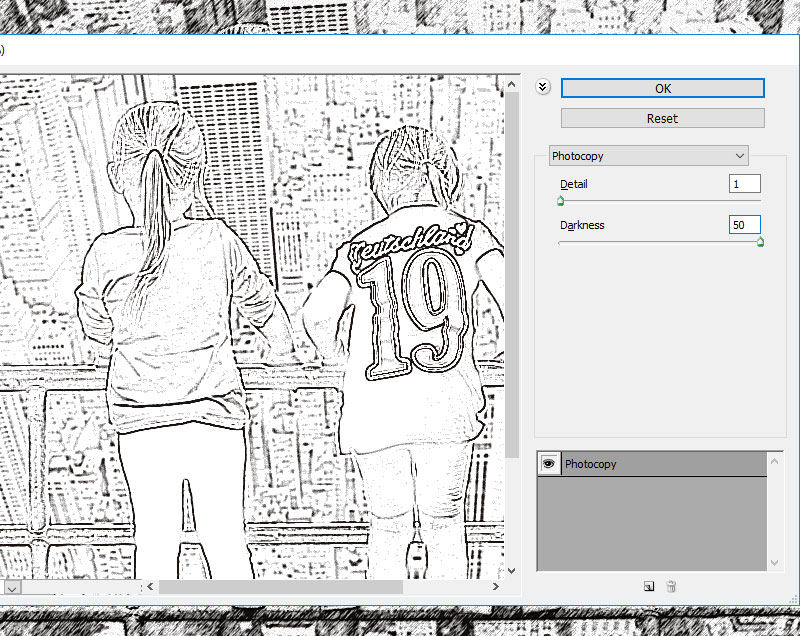
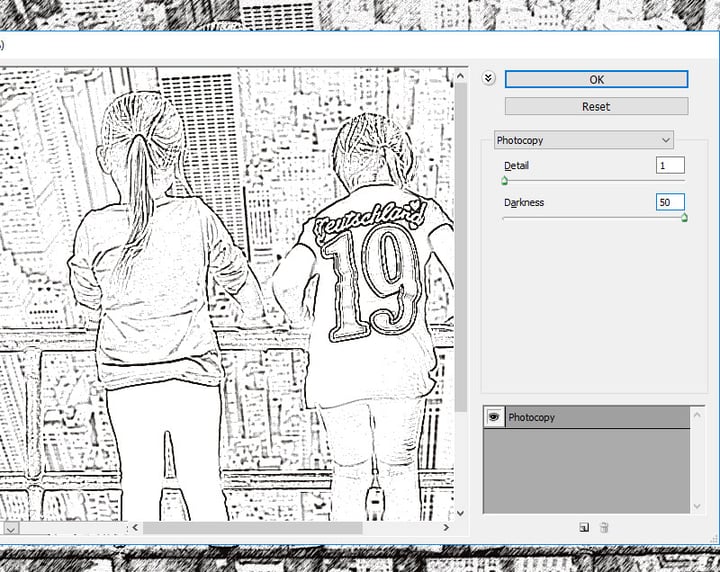
Make the Girls 3 layer visible and set the blend mode to Multiply, opacity 100%.
Step 2
Go to Filter > Sketch > Photocopy.

7. Use the Watercolor Filter in Photoshop
Step 1
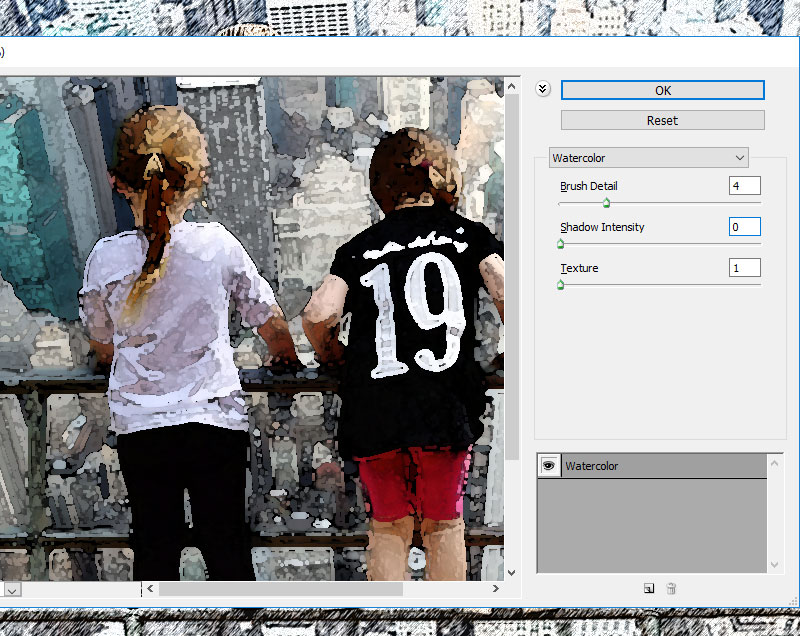
Make the Girls 4 layer visible and set the blend mode to Color, opacity 100%.
Step 2
Go to Filter > Artistic > Watercolor. You can hide the Girls 4 layer for now.


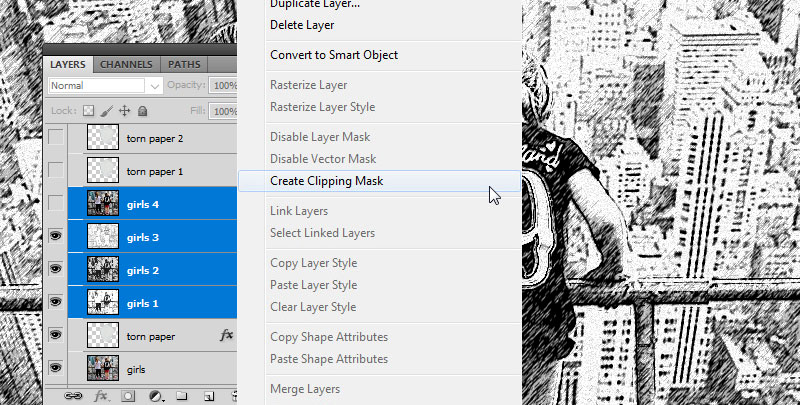
8. Create the Sketch Paper Piece With a Clipping Mask
Keep the Control key pressed and select the Girls 1 layer, Girls 2 layer, Girls 3 layer, and Girls 4 layer. Right click on the selected layers and choose Create Clipping Mask.
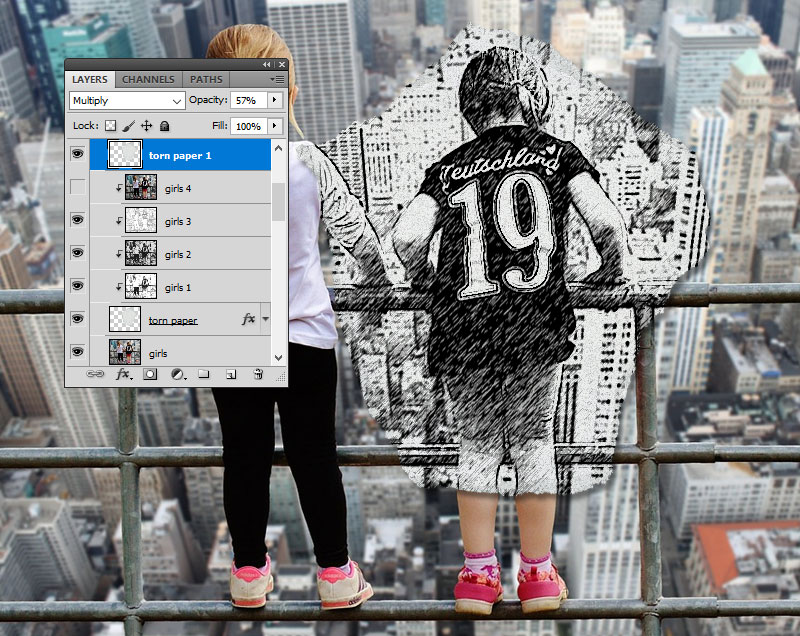
9. Create the Torn Paper Border
Step 1
Make the Torn Paper 1 layer visible and set the blend mode to Multiply, opacity 57%.
Step 2
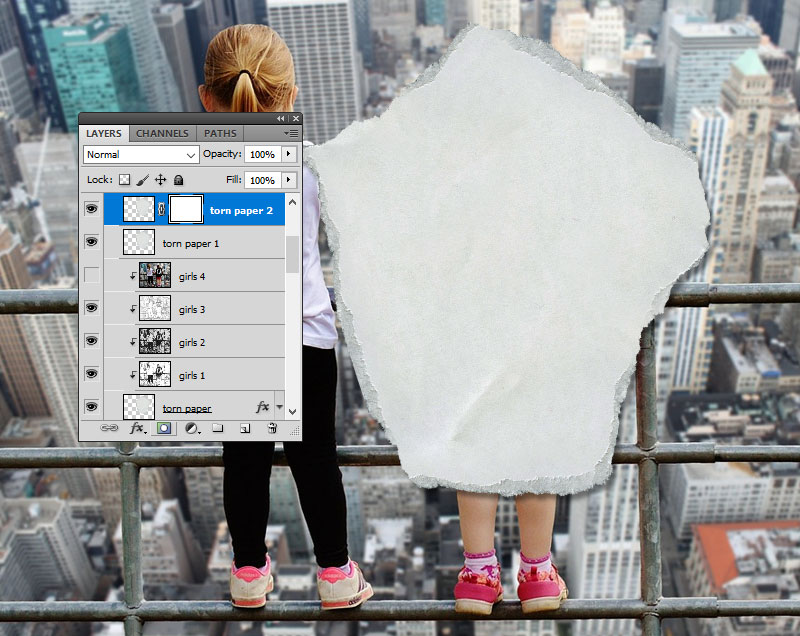
Make the Torn Paper 2 layer visible. Click on the Add Layer Mask button from the Layers tab to add a mask for the Torn Paper 2 layer.
Step 3
Create a new layer just below the Torn Paper 2 layer and fill it with color #ffffff .
Step 4
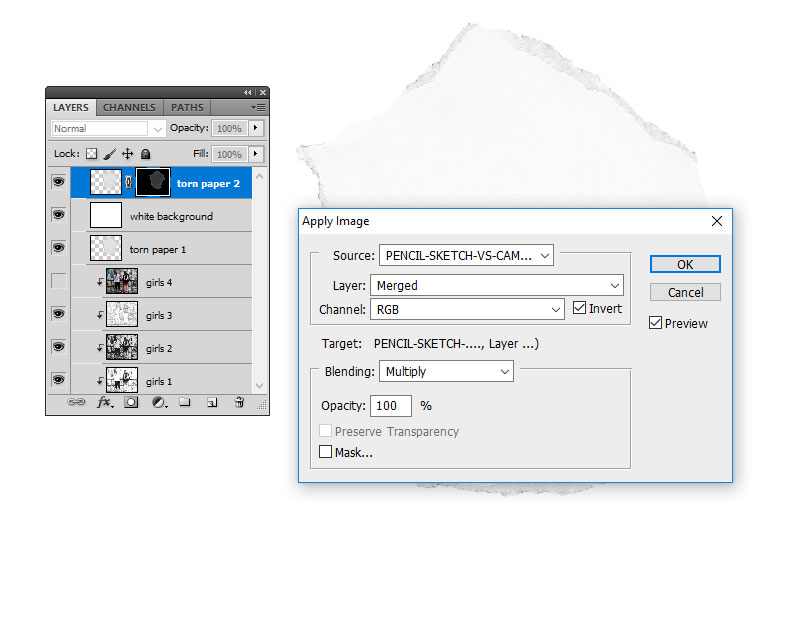
Click on the Torn Paper 2 layer mask thumbnail. Go to Image > Apply Image.


Step 5
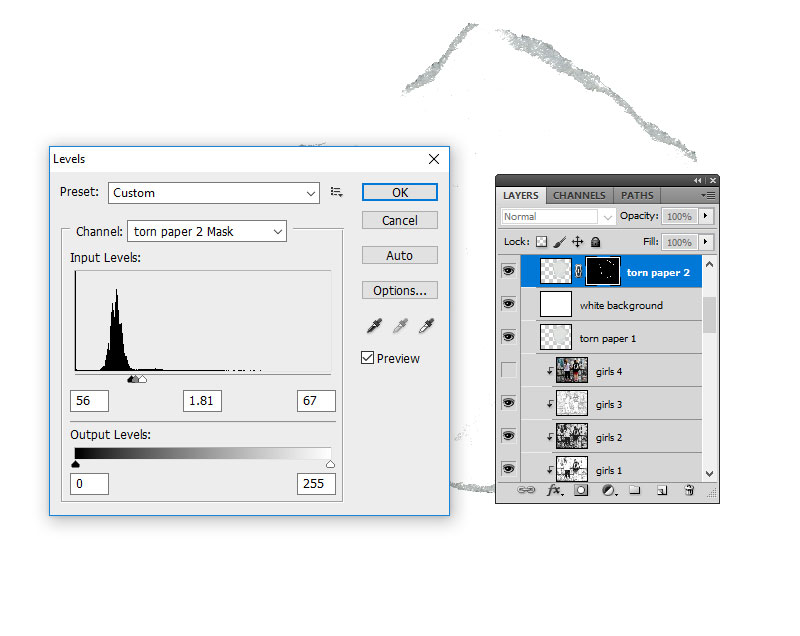
Go to Image > Adjustments > Levels and enter these settings.
You can use the Brush Tool and paint with color #ffffff inside the Torn Paper 2 layer if you want to add a more ripped edge effect.
Step 6
Delete the White Background layer to see the effect.
Step 7
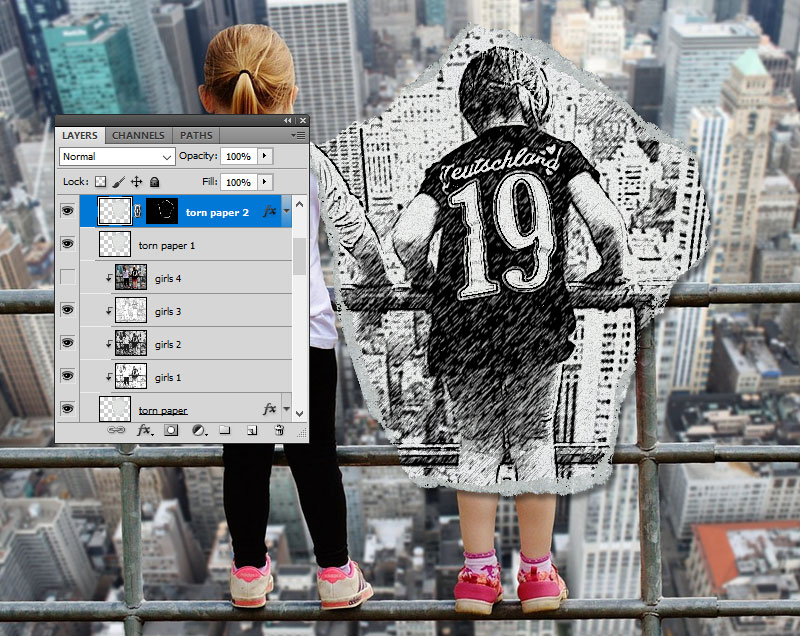
Keep the Control key pressed and select the Torn Paper 1 layer and the Torn Paper 2 layer. Right click on the selected layers and choose Create Clipping Mask.
10. Move the Sketch Effect Very Easily
If you want another part of your image to be turned into a sketch, simply keep the Control key pressed and select the Torn Paper 1 layer, the Torn Paper 2 layer, and the Torn Paper layer.
Use the Move Tool to change the position of the torn paper piece.
Congratulations! You’re Done!
In this tutorial, you’ve learned how to create a Sketch vs. Camera effect in Photoshop using your photos, in just a few steps.
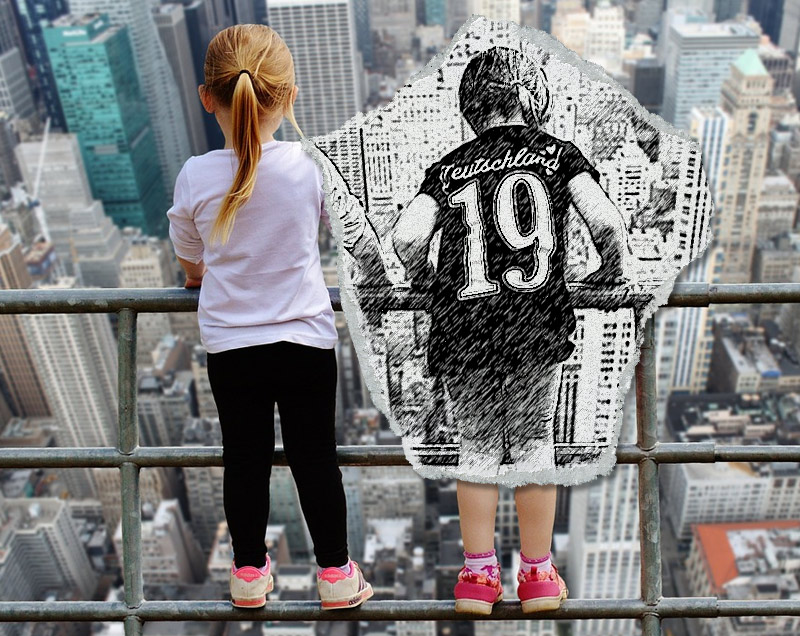
This effect is part of the Pencil Sketch vs. Camera Photoshop action that you can download from Envato Market.
Portrait Photo To Color Sketch With Photoshop
In this Photo Effects tutorial, we’ll learn how to easily convert a portrait photo into a pencil sketch with Photoshop. The initial sketch will appear in black and white, but at the end of the tutorial, we’ll learn how to colorize it with the photo’s original colors! In the next tutorial, we’ll learn a slightly different way to convert an image into a sketch, one that’s usually better suited for objects or landscape photos.
This version of the tutorial is for Photoshop CS5 and earlier. Photoshop CS6 and CC (Creative Cloud) users will want to check out the fully updated version.
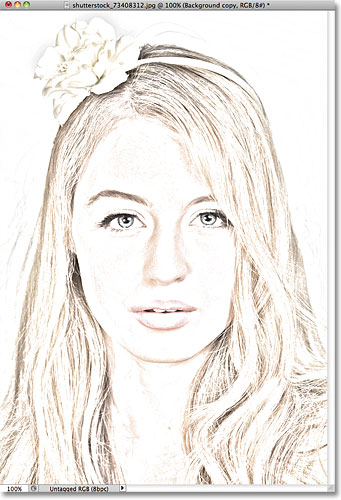
Here’s the photo I’ll be starting with:
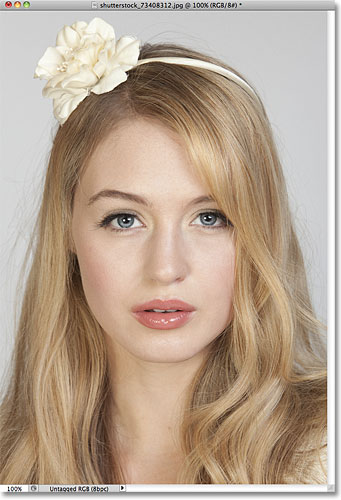
The original portrait image.
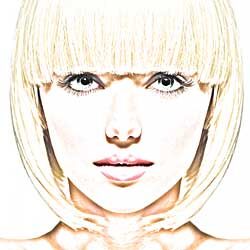
Here’s how it will look when we’re done:
The final portrait to sketch result.
This tutorial is from our Photo Effects series. Let’s get started!
The text version of this tutorial continues below the video. Please note that the video below is from the updated Photoshop CC version of the tutorial but everything I cover in the video is fully compatible with Photoshop CS5 and earlier.
How To Turn A Photo Into A Sketch With Photoshop
Step 1: Duplicate The Background Layer
The first thing we should do before starting on the effect is make a copy of the original image so we don’t harm it in case we need it later. With the photo newly opened in Photoshop, we see in the Layers panel that the image is sitting on the Background layer:
The Layers panel showing the photo on the Background layer.
Go up to the Layer menu in the Menu Bar along the top of the screen, choose New, then choose Layer via Copy. Or, for a faster way to run the same command, press Ctrl+J (Win) / Command+J (Mac) on your keyboard:
Go to Layer > New > Layer via Copy, or press Ctrl+J (Win) / Command+J (Mac).
Either way tells Photoshop to make a copy of the layer, which it names «Layer 1», and place it above the Background layer. Notice that Layer 1 is highlighted in blue, which tells us it’s the active layer. Anything we do next will happen to the copy of the image on Layer 1, leaving the original on the Background layer unharmed:
A copy of the photo appears on Layer 1.
Step 2: Desaturate The Image
Go up to the Image menu at the top of the screen, choose Adjustments, then choose Desaturate:
Go to Image > Adjustments > Desaturate.
The Desaturate command instantly removes all color from the image, giving us a quick black and white version:

The Desaturate command isn’t the best way to convert an image to black and white, but it’s good enough for our purposes here.
Step 3: Duplicate The Layer
Next, we need to make a copy of our desaturated image. Go back up to the Layer menu, choose New, then choose Layer via Copy, or press Ctrl+J (Win) / Command+J (Mac) on your keyboard, just as we did in Step 1. Photoshop makes a copy of Layer 1, names it «Layer 1 copy», and places it directly above Layer 1 in the Layers panel:
Photoshop always places copies of a layer above the original.
Step 4: Invert The Image
Go back up to the Image menu at the top of the screen, choose Adjustments, then choose Invert:
Go to Image > Adjustments > Invert.
This inverts the colors in the image, or in our case the brightness values, making light areas dark and dark areas light, leaving us with a photo negative effect:

The image after inverting the brightness values.
Step 5: Change The Blend Mode To Color Dodge
At the top of the Layers panel, you’ll find the Blend Mode option. It doesn’t actually say «Blend Mode» anywhere but it’s the drop-down box that’s set to Normal by default. Click on the word Normal, which opens a list of layer blend modes, and choose Color Dodge from the list:
Change the blend mode of the inverted layer from Normal to Color Dodge.
The document will temporarily appear filled with white. Depending on your image, there may be some areas of black here and there, but for the most part it will be filled with white:
After changing the blend mode to Color Dodge, the document appears white.
Step 6: Apply The Gaussian Blur Filter
This next step is where we actually create the sketch effect. Go up to the Filter menu at the top of the screen, choose Blur, then choose Gaussian Blur:
Go to Filter > Blur > Gaussian Blur.
This opens the Gaussian Blur filter’s dialog box. We create the sketch effect by blurring the layer. Begin dragging the Radius slider at the bottom of the dialog box towards the right to apply a slight amount of blurring. As you drag, you’ll see the sketch effect appearing in the document. The further you drag the slider, the more blurring will be applied and the more intense the sketch effect will become. If you drag the slider too far, though, too much of the original photo will show through and it won’t look like a sketch anymore.
There’s no specific Radius value to enter since the amount of blurring you use will depend on what you think looks good for your image, so make sure you keep an eye on your document to judge the results as you drag the slider. For my image, I’ll set my Radius value to around 12 pixels or so:

Drag the Radius slider to increase or decrease the amount of blurring.
Here’s what my initial sketch effect looks like:

The initial black and white sketch.
Step 7: Merge The Layers Onto A New Layer
Hold down the Alt (Win) / Option (Mac) key on your keyboard and with the key still held down, go up to the Layer menu at the top of the screen and choose Merge Visible:
Hold down Alt (Win) / Option (Mac) and go to Layer > Merge Visible.
Normally, the Merge Visible command would essentially flatten our image by merging all of our existing layers down onto a single layer, but by holding down Alt (Win) / Option (Mac) while choosing Merge Visible, we told Photoshop to keep all of our initial layer intact, merging them on to a new layer (Layer 2) above the originals:
The three original layers are combined onto a fourth layer above them.
Step 8: Change The Blend Mode To Multiply And Adjust The Layer Opacity
Go up to the Blend Mode option at the top of the Layers panel and change the blend mode for the merged layer from Normal to Multiply. This will darken the lines in the sketch effect. If you find the effect is now too dark, lower the Opacity value, which is to the right of the Blend Mode option. Keep an eye on the image as you adjust the opacity to fine tune the results. I’m going to lower mine down to 50%:
Change the blend mode to Multiply, then adjust the result with the Opacity option.
Here’s my result after darkening the effect:

The sketch now appears darker against the white background.
Step 9: Duplicate The Background Layer
At this point, the sketch effect is complete and if you’re happy with it in black and white, you can stop here. If you want to add color to the sketch, continue on with these last few steps. We’re going to colorize the sketch using the colors from the original photo. Our original photo is on the Background layer, so we’ll need to make a copy of it. Click on the Background layer in the Layers panel to select it:
Select the Background layer to make it active.
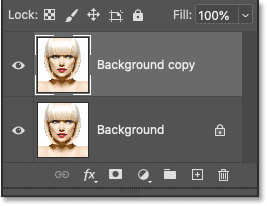
With the Background layer selected, go up to the Layer menu, choose New, then choose Layer via Copy, or press Ctrl+J (Win) / Command+J (Mac). Photoshop makes a copy of the layer, names it «Background copy» and places it directly above the original:
The copy appears above the original Background layer.
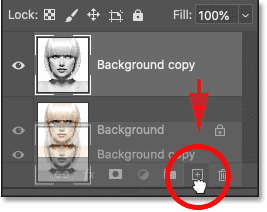
Step 10: Move The Background Copy Above The Other Layers
To use this Background copy layer to colorize our sketch, we need to move it above the other layers. We can jump it straight to the top of the layer stack by pressing the keyboard shortcut Shift+Ctrl+] (Win) / Shift+Command+] (Mac). The ] is the right bracket key. With the Background copy layer now at the top, the original image will once again appear in the document window:
The Background copy layer has been jumped to the top of the layer stack.
Step 11: Change The Blend Mode To Color
To mix the colors of the original image in with the sketch effect, change the blend mode for the Background copy layer from Normal to Color:
Change the layer blend mode to Color.
The Color blend mode mixes the colors from the current layer with the brightness values of the layers below it, giving us our colorized sketch effect:

The result after changing the blend mode to Color.
Step 12: Lower The Opacity
Finally, if you find the color looks too intense, simply lower the Opacity value at the top of the Layers panel to fine-tune the results. I’ll lower mine down to 65%:
Lower the layer opacity to reduce the amount of color in the sketch.
With the opacity lowered, here is my final result:
The final color sketch effect.
And there we have it! Visit our Photo Effects section for more Photoshop effects tutorials!
Get all of our Photoshop tutorials as PDFs! Download them today!
Links
Tutorials
Other Stuff
© 2024 Photoshop Essentials.com.
For inspiration, not duplication.
Site design by Steve Patterson.
Photoshop is a trademark of Adobe Systems Inc.
Turn a Photo to a Pencil Sketch in Photoshop
In this tutorial, I show you how easy it is to turn a photo into a pencil sketch with Photoshop. We’ll start by turning the image into a black and white sketch, and then I’ll show you three different ways to add color to your sketch, including how to use the photo’s original colors, a single color, and a gradient!
You can follow along with any portrait image. I’ll use this image from Adobe Stock:
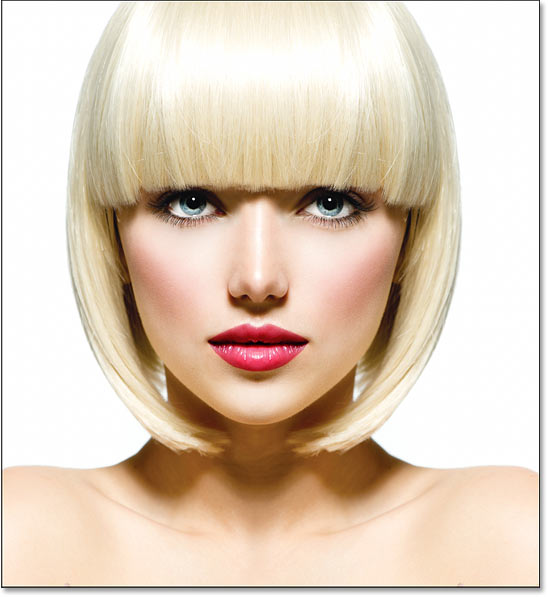
The original image.
Here’s how the photo will look as a black and white sketch:
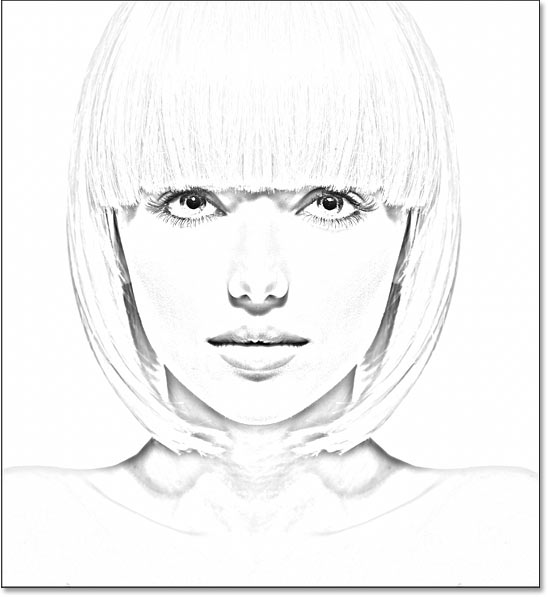
The black and white version of the sketch.
And once we have the black and white version, we’ll start adding color.
Here’s the sketch using colors from the original photo:
The sketch with colors from the photo.
Here’s the effect using a single color (you can choose any color you like):
The single color version of the sketch.
And finally, here’s the sketch using colors from a gradient. At the end of the tutorial, I show you how to switch between all four versions of the sketch so you can choose the one you like best:
The gradient colors.
Let’s get started!
How to turn the photo into a pencil sketch
I used Photoshop 2021 but every step works with Photoshop 2022 and 2023. You can get the latest Photoshop version here.
These first steps will turn the image into a black and white sketch.
Step 1: Duplicate the Background layer
We’ll start in Photoshop’s Layers panel where the image appears on the Background layer:
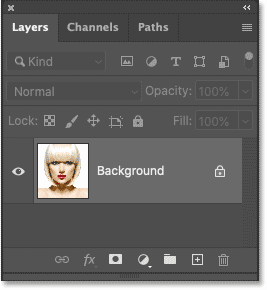
Photoshop’s Layers panel.
We’ll need this image when we add color to the sketch later on. So to keep it safe, we’ll make a copy of it.
Click on the Background layer and drag it down onto the New Layer icon:
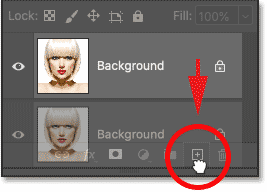
Making a copy of the Background layer.
A copy appears above the original:
The Background copy layer.
Step 2: Desaturate the layer
Next, we’ll remove all the color from the Background copy layer using Photoshop’s Desaturate command.
Go up to the Image menu in the Menu Bar along the top of the screen, choose Adjustments, and then choose Desaturate:
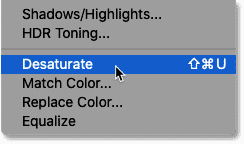
Going to Image > Adjustments > Desaturate.
Photoshop desaturates the image, leaving us with a black and white version of our photo:
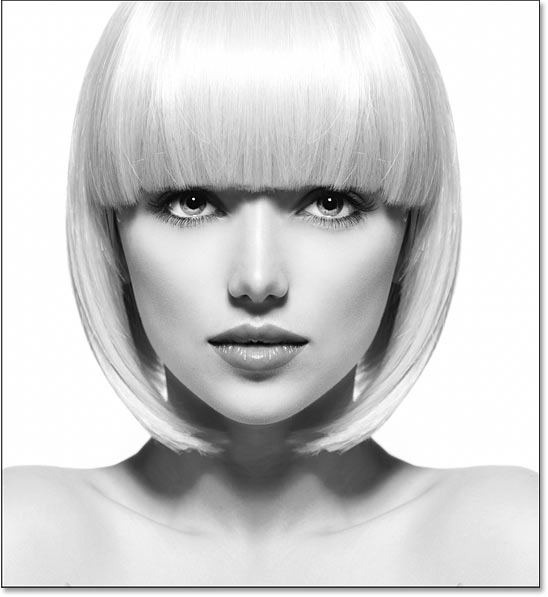
The image after desaturating the color.
Step 3: Duplicate the desaturated layer
Back in the Layers panel, make a copy of the desaturated version by dragging the Background copy layer down onto the New Layer icon:
Dragging the «Background copy» layer onto the New Layer icon.
And again, the copy appears above the original:
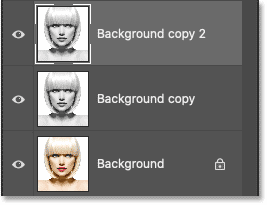
The new Background copy 2 layer appears at the top.
Step 4: Invert the layer
We need to invert the brightness levels on this layer, making light areas dark and dark areas light. For that, we’ll use Photoshop’s Invert command.
Go up to the Image menu, choose Adjustments, and then choose Invert:
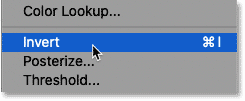
Going to Image > Adjustments > Invert.
This inverts the image, creating a film negative effect:
The image after inverting the brightness.
Step 5: Change the layer’s blend mode to Color Dodge
In the Layers panel, change the blend mode of the inverted layer from Normal (the default) to Color Dodge:
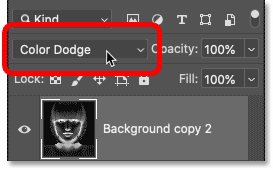
Changing the blend mode to Color Dodge.
The document turns completely white, although you may see a few scattered areas of black depending on your image:
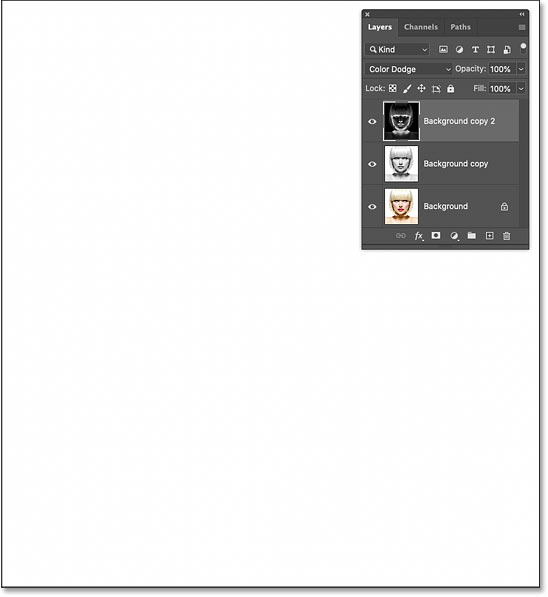
The result after changing the blend mode to Color Dodge.
Step 6: Convert the layer into a smart object
To create the sketch effect, we’ll blur the inverted layer using Photoshop’s Gaussian Blur filter. But to keep the filter settings editable, we’ll apply Gaussian Blur as a smart filter. And to do that, we first need to convert the layer into a smart object.
In the Layers panel, click the menu icon in the top right corner:
![]()
Clicking the Layers panel menu icon.
And choose Convert to Smart Object from the menu:
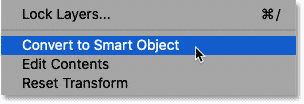
Choosing the «Convert to Smart Object» command.
An icon appears in the layer’s preview thumbnail, telling us that the layer is now a smart object and we’re ready to apply the filter:
![]()
The smart object icon.
Step 7: Apply the Gaussian Blur filter
Go up to the Filter menu in the Menu Bar, choose Blur, and then choose Gaussian Blur:
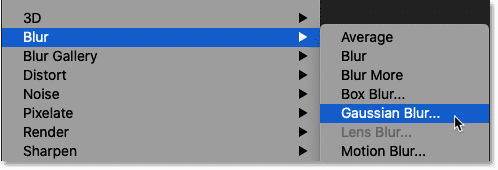
Going to Filter > Blur > Gaussian Blur.
Then in the Gaussian Blur dialog box, drag the Radius slider along the bottom to blur the layer’s contents. The sketch effect you achieve will depend on the amount of blur you apply. Lower radius values will create a sketch with fine thin lines, while larger values create more photo-realistic sketches.
For example, if I choose a fairly low radius value of 10 pixels:
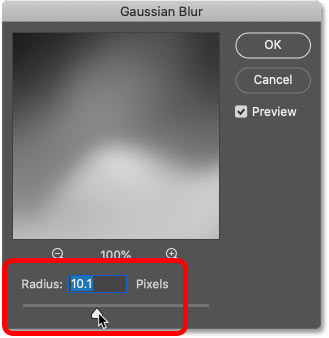
Starting with a lower radius value.
I end up with this effect here with very fine lines:
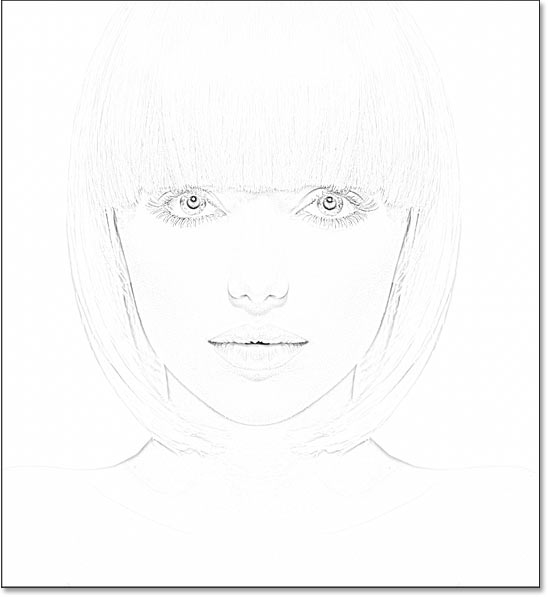
The sketch effect using a lower radius value.
But if I increase the value to something much higher, like 45 pixels:
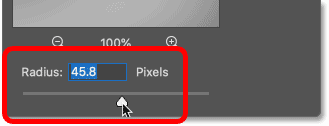
Increasing the radius value.
The effect looks more like the original photo. The radius value you need will depend on your image and the look you’re going for. So keep an eye on your image as you drag the slider to judge the results.
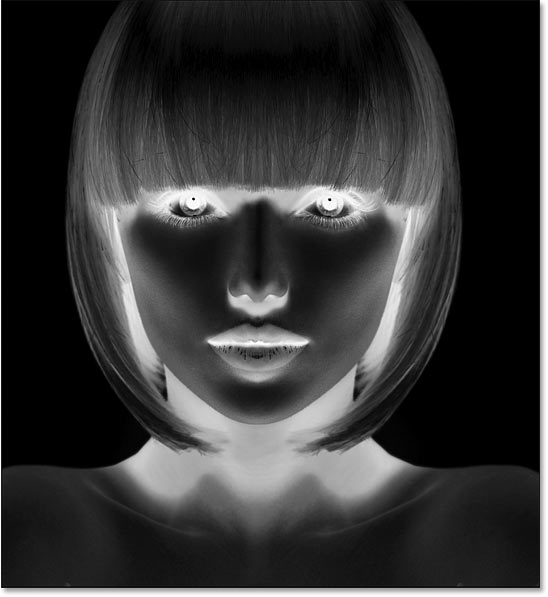
In my case, I’ll go with the second, more photo-realistic version. Click OK when you’re done to close the Gaussian Blur dialog box:
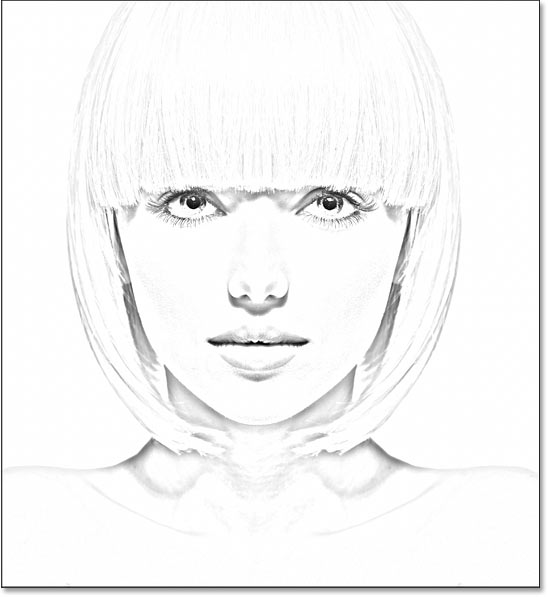
The sketch effect with a larger radius value.
How to edit the Gaussian Blur setting
Since we applied the Gaussian Blur filter to a smart object, the Layers panel shows it listed as a smart filter below the smart object. You can double-click on the words Gaussian Blur at any time to re-open the filter’s dialog box and experiment with different settings:
Double-click on a smart filter to re-open its dialog box.
Step 8: Add a Levels adjustment layer
At this point, the sketch may look too bright with too little contrast. But we can darken it very easily using a Levels adjustment layer and a layer blend mode.
Still in the Layers panel, click the New Fill or Adjustment Layer icon:
![]()
Clicking the New Fill or Adjustment Layer icon.
And choose Levels from the list:
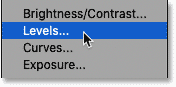
Choosing a Levels adjustment layer.
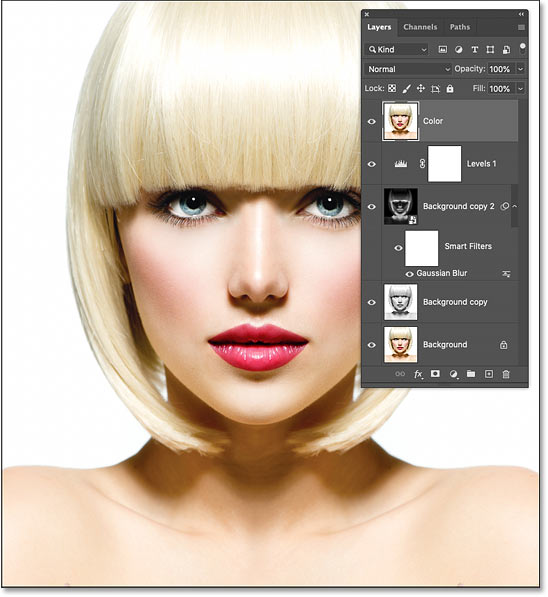
Photoshop adds a Levels adjustment layer above the smart object:
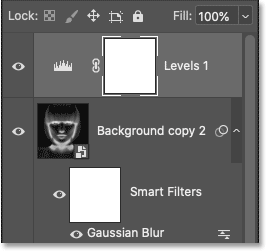
The Levels adjustment layer.
Step 9: Change the blend mode to Multiply
Then to darken the sketch, simply change the blend mode of the adjustment layer from Normal to Multiply:
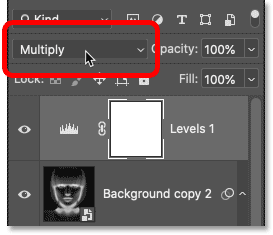
Changing the blend mode to Multiply.
The Multiply blend mode is one in a group of blend modes that darken the overall image. And right away, the sketch appears much darker:
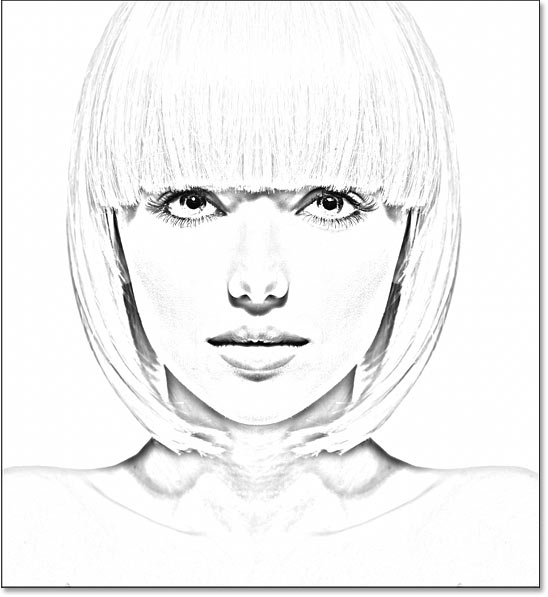
The sketch effect after changing the blend mode to Multiply.
How to fine-tune the brightness
If the sketch looks too dark, lower the adjustment layer’s Opacity value, located directly across from the Blend Mode option in the Layers panel. The more you lower the opacity from 100%, the more the layers below the adjustment layer will show through, brightening the sketch back up.
I’ll lower mine to around 40%:
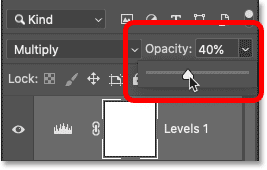
Lowering the opacity of the Levels adjustment layer.
And with that, we have our black and white version of the sketch! Up next, I’ll show you a few different ways add color:
The final black and white sketch effect.
Coloring the sketch with the photo’s original colors
These next steps will add color to the sketch using colors from the original photo. After that, I’ll show you how to color the sketch with a single color, and then with a gradient.
Step 10: Duplicate the Background layer again
In the Layers panel, make a copy of the original image by dragging the Background layer (the original one at the bottom) down onto the New Layer icon:
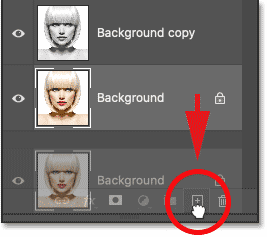
Making another copy of the Background layer.
The copy ( Background copy 3 ) appears between the Background and Background copy layers:
The Background copy 3 layer.
Step 11: Rename the new layer Color
At this point, our Layers panel is cluttered with copies of the Background layer. And they all have names like Background copy , Background copy 2 , Background copy 3 that tell us nothing about what the layer is being used for. So let’s rename our new layer to something more descriptive.
Double-click directly on the name Background copy 3 to highlight it:
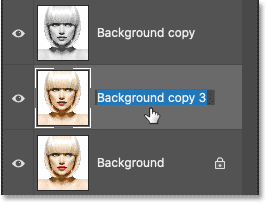
Highlighting the current name by double-clicking on it.
Then change the name to Color . Press Enter (Win) / Return (Mac) on your keyboard to accept it:
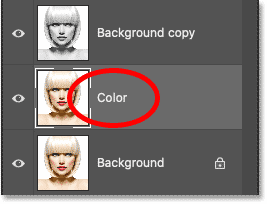
Changing the layer’s name to «Color».
Step 12: Move the Color layer above the adjustment layer
We need the image to appear above the sketch. So click on the Color layer and drag it above the Levels adjustment layer. When a blue line appears above the adjustment layer, release your mouse button:
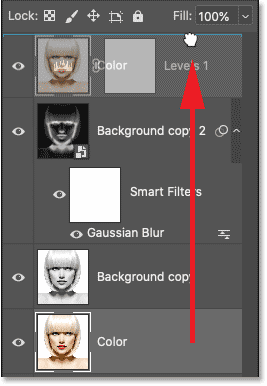
Dragging the Color layer to the top.
The image temporarily blocks the sketch from view:
The original photo returns.
Step 13: Change the blend mode to Color
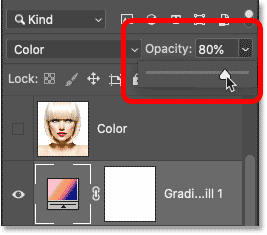
To blend the colors from the image into the sketch, change the blend mode of the Color layer from Normal to Color:
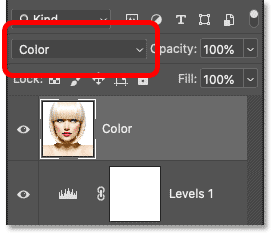
Changing the blend mode to Color.
The Color blend mode tells Photoshop to blend only the color from the active layer with the layers below it. And just like that, we’ve added the original colors back to the sketch:
The sketch colorized with the photo’s original colors.
How to fine-tune the color intensity
If the color is too strong, lower the layer’s opacity. I’ll lower mine to 50%:
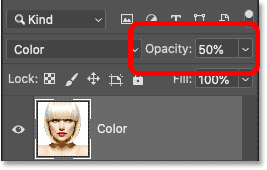
Lowering the opacity of the «Color» layer.
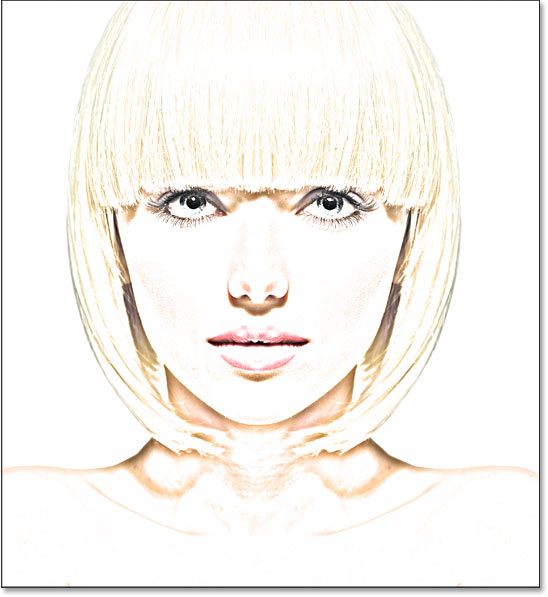
With the opacity lowered, the colors appear more subtle. And that’s how to color the sketch using the photo’s original colors:
The result with the opacity lowered.
How to color the sketch with a single color
If you like the way your sketch looks with the colors from the photo, you can stop here. Otherwise, let’s look at a second way to add color, this time using a single color. Then we’ll finish off the tutorial by learning how to color the sketch with a gradient.
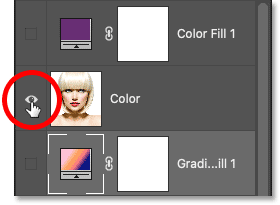
Step 14: Turn off the Color layer
Before we go any further, turn off the Color layer that we used in the previous steps by clicking its visibility icon (the eyeball) in the Layers panel:
![]()
Turning off the Color layer.
Step 15: Add a Solid Color fill layer
To color the sketch with a single color, we’ll use a Solid Color fill layer. Click on the New Fill or Adjustment Layer icon at the bottom of the Layers panel:
![]()
Clicking the New Fill or Adjustment Layer icon.
Then choose Solid Color from the list:
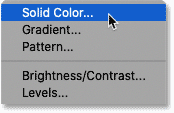
Choosing a Solid Color fill layer.
Photoshop opens the Color Picker where we choose the color we need. Don’t worry about choosing the wrong color because you can always come back and choose a different one, as we’ll see in a moment.
I’ll try a shade of blue. Click OK when you’re done to close the Color Picker:
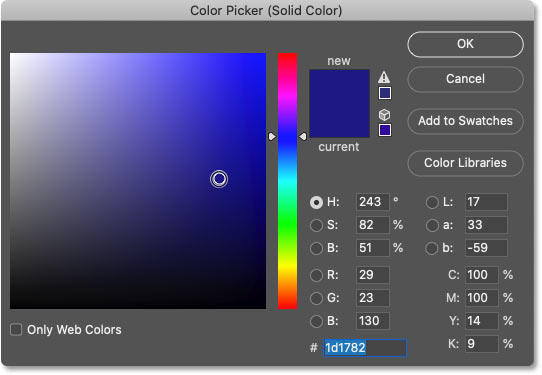
Choosing blue from the Color Picker.
In the Layers panel, the Solid Color fill layer appears above the other layers. And in the document, the color you selected temporarily blocks the sketch from view:
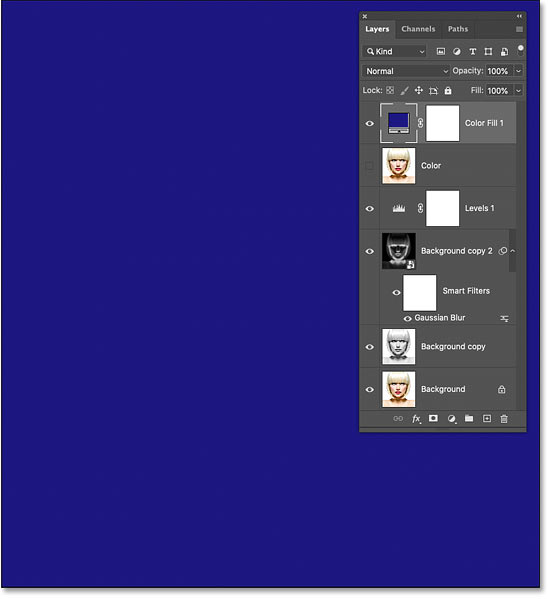
The color blocks the image.
Step 16: Change the blend mode to Color
To blend the color into the sketch, change the fill layer’s blend mode to Color:
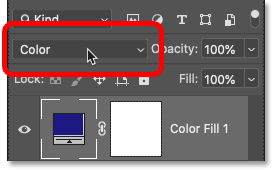
Changing the blend mode to Color.
And here’s the result with the sketch colored in blue:
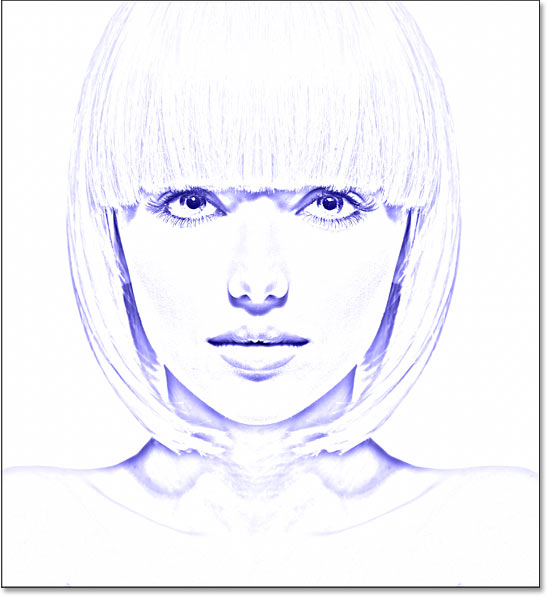
The color effect using blue.
How to change the color
To try a different color, double-click on the fill layer’s color swatch in the Layers panel:
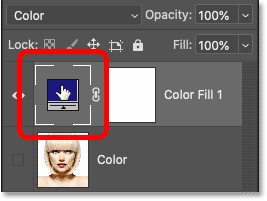
Double-clicking the color swatch.
And then choose a new color from the Color Picker. As long as the Color Picker remains open, you can keep selecting different colors and see a live preview in the document.
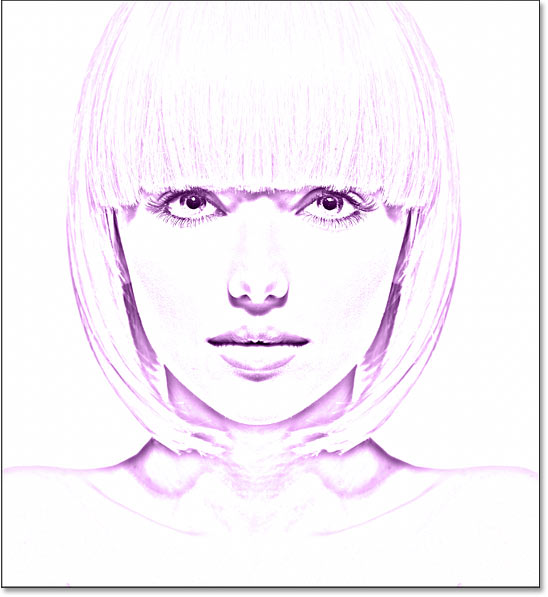
I’ll go with a shade of purple. When you’re done, click OK to close the Color Picker:

Choosing a different color from the Color Picker.
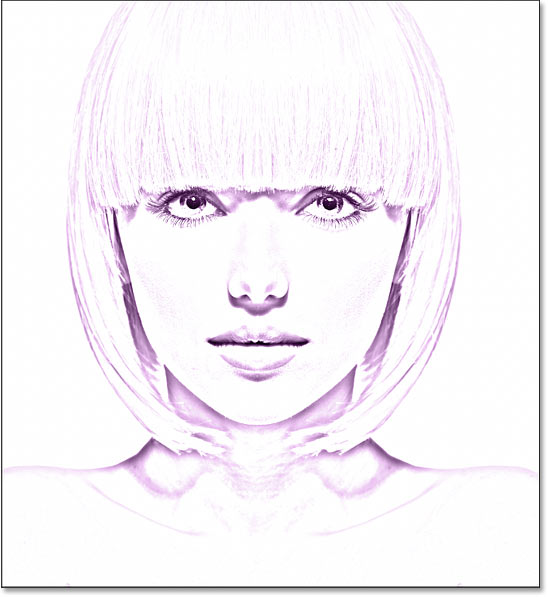
And now my sketch is colored in purple:
The color effect using purple.
Adjusting the color’s intensity
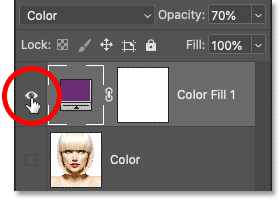
If the color is too intense, lower the fill layer’s Opacity value. I’ll lower it to 70%:
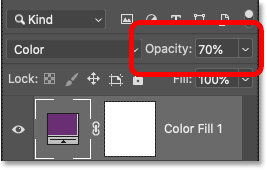
Lowering the fill layer’s opacity.
And that’s how to add a single color to your sketch! Up next, we’ll finish things off by learning how to color the sketch with a gradient, and then I’ll show you how to switch between all these different versions to choose the one you like best:
The result with the opacity lowered.
How to color the sketch with a gradient
At this point, we’ve learned how to convert the photo to a black and white sketch, how to bring back the original colors from the photo, and how to add a single color. We’ll finish off this tutorial by learning how to color the sketch with a gradient.
I won’t cover how to create your own custom gradients here. Instead, we’ll use one of Photoshop’s built-in gradients. And in the most recent versions of Photoshop (from 2020 and up), there are lots of new gradients to choose from.
Step 17: Turn off the Solid Color fill layer
First, if you’ve been following along from the beginning, turn off the Solid Color fill layer we used in the previous steps by clicking its visibility icon in the Layers panel:
Clicking the fill layer’s visibility icon.
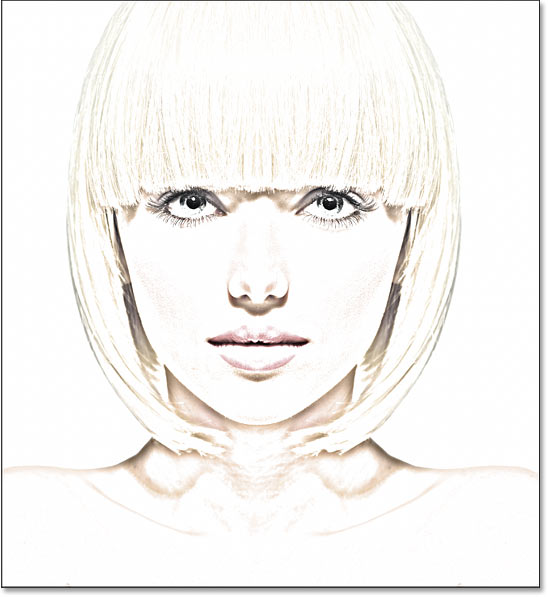
This restores the black and white version of the sketch:
The black and white sketch returns.
Step 18: Add a Gradient Fill layer
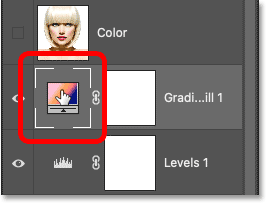
To color the sketch with a gradient, we’ll use a Gradient fill layer. And we’ll add the fill layer directly above the Levels adjustment layer. So first, click on the Levels adjustment layer in the Layers panel to make it active:
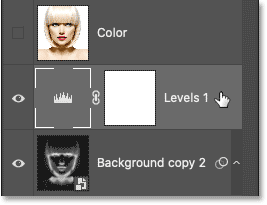
Selecting the Levels adjustment layer.
Then click once again on the New Fill or Adjustment Layer icon:
![]()
Clicking the New Fill or Adjustment Layer icon.
And choose Gradient from the list:
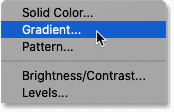
Choosing a Gradient fill layer.
Step 19: Select a gradient
In the Gradient Fill dialog box, choose a gradient by clicking the small arrow next to the gradient swatch:
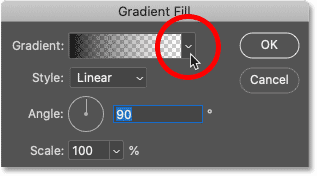
Clicking the arrow to the right of the gradient swatch.
This opens the Gradient picker with lots of new gradients that were added back in Photoshop 2020. The gradients are divided into groups based on theme (Basics, Blues, Purples, and so on):
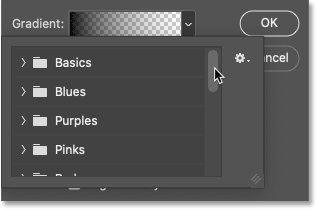
The Gradient picker.
To open a group, click the arrow next to the group’s folder icon. I’ll twirl open the Purples group:
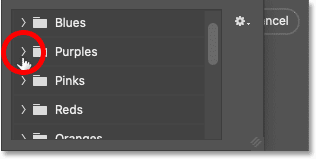
Twirling open one of the gradient groups.
Then to select a gradient inside the group and close the Gradient picker, double-click on the gradient’s thumbnail:
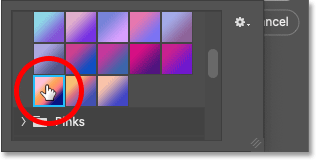
Double-clicking to select a gradient.
The gradient settings
Back in the Gradient Fill dialog box, you can change the Style of the gradient from Linear (the default) to Radial, Angle, Reflected or Diamond:
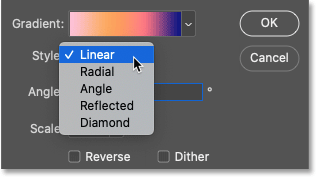
The Style options.
You can Reverse the order of the gradient colors:

The Reverse option.
And you can change the Angle of the gradient. I’ll leave mine at the default of 90 degrees:
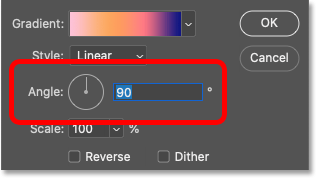
The Angle option.
Click OK when you’re done to close the Gradient Fill dialog box. The gradient temporarily blocks the sketch from view:
The gradient is blocking the sketch.
Step 20: Change the Blend Mode to Color
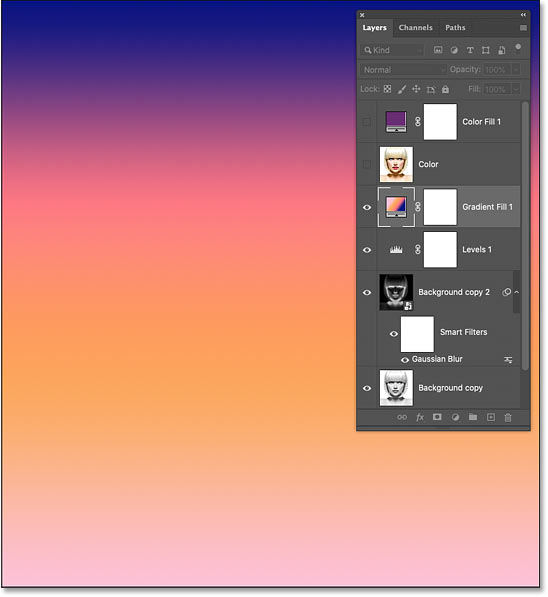
Back in the Layers panel, the Gradient fill layer appears above the Levels adjustment layer. To blend the gradient colors in with the black and white sketch, change the blend mode of the Gradient fill layer from Normal to Color:
Changing the blend mode to Color.
Then adjust the intensity of the colors if needed by lowering the layer’s opacity:
Lowering the opacity.
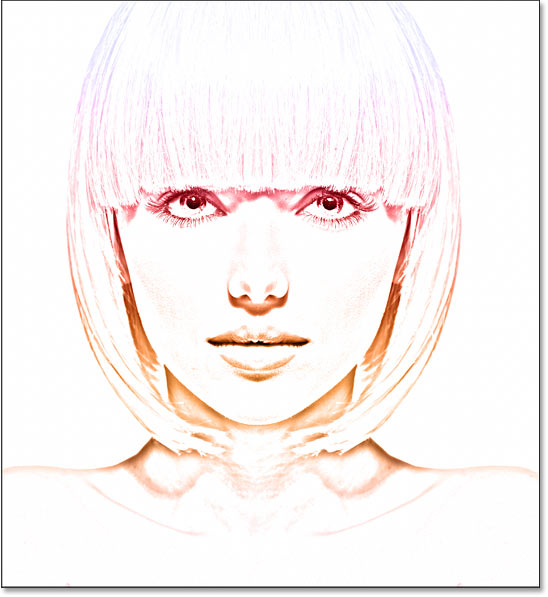
And here’s my sketch using the gradient colors:
The sketch using the gradient colors.
How to choose a different gradient or edit the settings
To try a different gradient or edit any of the gradient options (Style, Reverse, Angle), double-click on the Gradient fill layer’s color swatch. This will re-open the Gradient Fill dialog box where you can make any changes you need:
Double-click the Gradient fill color swatch.
How to switch between the sketch color effects
Now that we’ve colored the sketch with a gradient, what if you want to go back to the colors from the original photo, or the single color version, or even the black and white version? Here’s how to switch between the different effects.
Restoring the black and white sketch
To hide all the color effects and return to the black and white version, simply turn off the Color layer, the Solid Color fill layer and the Gradient fill layer using their visibility icons. I already have the Color and Solid Color layers turned off, so I’ll turn off the Gradient fill layer as well:
![]()
Turning off all three color effect layers.
With all three color effect layers turned off, I’m back to my black and white sketch:
Back to the black and white version.
Restoring a color version of the sketch
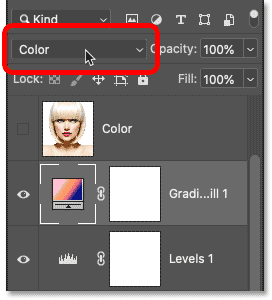
Then to turn on one of the color effects, click its visibility icon. I’ll turn on my Color layer. Make sure you turn on only one color effect at a time, otherwise they will blend together:
Turning on the Color layer.
And with the Color layer turned on, we’re back to the photo’s original colors:
The original color version.
And there we have it! That’s how to turn a photo into a black and white pencil sketch, along with a few different ways to color the sketch, in Photoshop! Check out my Photo Effects section for more tutorials!
Get all of our Photoshop tutorials as PDFs! Download them today!
Links
Tutorials
Other Stuff
© 2024 Photoshop Essentials.com.
For inspiration, not duplication.
Site design by Steve Patterson.
Photoshop is a trademark of Adobe Systems Inc.